Maintenance
ReplacingthePrinterModuleAssembly
Usethefollowingproceduretoreplacetheprintermoduleassembly.
1.Insertthenewprintermoduleassemblyintothebottomcoverandsnapitinto
place.
Ensurethescrewholesintheprintermoduleassemblylineupproperlywith
thescrewholesinthebottomcover.
2.Securethenewprintermoduleassemblytothebottomcoverwithfour(4)
screws.
3.Reattachthechassis.
Seestep1throughstep6in“AttachingtheChassis”onpage85forinstructions.
4.Reattachthetopcoverassembly.
See“ReattachingtheTopCoverAssemblytotheDevice”onpage81for
instructions.
5.Reinsertthebattery.
Seestep6throughstep8in“ReplacingtheBattery”onpage74forinstructions.
6.ContinuewiththeappropriatefunctionalcheckoutprocedureforthisFRU.
See“FunctionalCheckout”onpage129formoreinformation.
PrinterMotorandGearAssembly
Thefollowingproceduresdescribehowtoreplacetheprintermotorandgear
assembly.
RemovingthePrinterMotorandGearAssembly
Usethefollowingproceduretoremovetheprintermotorandgearsfromtheprinter
moduleassembly.
1.Beforebeginninganysteps,followtheinstructionsin“PreparingtheSystemfor
FRUReplacement”onpage73.
2.Removetheprintermoduleassembly.
See“RemovingthePrinterModuleAssembly”onpage94forinstructions.
2053535-003C
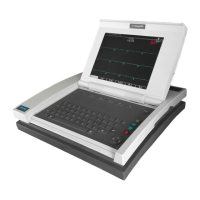
MAC™2000ECGAnalysisSystem
95