Revision G MAC
TM
600 4-19
2047426-002
Maintenance: Preparing System for FRU Replacement
9. Enter the serial number and option code (optional) as described in
“Restoring Setup” on page 4-30.
10. Adjust the time and date. See MAC 600 operator’s Manual for setting
date and time.
11. If possible, set the configuration to the previous user settings. If not,
select the default settings.
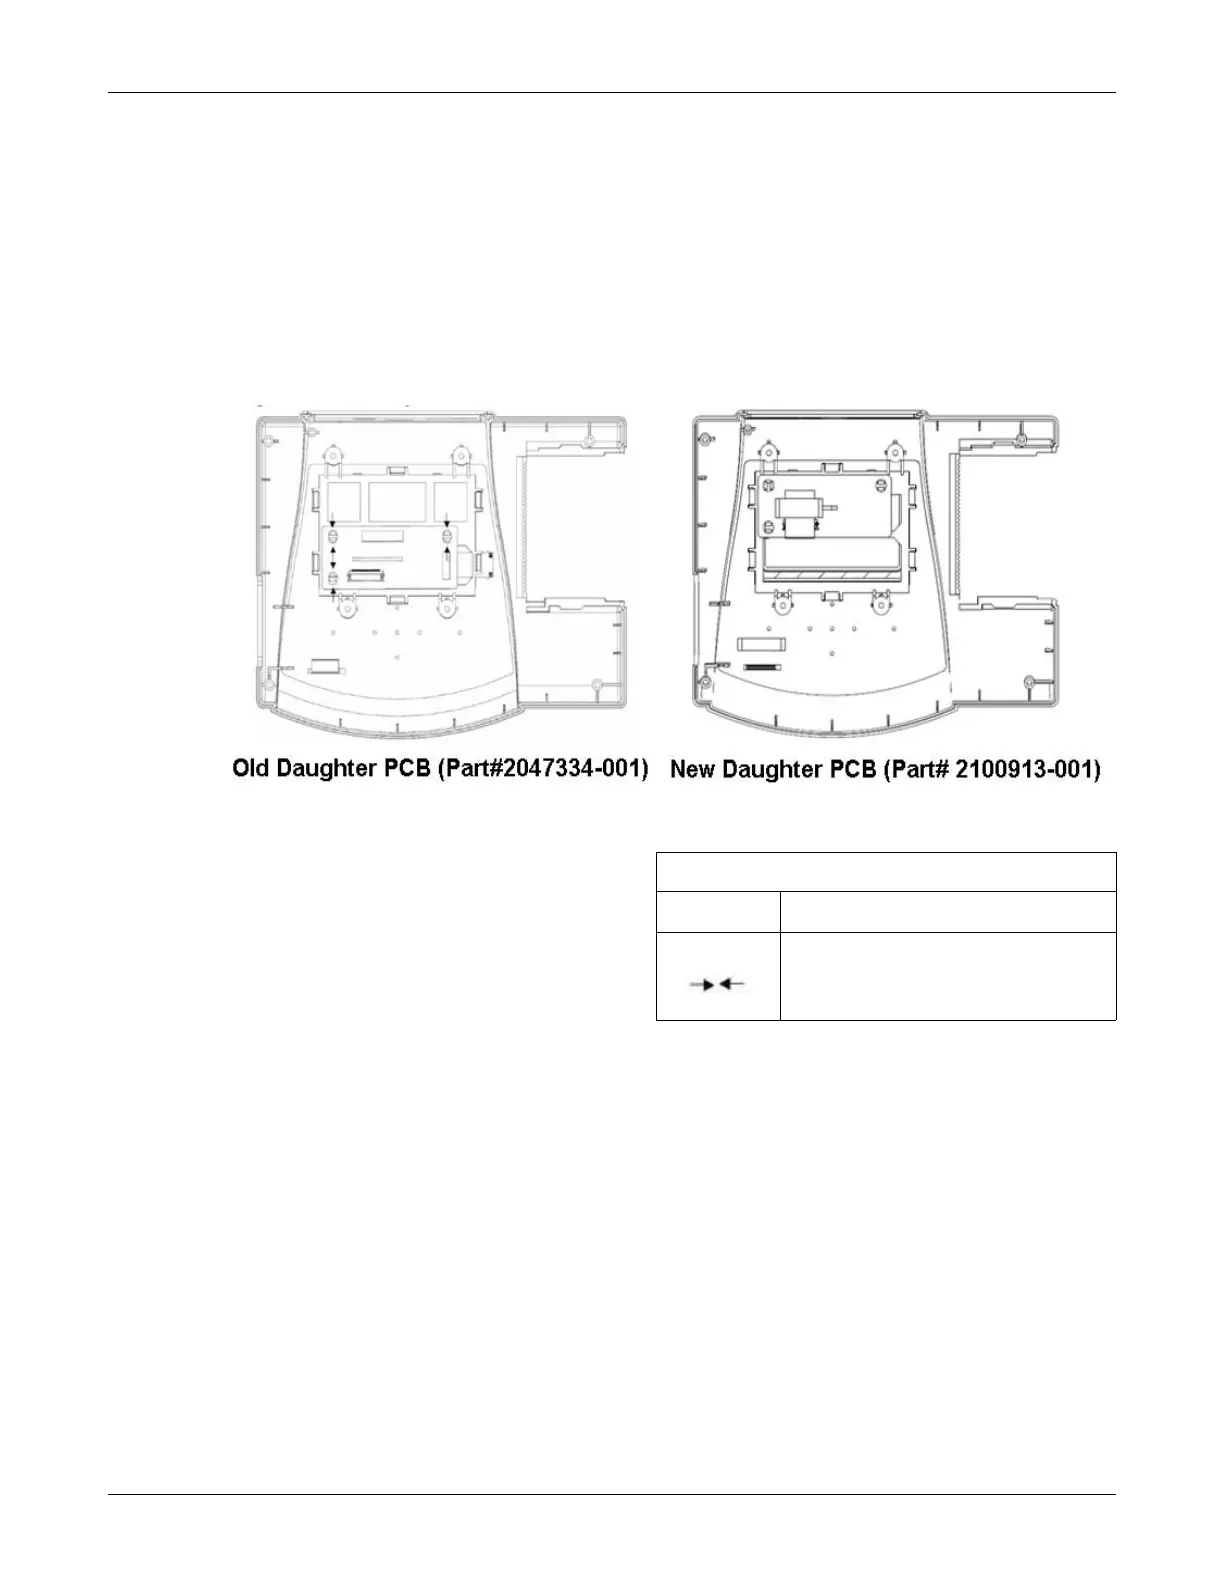
Replacing the Daughter PCB assembly
1. Open the device as described in “Opening the Device” on page 4-8.
2. Remove the top cover assembly from the bottom cover.
3. Disconnect the display cable connector from the J2 connector on the
daughter PCB.
4. Press the snap for daughter board using the nose pliers and lift the
daughter board to detach from the snap.
5. Repeat step 4 for all the 3 snap features to completely remove the
daughter board from the display holder snap fit mechanism.
6. Align and fix the new daughter board to the daughter board-
mounting bracket snap fit mechanism.
7. Fix the ferrite with double-sided tape in line with J1.
8. Connect the display cable connector to the J2 connector on the
daughter PCB.
Table 4-10. Replacing the Daughter PCB Assembly
Legend Description
Press the snap using a nose plier. Lift the
PCB board up.
 Loading...