– 45 –
Pull the fan blade off the "D" shaped motor 5.
shaft.
Note: Do not remove the two 1/4-in. hex-head
screws from the back wall of the oven cavity.
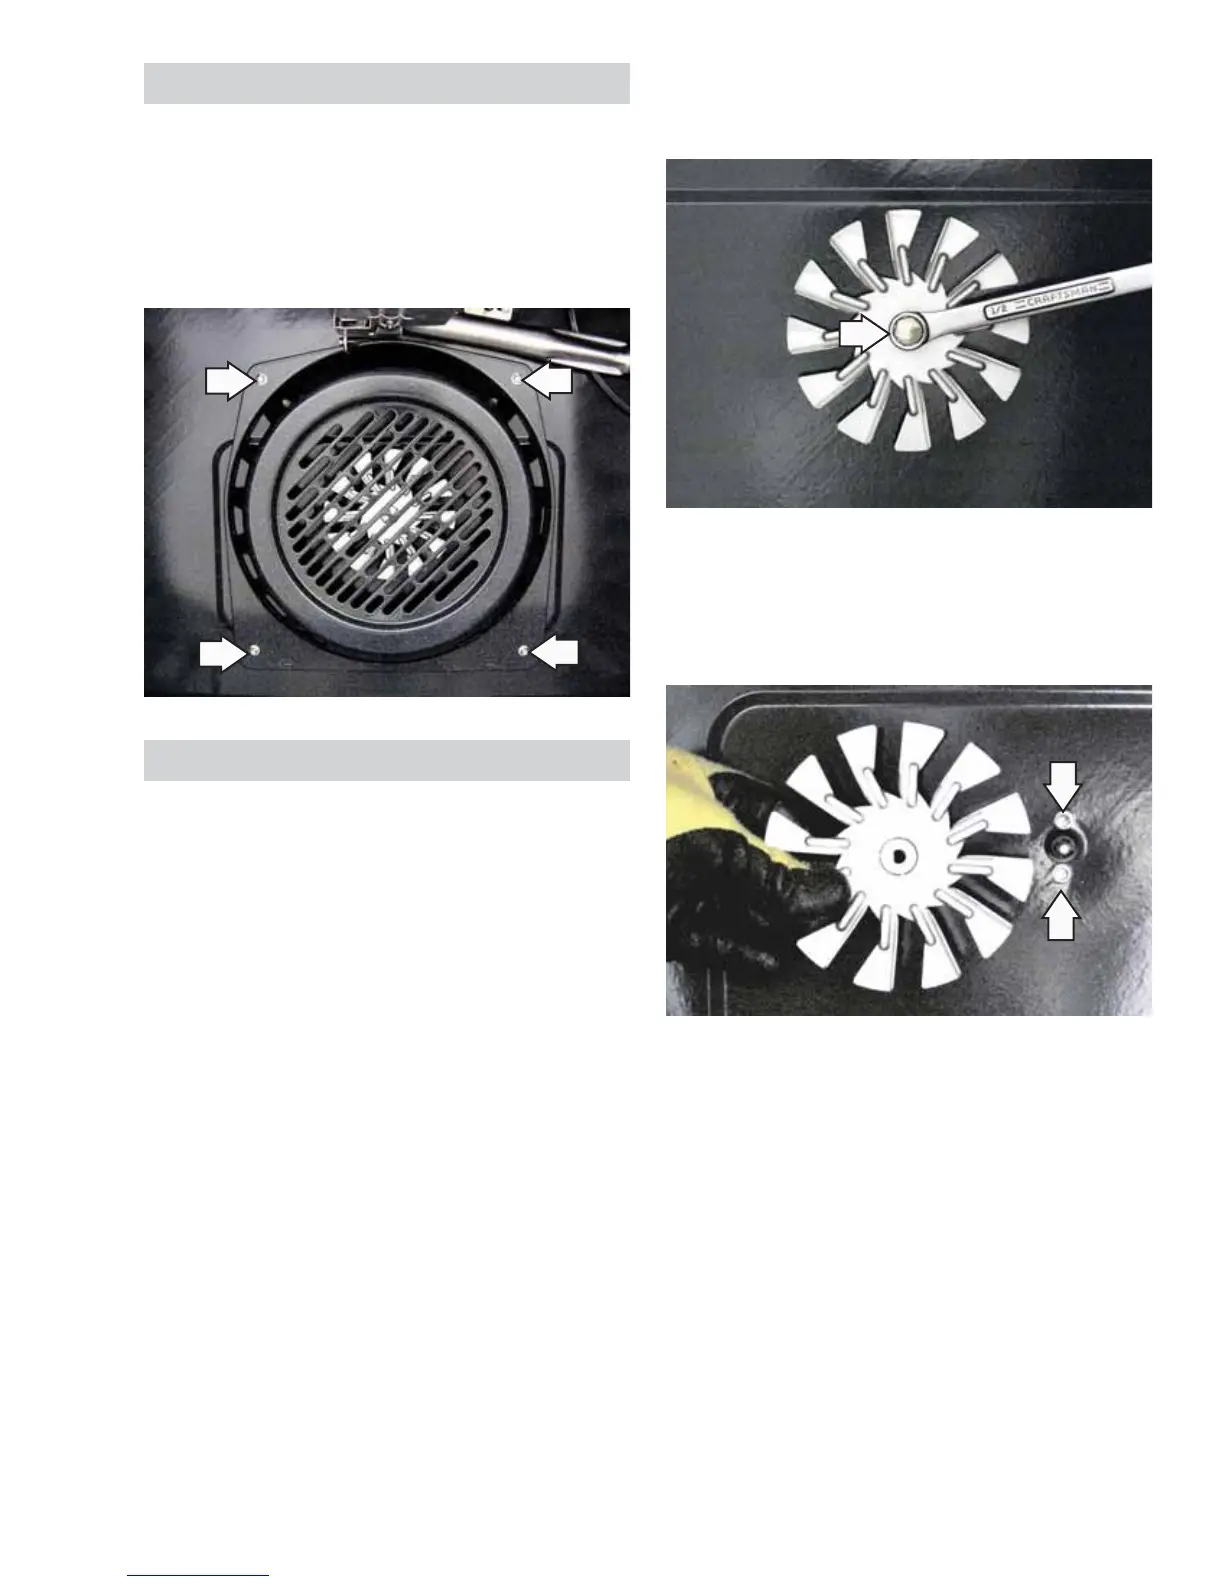
Convection Fan Cover
To remove the convection fan cover:
Remove the oven door. (See 1.
Oven Door Removal.)
Remove the four 1/4-in. hex-head screws that 2.
hold the convection fan cover to the back wall of
the oven cavity.
Using a 1/2-in. wrench, remove the nut from 4.
the convection fan blade by holding the blade
securely and turning the nut clockwise.
(Continued next page)
Convection Fan Motor
The resistance of the convection fan can be checked
on the ERC. Place the control panel in the service
position. (See Touch Panel and ERC.)
Test the low speed winding between N and the blue
wire on RY2 for the approximate resistance value of
19 Ω. Test the high speed winding between N and
the red wire on RY2 for the approximate resistance
value of 24.5 Ω. Both approximate resistance values
are at room temperature.
To remove the convection fan motor:
Remove the oven door. (See 1. Oven Door Removal.)
Remove the range from the installation.2.
Remove the convection fan cover. (See 3.
Convection Fan Cover.)
Note: The fan blade is attached to the "D" shaped
motor shaft with a left-hand thread 1/2-in. hex-nut.
Remove the rear cover. (See 6.
Rear Cover Removal.)
 Loading...