– 42 –
Remove the two 1/4-in. hex-head screws that 9.
hold the burner in place and remove the burner.
Note: When installing the broil burner, be sure the
orifi ce hood is inserted into the burner inlet opening.
Bake and Broil Burner Flame Adjustments
WARNING: Adjustments require disassembly of the
burner section. To prevent handling hot parts, the
oven should be cool.
Note: A small amount of odor is normal and will be
present when the range is fi rst turned on. If there is
a strong odor, the bake and broil burner assemblies
should be inspected.
Bake and Broil Burner Test
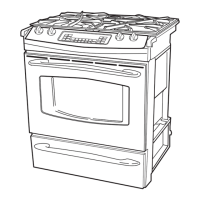
Remove oven door. (See 1. Oven Door.)
Remove the oven bottom and fl ame spreader 2.
(burner baffl e). (See Bake Burner and Glow-bar
Igniter.)
Reinstall the oven door. 3.
Close the oven door, set the control for 4. BAKE,
and observe the bake burner fl ame.
6. Set the control for BROIL and repeat step 5.
Note: The door should remain closed during this
test.
(Continued next page)
To correct any fl ame problems, perform the
following procedures:
Bake Burner
Remove the oven door. (See 1.
Oven Door.)
Remove the screw that holds the orifi ce cover in 2.
place. Remove the fi tting cover.
Cover
Observe the fl ames for a period of at least 2 5.
minutes. The fl ame should not lift or blow off the
burner during any period of operation. It should
be blue with approximately a
1
/
2
-in. to
3
/
4
-in. (13-
mm to 19-mm) inner cone.
Closely examine the angle of the orifi ce. The 3.
orifi ce must point straight into the burner.
Note: The angle can be corrected by using a small
adjustment wrench clamped loosely over the orifi ce
to bend the orifi ce and it's mounting assembly as
needed.
 Loading...