Shenzhen Getech Technology Co.,Ltd
11
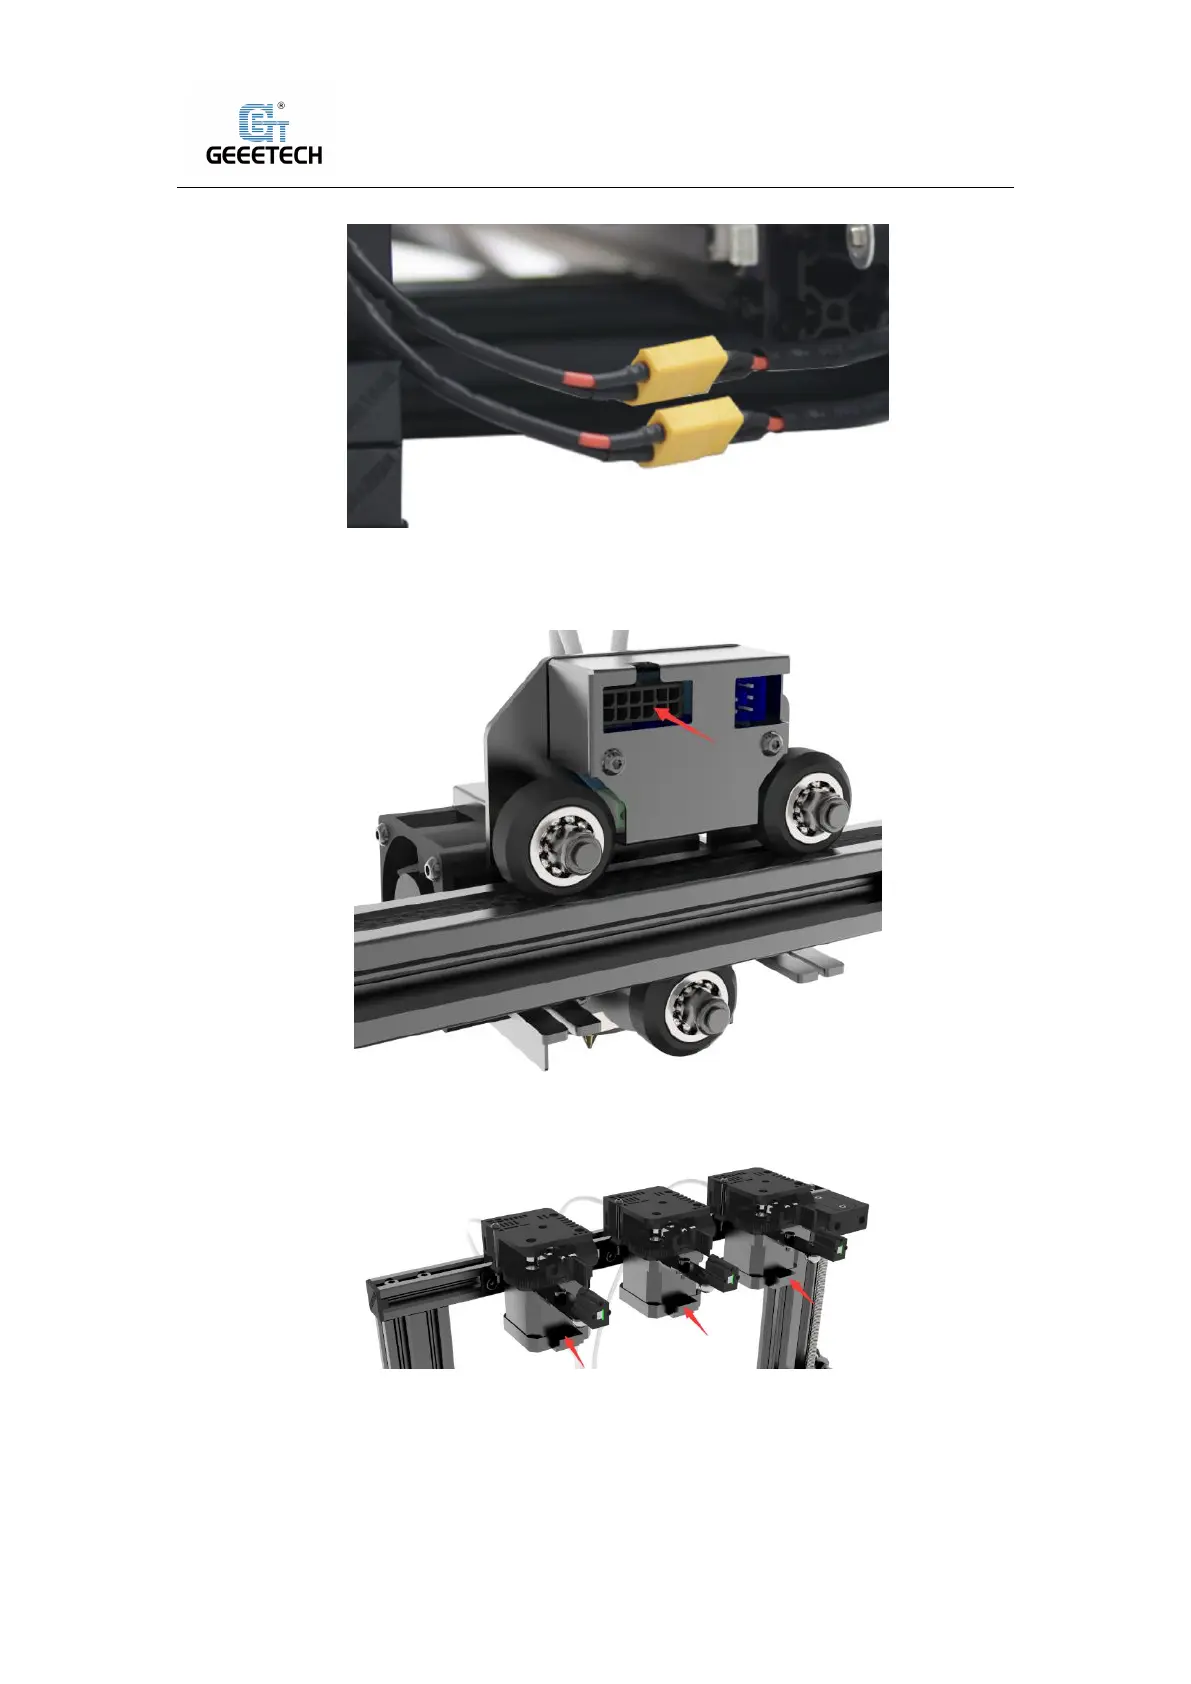
See picture (5-9).
(Picture 5-9)
Plug the extruder cables into the socket of the extruder head adapter plate, and the buckle
must be fastened. See picture (5-10)
(Picture 5-10)
Connect the motor wires of E0, E1 and E2. See picture (5-11).
(Picture 5-11)
Then the extruder wire and the motor extruder wire are fixed into the small hole on the backside
of the screw with the Cable tie to avoid the wire harness touching the model during printing. In
addition, the position the harness fixed needs to reserve the length of the Z-axis at the maximum
height. See picture (5-12).