PRINTED IN U.S.A. 65 913225/CP0807
- Take drain hose (3) (fig. D1/3).
- Screw drain hose to the draining port (4) (fig. D1/4).
- Remove filler cap (5) (fig. D1/5) to ensure that the
oil drains properly.
IMPORTANT: Dispose of the drain oil in an eco-
logical manner.
REPLACING THE FILTER
- Remove engine oil filter (6) (fig. D1/2) ; discard the
filter and the filter seal.
- Clean the filter mounting surface with a clean, lint-
free cloth.
- Lightly grease the new oil filter seal and install the
oil filter (see chapter: 6 - MAINTENANCE: FIL-
TER CARTRIDGES AND BELTS).
IMPORTANT: Tighten the oil filter by hand, and
then secure the filter with a quarter turn more.
REFILLING THE OIL
- Loosen, clean and replace the drain hose (3) (fig.
D1/3).
- Replace and tighten drain plug (2) (fig. D1/2).
- Replace access panel (1) (fig. D1/1).
- Fill with oil (see chapter: 6 - MAINTENANCE:
LUBRICANT AND FUEL) by filler port (7) (fig.
D1/5).
- Wait a few minutes to allow the oil to flow into the
crankcase.
- Start the engine and let it run for a few minutes.
- Check for possible leaks at the drain plug and the oil
filter.
D1/3 D1/4
3
4
D1/5
5
7
- Stop the engine, wait a few minutes and check that
the level is at the upper mark on the dipstick (8) (fig.
D1/6).
- Top up if necessary.
D3 - DRY AIR FILTER CARTRIDGE
CHANGE
In case of use in a very dusty conditions, the checking
and cleaning period of the cartridge must be reduced to
250 hours.
IMPORTANT: Change the cartridge in a clean
location, with the engine stopped. Never run the
engine with the air filter removed or damaged.
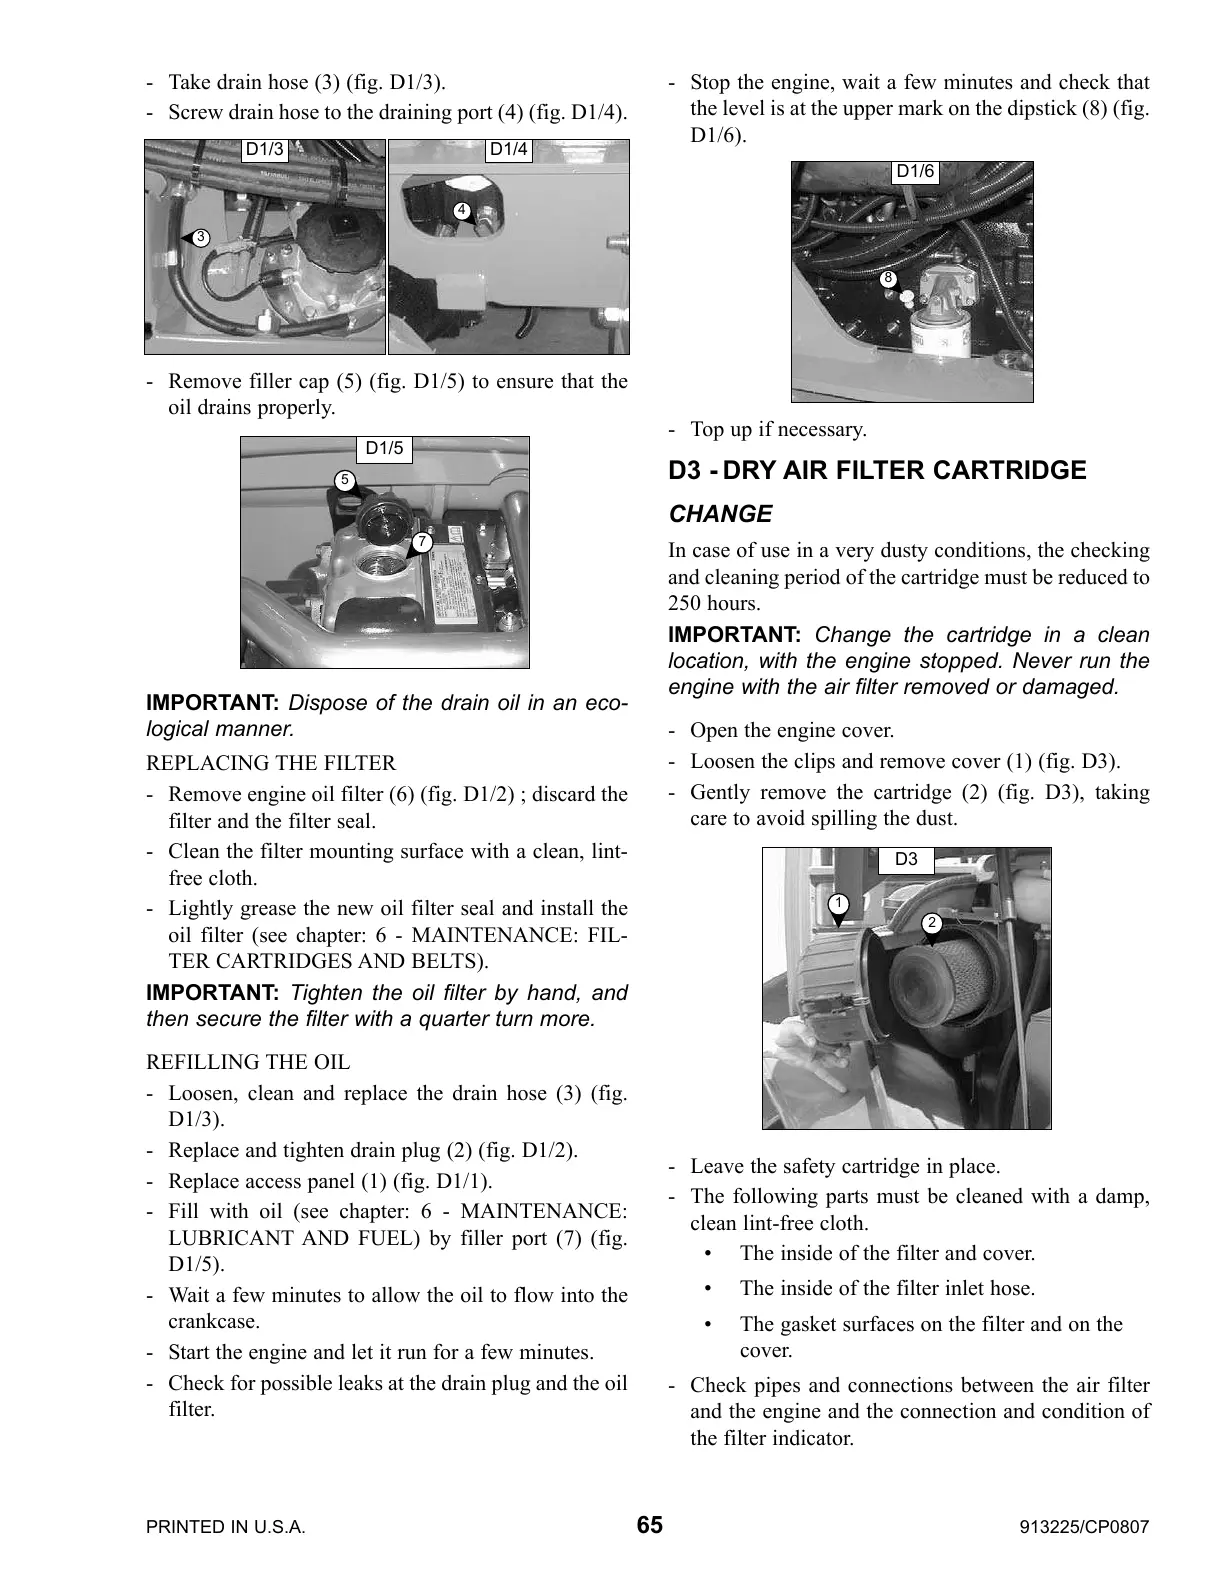
- Open the engine cover.
- Loosen the clips and remove cover (1) (fig. D3).
- Gently remove the cartridge (2) (fig. D3), taking
care to avoid spilling the dust.
- Leave the safety cartridge in place.
- The following parts must be cleaned with a damp,
clean lint-free cloth.
• The inside of the filter and cover.
• The inside of the filter inlet hose.
• The gasket surfaces on the filter and on the
cover.
- Check pipes and connections between the air filter
and the engine and the connection and condition of
the filter indicator.
D3
1
2
D1/6
8
Courtesy of CraneMarket.com
 Loading...