Press the vehicle remote control lock/unlock buttons to make sure the alarm system works properly.
Eventually disconnect the 8-pin connector and reconnect it after a few seconds.
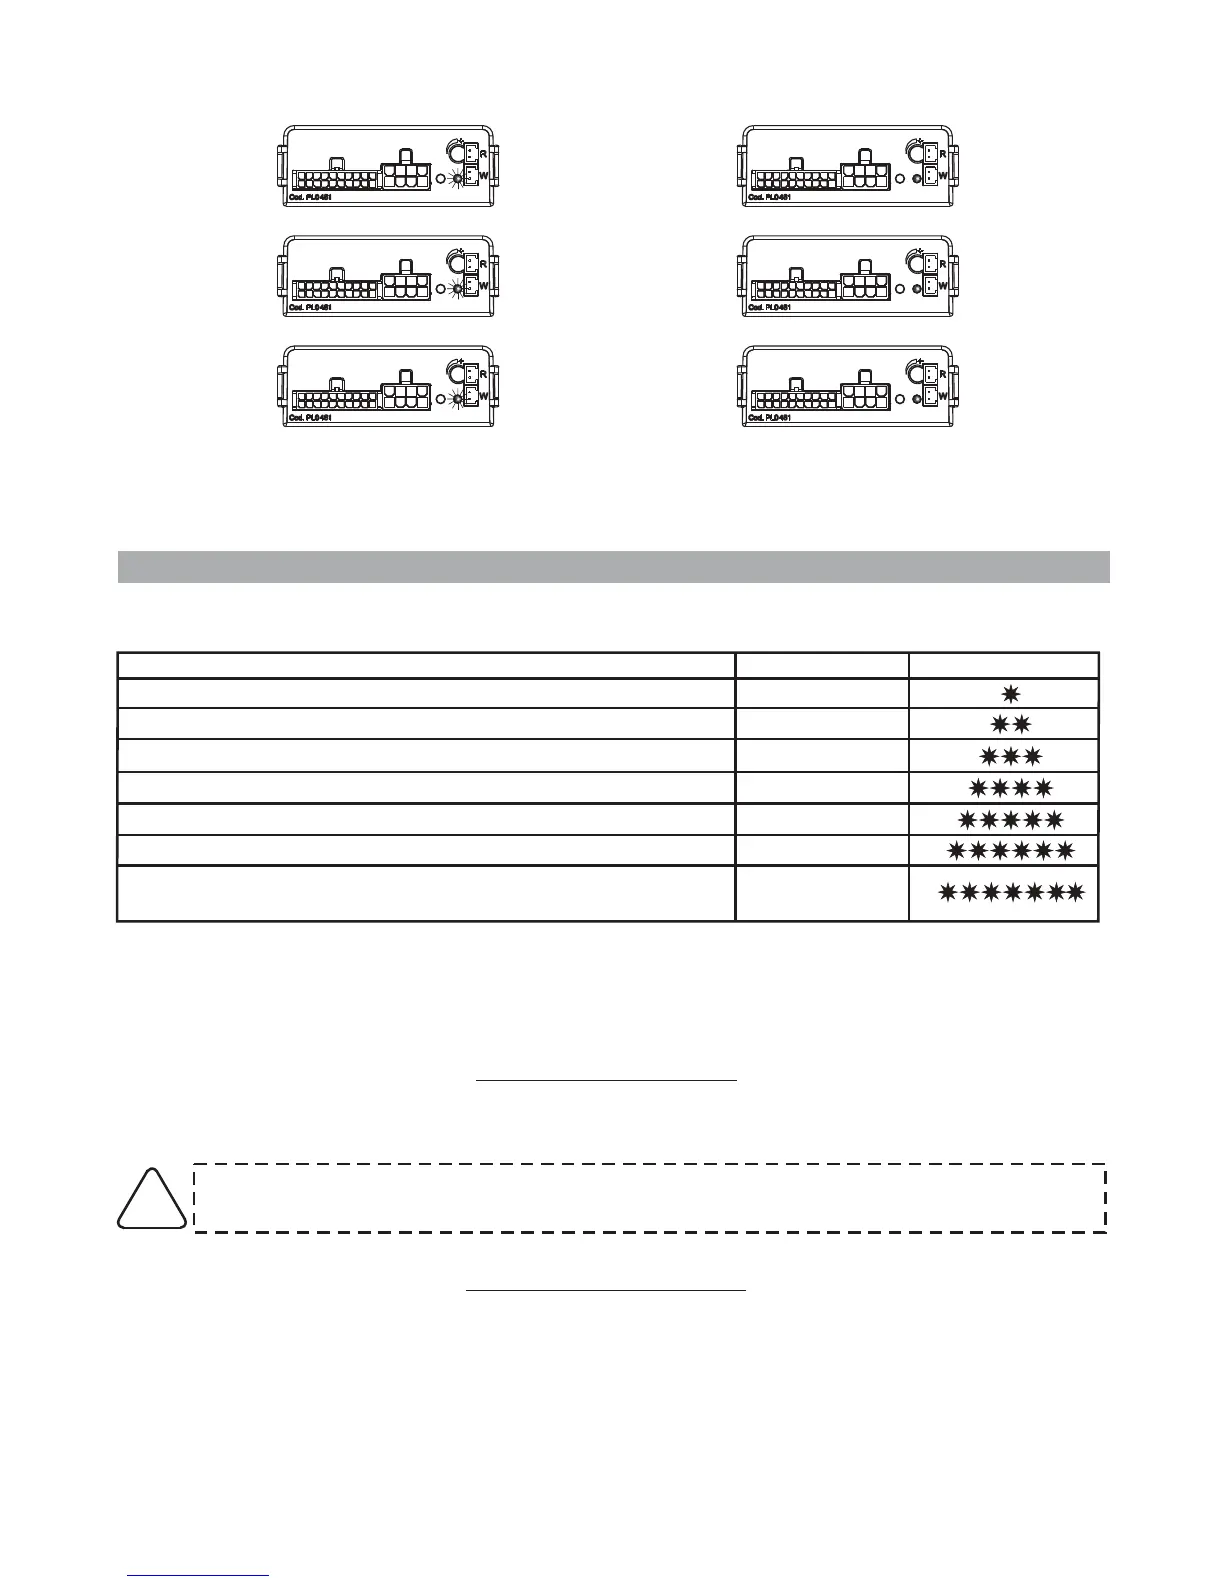
10 FLASHES AND A
SHORT PAUSE
3 FLASHES
1 FLASH AND A
SHORT PAUSE
When the last digit is entered, the alarm system “repeats” the entered code.
8.0 - SYSTEM PROGRAMMING
The table below applies to the system programmed in “standard configuration”.
Every time you enter the programming procedure, the alarm resets to the default settings.
FUNCTION STATUS LED FLASHES
Enabled
Disabled
Disabled
Enabled
Enabled
-----
-----
“ ” of arming/disarming optical signals
“ ” of arming/disarming acoustic signals
System passive arming
For Gemini only: Turn ignition key
Door input - positive
Optical pulse signals (Hazard)
For Gemini only: Turn ignition key
Exclusion
Exclusion
Alack of power during electrical system maintenance, will not affect the programming.
The procedure must always be carried out entirely. Every key rotation disables the selected function
and moves to the next option until the programming procedure is completed.
If the vehicle already has optical lock/unlock signals, the turn indicators alarm flashes
should be disabled.
!
8.1
(signals are factory disabled).
- OPTICAL SIGNALS
This function activates the optical signals (turn indicator flashes) that confirm system
arming/disarming
PAGE 12 - INSTALLER MANUAL
8.2 -
(signals are factory disabled).
ACOUSTIC SIGNALS
This function activates the acoustic signals (siren chirp) that confirm system arming/disarming