51
MDE-5222F
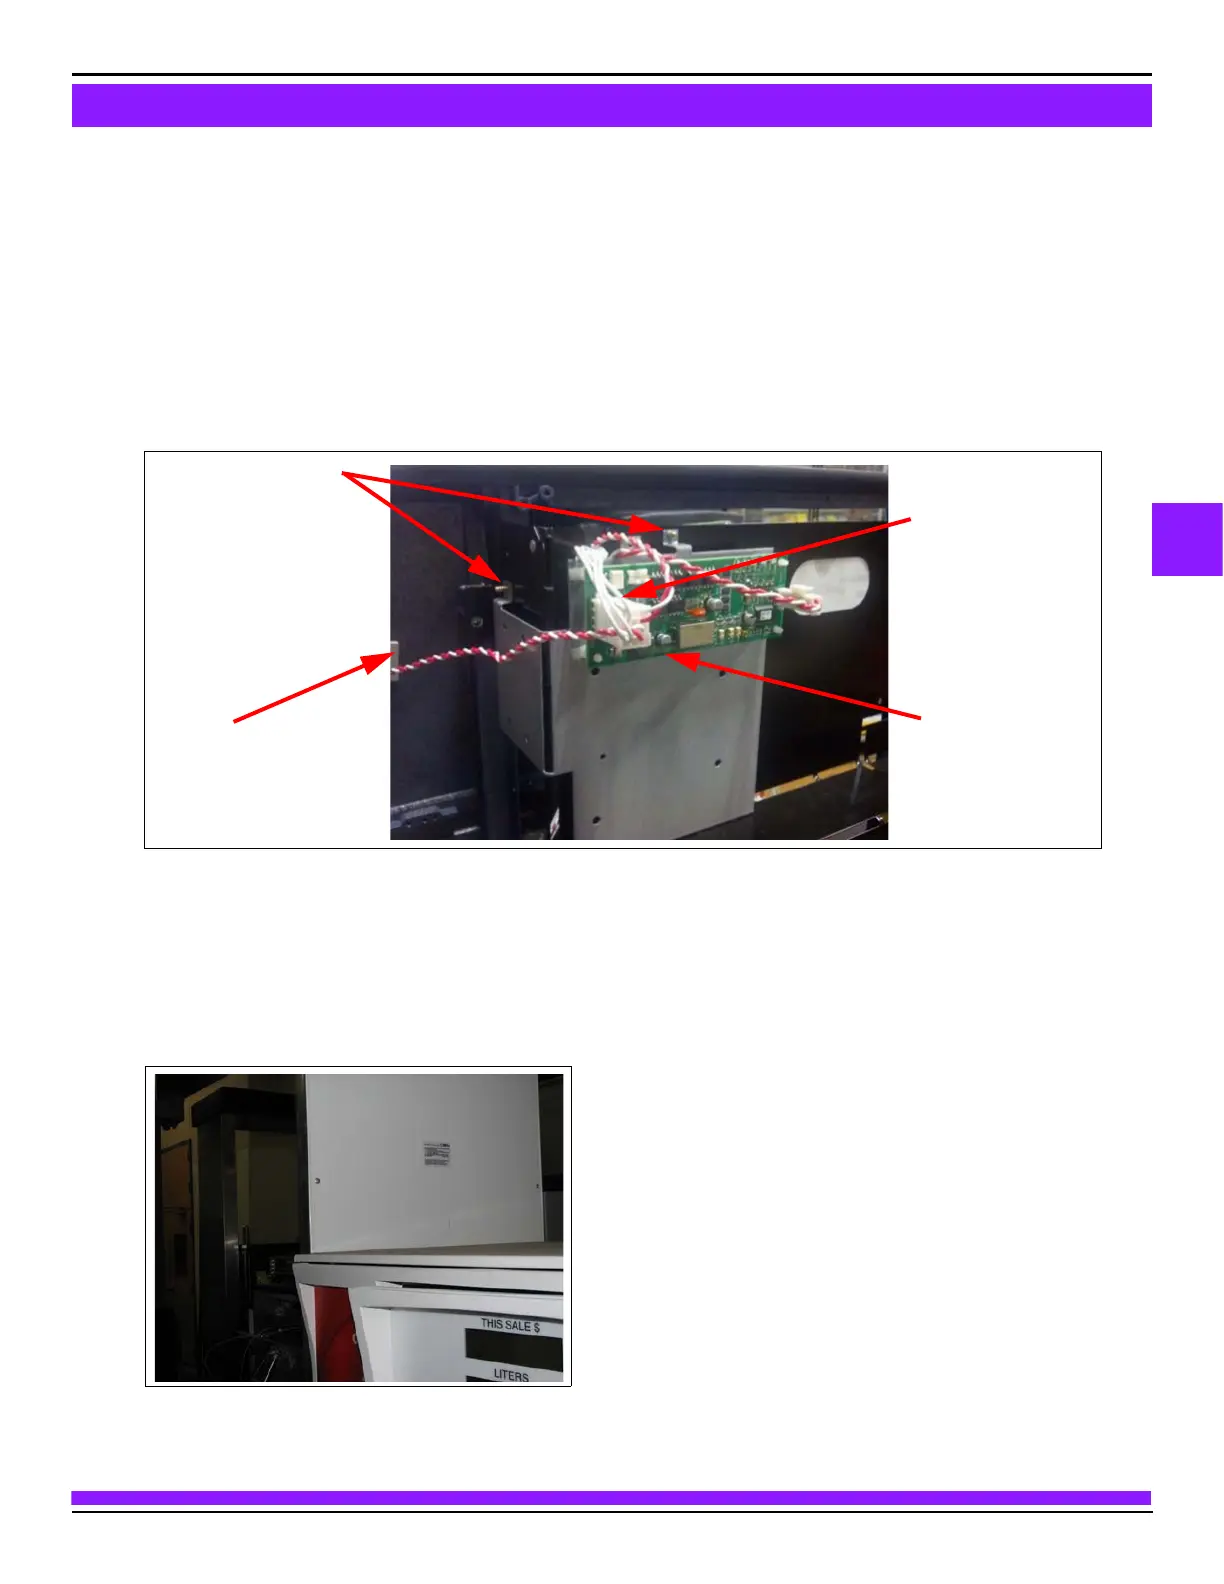
To install the intercom system:
1 Secure the Intercom Interface PCA (M09751A002) that is premounted to sheet metal with two
Q11677-24 Screws (6-20, 3/8-inch), see Figure 3.
Note: The screws are to be inserted from inside the bucket.
2 Route the four cables (all but field wiring pigtail) through the left to the PIP3 and to the speaker on the
door.
Note: Use Q13558-04 Cable Clamp for routing.
Figure 3: Installing Intercom System
Q11677-24 Screws (2X)
Four Cables
Intercom Interface PCA
(M09751A002)
Q13558-04 Cable Clamp
For details on cable connections, see Figure 2 on page 50.
3 Install Patent and Federal Communications Commission (FCC) Decal (M02962B017) on the outside
sheathing underneath the existing FCC label.
Figure 4: Installing Decal
Note: If two kits are installed on one unit (one on each side), only one decal is needed underneath the
existing FCC label.
 Loading...