23
Operations & Maintenance Manual: Setting Up
PROCEDURE 7. PERFORM A FUNCTIONAL CHECK
Before you use the device for the first time, perform the following functional check to ensure that the
system is working properly. Please contact your Verathon
®
Customer Care representative if your GlideScope
Titanium system does not function as described below.
1. Fully charge the monitor battery (this takes approximately 6hours).
2. Attach the video cable and video laryngoscope to the monitor, according to the instructions in Attach the
Video Cable & Blade.
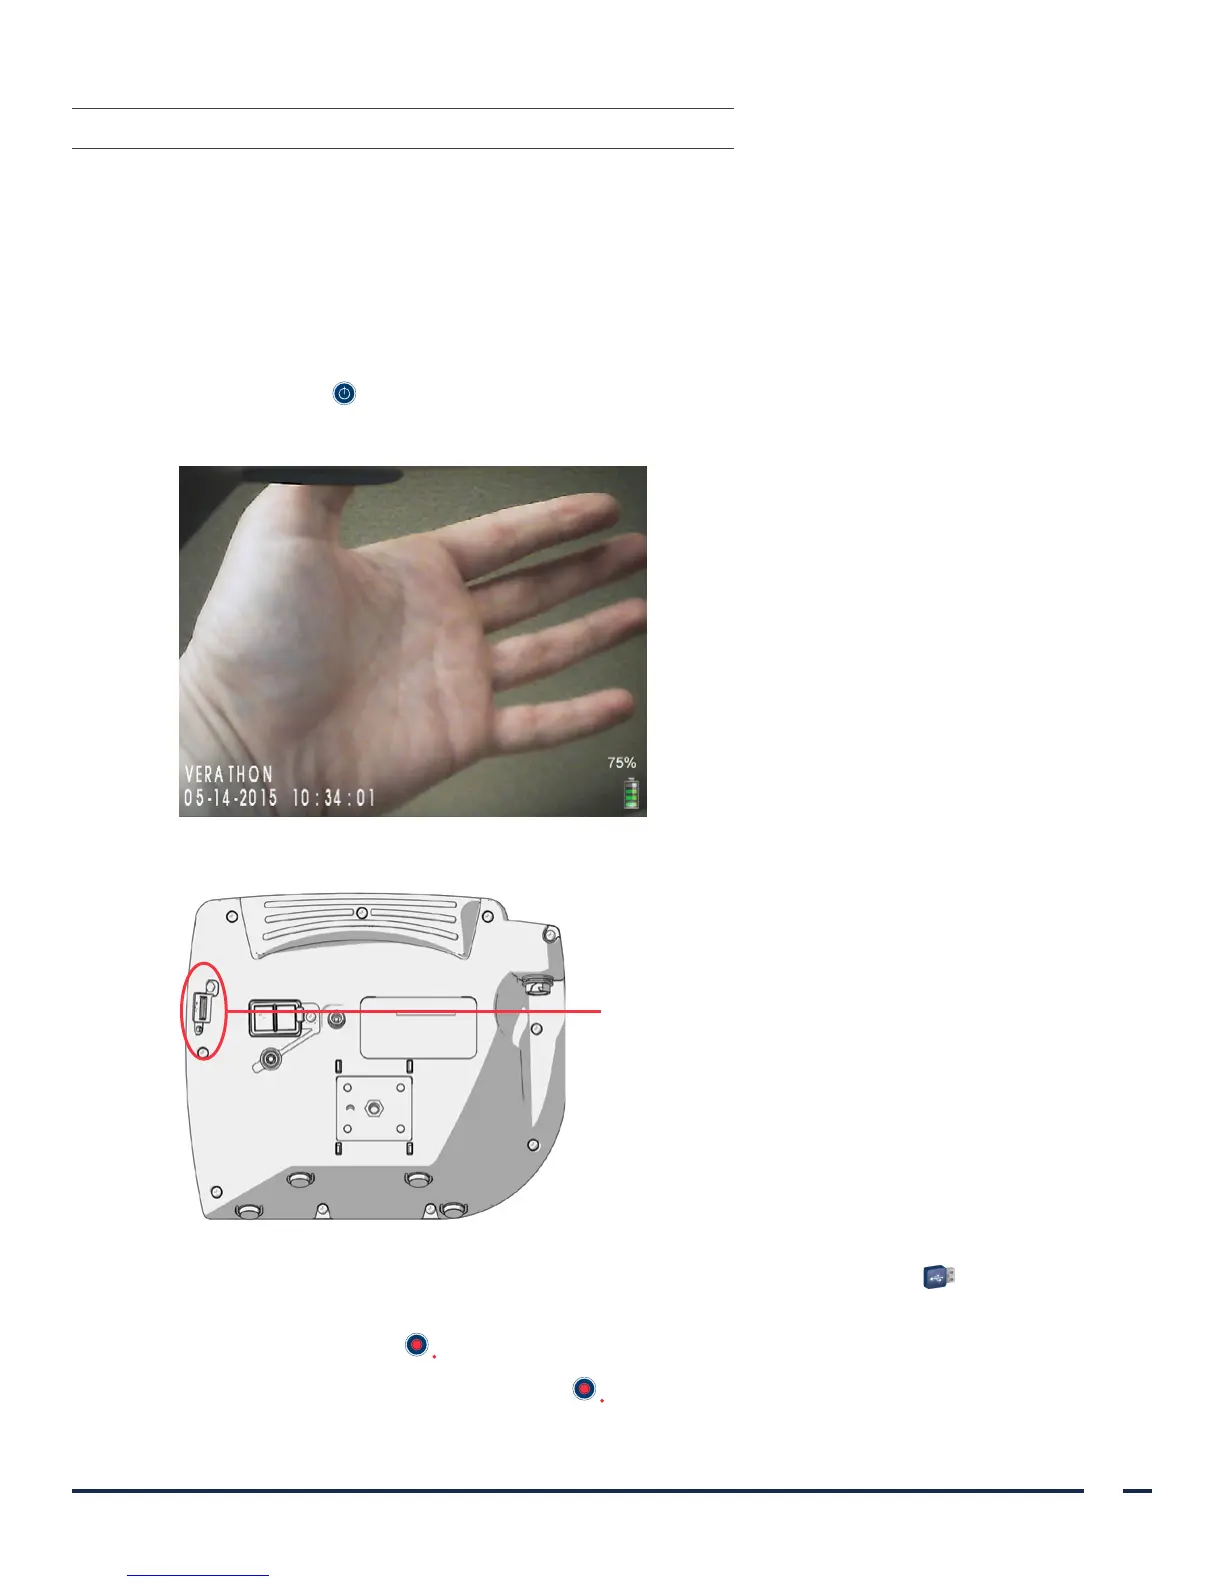
3. Press the Power button. The monitor turns on.
4. Look at the monitor screen, and verify that the image displayed is being received from the blade.
Note: There may be a slight blade intrusion in the
upper-left corner of the monitor, and a thin line
may appear along the top. These blade edges are
captured in the view because of the wide-angle
camera lens used in the video laryngoscope. This
image acts as a frame of reference during the
intubation process and ensures that the orientation
of the image is correct in the monitor.
5. On the back of the monitor, remove the USB port cap, and then insert a USB flash drive into the port.
USB port
6. Ensure that the USB flash drive is detected by checking if the USB Flash Drive icon on the bottom of the
screen is displayed.
7. Press the Record button . Recording starts.
8. To stop recording, press the Record button again.