26
PROCEDURE 1. PREPARE THE GLIDESCOPE SYSTEM
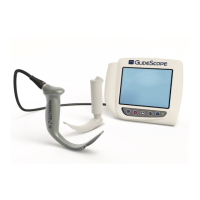
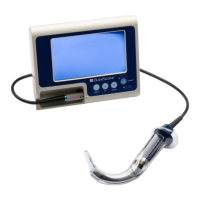
In this procedure, you select and attach the appropriate video laryngoscope for the patient, turn the system on,
and verify that the system is functioning properly.
Ensure that the video monitor is turned off prior to connecting or disconnecting a video cable, GlideScope Smart
Cable, or video laryngoscope.
The monitor is also compatible with GlideScope AVL system blades. For more information, contact Verathon
®
Customer Care or see the GlideScope AVL System Operations & Maintenance Manual.
Table 6. Video Laryngoscope Sizes
GLIDESCOPE TITANIUM BLADE RECOMMENDED PATIENT WEIGHT/SIZE
LoPro T3 or LoPro S3 10 kg to adult
LoPro T4 or LoPro S4 40 kg to morbidly obese
MAC T3 or MAC S3 Medium adult
MAC T4 or MAC S4 Large adult
1. Ensure that each GlideScope system component has been properly cleaned, disinfected, or sterilized
according to the guidance provided in Table 7 on page 33.
2. Using the information in Table 6, in combination with a clinical assessment of the patient and the experience
and judgment of the clinician, select the GlideScope video laryngoscope that is appropriate for the patient.
3. Attach the video cable and video laryngoscope to the monitor, according to the instructions in Attach the
Video Cable & Blade.
4. Press the Power button . The video monitor turns on.
Note: If the GlideScope Video Monitor locks up or becomes unresponsive for any reason, press and hold the
Power button for 10seconds to reboot the system.
5. Ensure that the battery is sufficiently charged. If necessary, connect the monitor directly to power.
6. On the monitor screen, verify that the image displayed is from the video laryngoscope camera. A small
portion of the blade may be visible on the upper-left corner or top of the monitor screen.
7. If you are using a reusable blade and if needed, allow the GlideScope Reveal™ anti-fog feature to warm up
for 30–120seconds.
Note: The time required for the anti-fog feature to be fully optimized varies according to the ambient
temperature and humidity where the equipment is being stored or used. If the video laryngoscope is stored
in cold conditions, additional warming time may be required for optimal performance of the anti-fog feature.
8. If desired to provide additional anti-fog benefits, you may apply Dexide™ Fred™ Lite to the camera window
on the reusable blade.
1
Use the solution according to the manufacturer’s instructions.
1 Compatibility has been demonstrated for up to 100 cycles on reusable blades.