Repair
38 309856A
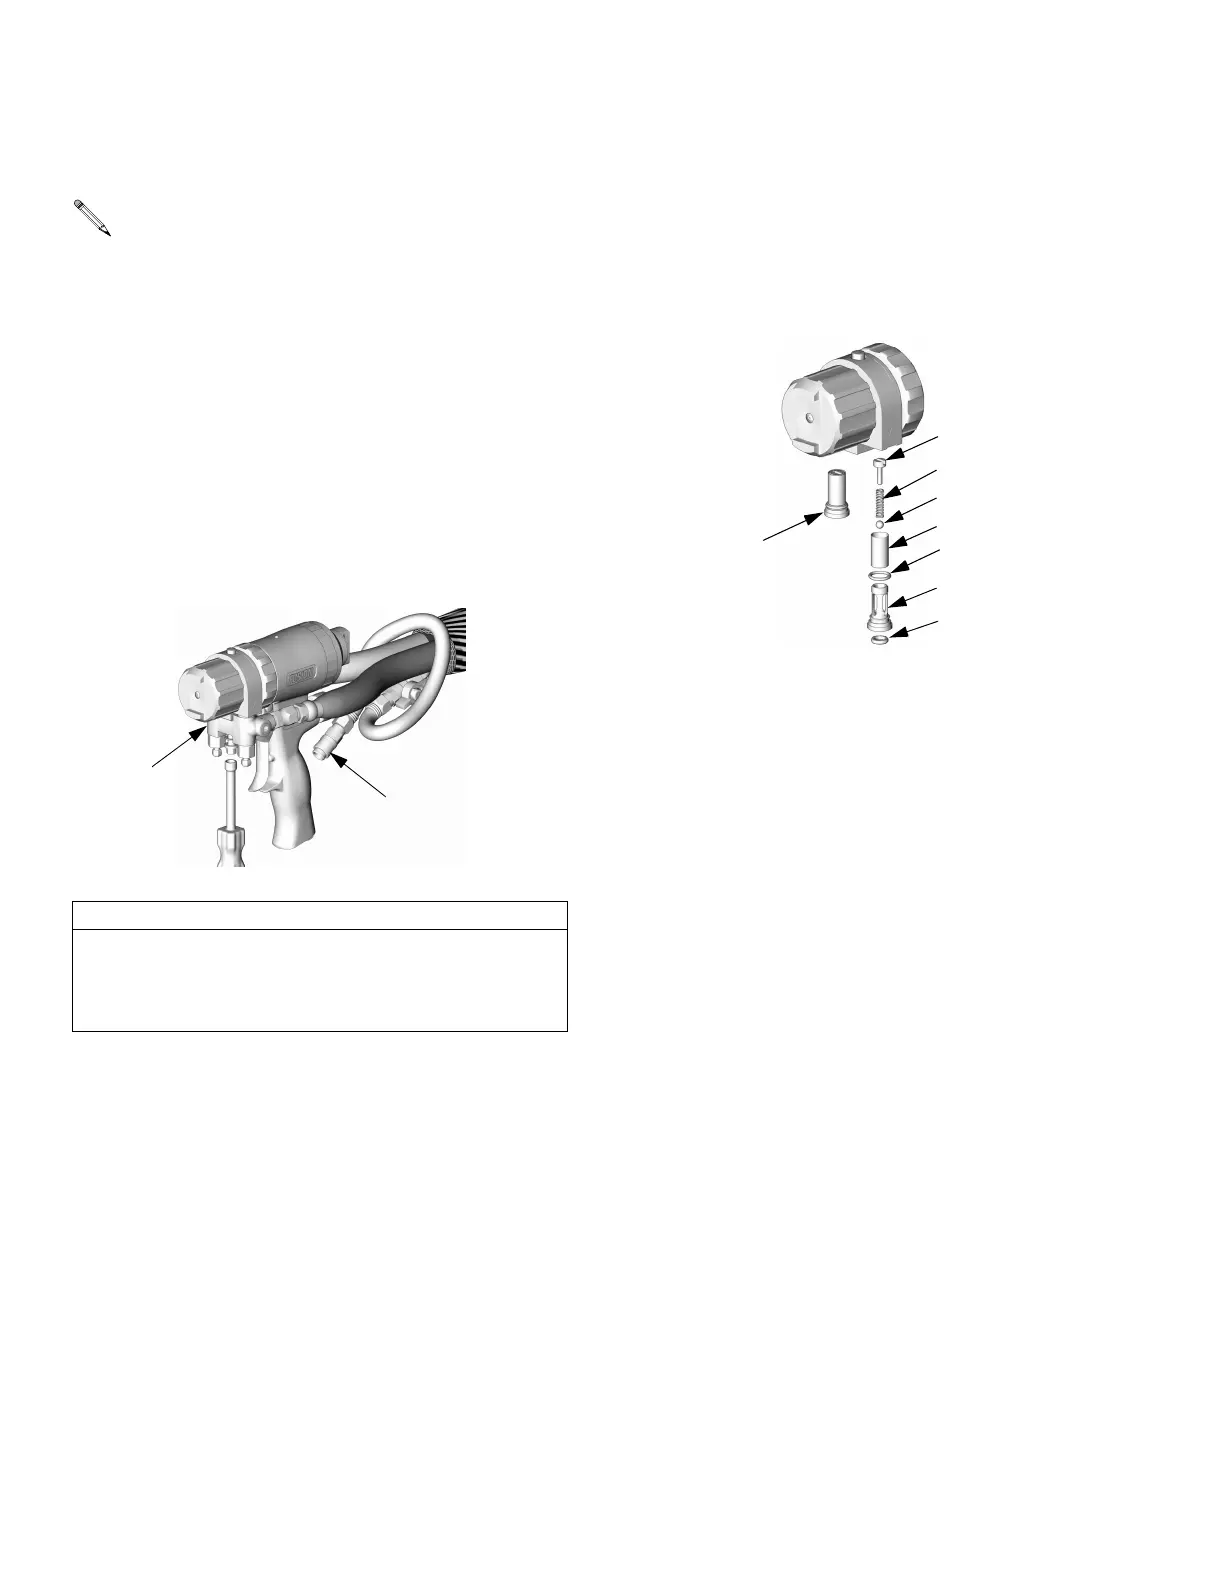
Check Valves
Before disassembling, press on ball (36c) to test
check valve for proper movement and spring
action.
1.
Follow
Pressure Relief Procedure
, page 17.
2.
Flush Gun
, page 21.
3.
Disconnect air (D) and remove fluid manifold (G).
Clean and inspect check valve mating surfaces
and fluid ports.
CAUTION
To prevent cross-contamination of the check valves,
do not interchange A component and B component
parts. The A component check valve is marked with
an A.
4.
Pry out check valves (36) at notch.
TI3837a
G
D
5.
Slide filter (36d) off. Clean and inspect parts. Thor-
oughly inspect o-rings (36f, 36g). Replace if any
damage is seen, or external leakage may result. If
necessary, remove screw (36b) and disassemble
check valve.
6.
Reassemble check valves. Liberally lubricate
o-rings (36f, 36g) and carefully reinstall in fluid
housing.
7.
Attach fluid manifold. Connect air. Return gun to
service.
36b
36
B
A
36e
36c
36d
36g
36a
36f
TI3836a
 Loading...


