Repair
309856A 41
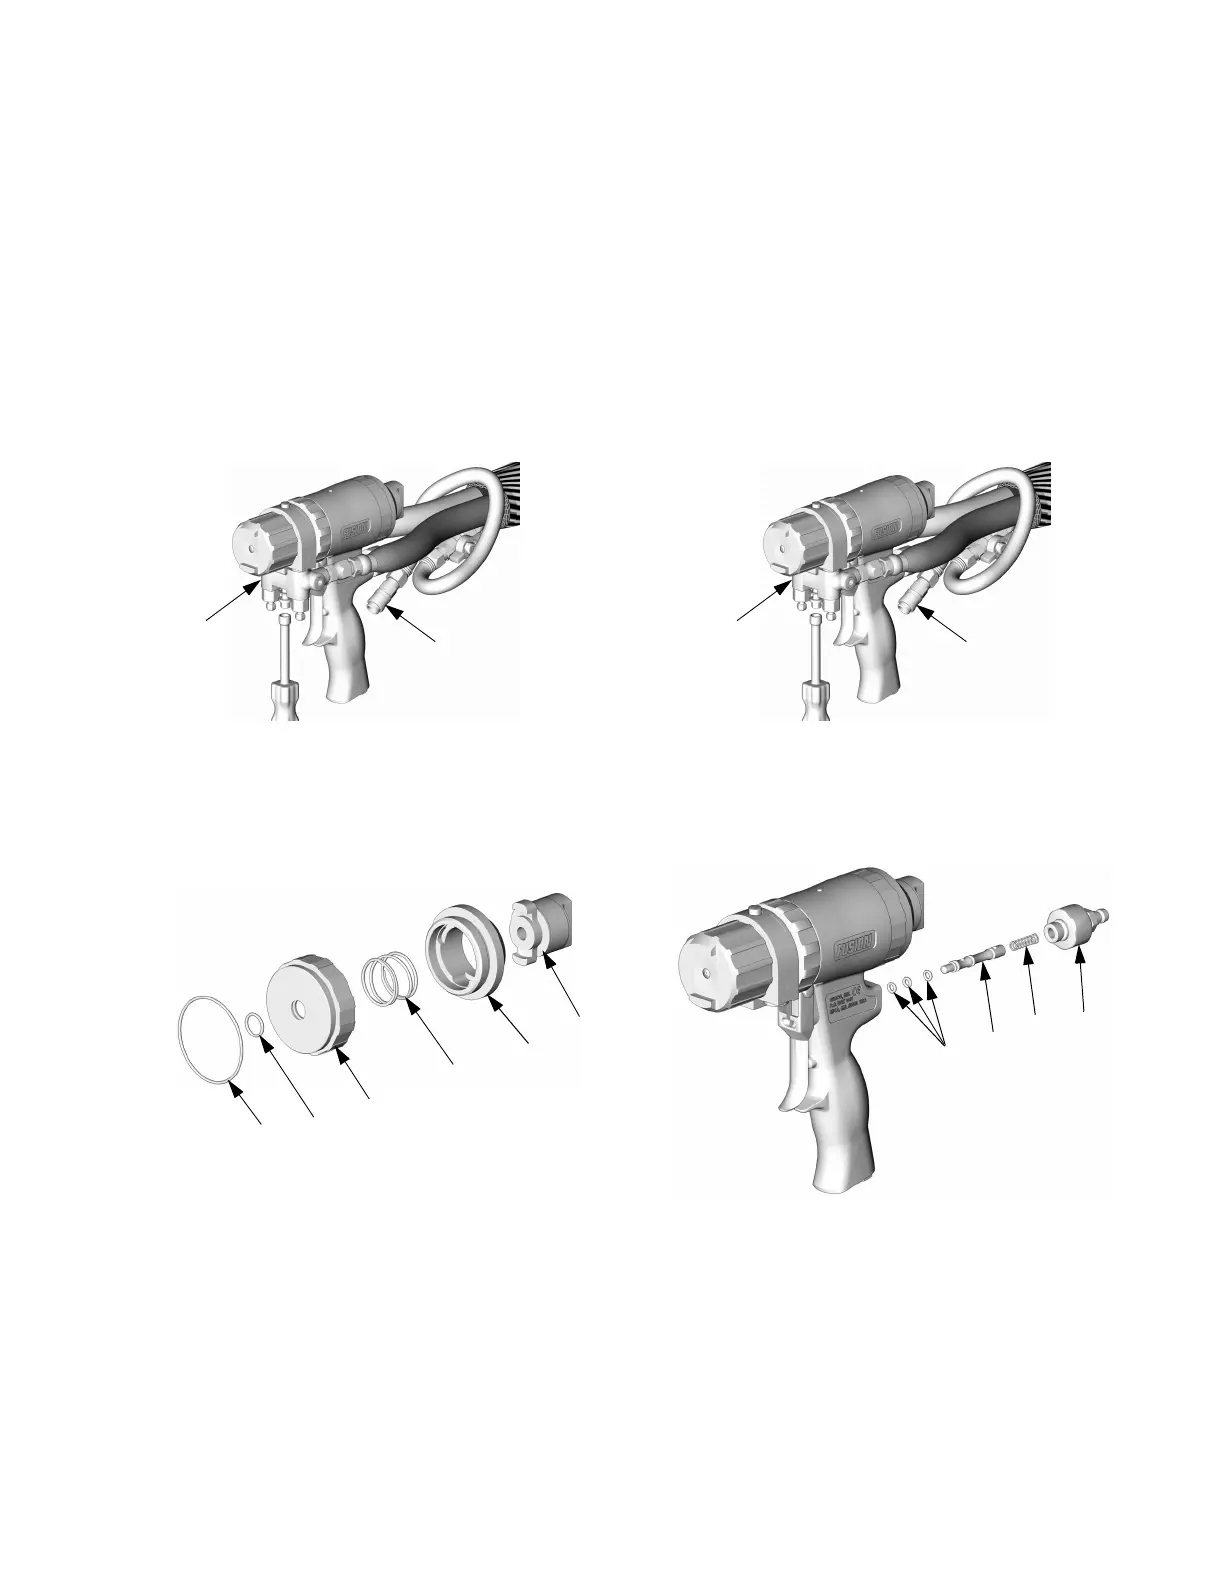
Safety Lock Air Valve
1.
Follow
Pressure Relief Procedure
, page 17.
2.
Flush Gun
, page 21.
3.
Disconnect air (D) and remove fluid manifold (G).
4.
Unscrew safety lock assembly. Using two pair of
channel-lock pliers, unscrew rod stop (15) from
rear cap (10). Inspect spring (17), safety actuator
(3), bushing (4), and o-rings (14, 18).
5.
Lubricate o-rings (14, 18) and safety lock actuator
(3), and reassemble. Clean threads with solvent or
alcohol. Apply medium-strength Loctite
®
or equiv-
alent to threads on stop (15) and reassemble.
6.
Attach fluid manifold. Connect air. Return gun to
service.
TI3837a
G
D
10
15
17
3, 4
TI3835a
14
18
1.
Follow
Pressure Relief Procedure
, page 17.
2.
Flush Gun
, page 21.
3.
Disconnect air (D) and remove fluid manifold (G).
4.
Unscrew air valve plug (2) and remove spring (26).
Using a small diameter tool, push spool (27) out
from front. Inspect o-rings (24).
5.
Liberally lubricate o-rings and reassemble. Torque
plug (2) to 125-135 in-lb (14-15 N•m).
6.
Attach fluid manifold. Connect air. Return gun to
service.
TI3837a
G
D
 Loading...


