J
jody43Sep 13, 2025
Why will the blade on my Grizzly Saw not go beneath the table surface?
- BboydmonicaSep 13, 2025
If the blade on your Grizzly Saw will not go beneath the table surface, tighten the roll pins and set screws in the worm gear.
Why will the blade on my Grizzly Saw not go beneath the table surface?
If the blade on your Grizzly Saw will not go beneath the table surface, tighten the roll pins and set screws in the worm gear.
What to do if the blade will not move up or down on my Grizzly G0771Z?
If the blade on your Grizzly Saw will not move up or down, tighten or replace the set screw on the worm gear.
What causes the workpiece to catch on the table insert during cutting with my Grizzly G0771Z Saw?
If the workpiece catches on the table/dado insert or table throat during a cutting operation with your Grizzly Saw, adjust the table/dado insert so it is perfectly flush with the table surface.
Why does my Grizzly Saw machine stall or is underpowered?
If your Grizzly Saw machine stalls or is underpowered, consider the following: * Decrease the feed rate or cutting speed. * Ensure you are only cutting wood with moisture content below 20%. * Straighten or replace crooked workpieces and adjust the fence. * Use the correct blade and reduce the feed rate or depth of cut if the machine is undersized for the task. * Test, repair, or replace the run capacitor. * Check and tension or replace the belt if it's slipping. * Correctly wire the motor. * Test the plug/receptacle for good contacts and correct the wiring if faulty. * Replace any loose pulley/shaft. * Test, repair, or replace the motor bearings. * Test all legs of the contactor for power and replace if faulty. * Clean the motor, let it cool, and reduce the workloa...
Why does my Grizzly Saw have vibration or noisy operation?
If your Grizzly Saw machine has vibration or noisy operation, here are some things to check: * Inspect and replace any damaged bolts/nuts, and re-tighten with thread locking fluid if a motor or component is loose. * Replace warped/bent blade or resharpen dull blade if the blade is at fault. * Tension/replace belt if belts are worn or loose. * Realign/replace shaft, pulley, setscrew, and key if the pulley is loose. * Tighten/replace if the motor mount is loose/broken. * Tighten mounting bolts or relocate/shim the machine if it's incorrectly mounted. * Retighten/replace arbor pulley if it is loose. * Replace arbor housing bearings or replace the arbor if arbor bearings are at fault. * Test by rotating shaft; grinding/loose shaft requires bearing replacement if motor bearin...
Details changes to the blade guard assembly and its components.
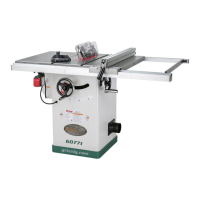
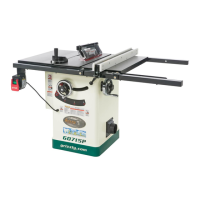
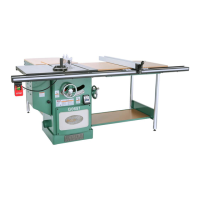
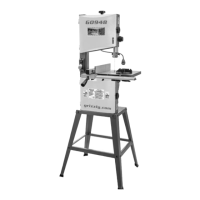
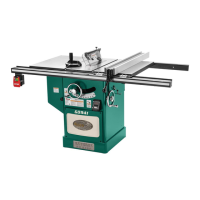
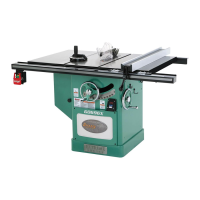
Overview of the table saw's features and build.
Contact details for technical support and documentation feedback.
Information on manual accuracy and potential machine differences.
Location and function of the machine's main power switch.
Control for adjusting the saw blade's vertical position.
Control for adjusting the saw blade's tilt angle.
Control for securing the rip fence in its position.
Core specifications like table saw type, arbor size, and cut depths.
Details on included blade, spreader/riving knife thickness.
Dimensions and features of the table and extension wings.
Specifications related to the fence type, size, and rails.
General safety guidelines and hazard warnings for operating machinery.
Methods and precautions to avoid workpiece kickback during cuts.
Steps to take to minimize injury if kickback occurs.
Considerations for the required power supply circuit before installation.
Details on power supply circuits and fuse requirements.
Electrical specifications for operating the machine on 120V.
Electrical specifications for operating the machine on 240V.
List of items required but not included for machine setup.
Instructions for unpacking the machine and inspecting for damage.
Determining adequate space for operation and maintenance.
Guidelines for safe placement and connection to power.
Basic understanding of how to operate the machine.
Characteristics of blades suitable for ripping operations.
Characteristics of blades suitable for crosscutting operations.
Function and safety aspects of the blade guard.
Role of the spreader/riving knife in preventing kickback.
Procedure for correctly installing the blade guard assembly.
Benefits and types of shop-made featherboards.
Step-by-step guide to creating featherboards.
Techniques for safely feeding workpieces with push sticks.
Template and instructions for creating a push stick.
Methods for using push blocks for better workpiece control.
Template and instructions for creating a push block.
Construction guide for a combined fence and push block jig.
Recommended maintenance checks and intervals for optimal performance.
Procedures for cleaning and protecting the machine's surfaces.
Solutions for common machine problems and symptoms.
Adjusting the blade's 90-degree tilt limit.
Adjusting the blade's 45-degree tilt limit.
How to verify the alignment of the spreader/riving knife with the blade.
Steps to adjust the spreader/riving knife position for proper alignment.
Procedure to straighten or replace a bent spreader/riving knife.
Optional adjustment to offset the fence for kickback prevention.
Critical safety precautions for working with electrical wiring.
Exploded view and parts list for the main saw unit.
| Type | Hybrid Table Saw |
|---|---|
| Blade Diameter | 10 inches |
| Max. depth of cut at 90 degrees | 3-1/8 inches |
| Max. depth of cut at 45 degrees | 2-1/4 inches |
| Distance from front of table to blade at max cut | 12 inches |
| Distance from right of blade to rip fence | 30 inches |
| Table Size | 27 inches x 40 inches |
| Arbor Size | 5/8 inches |
| Max. width of dado | 13/16 inches |
| Amps | 13 Amps |