Maintenance
Replacement Procedures
8-15
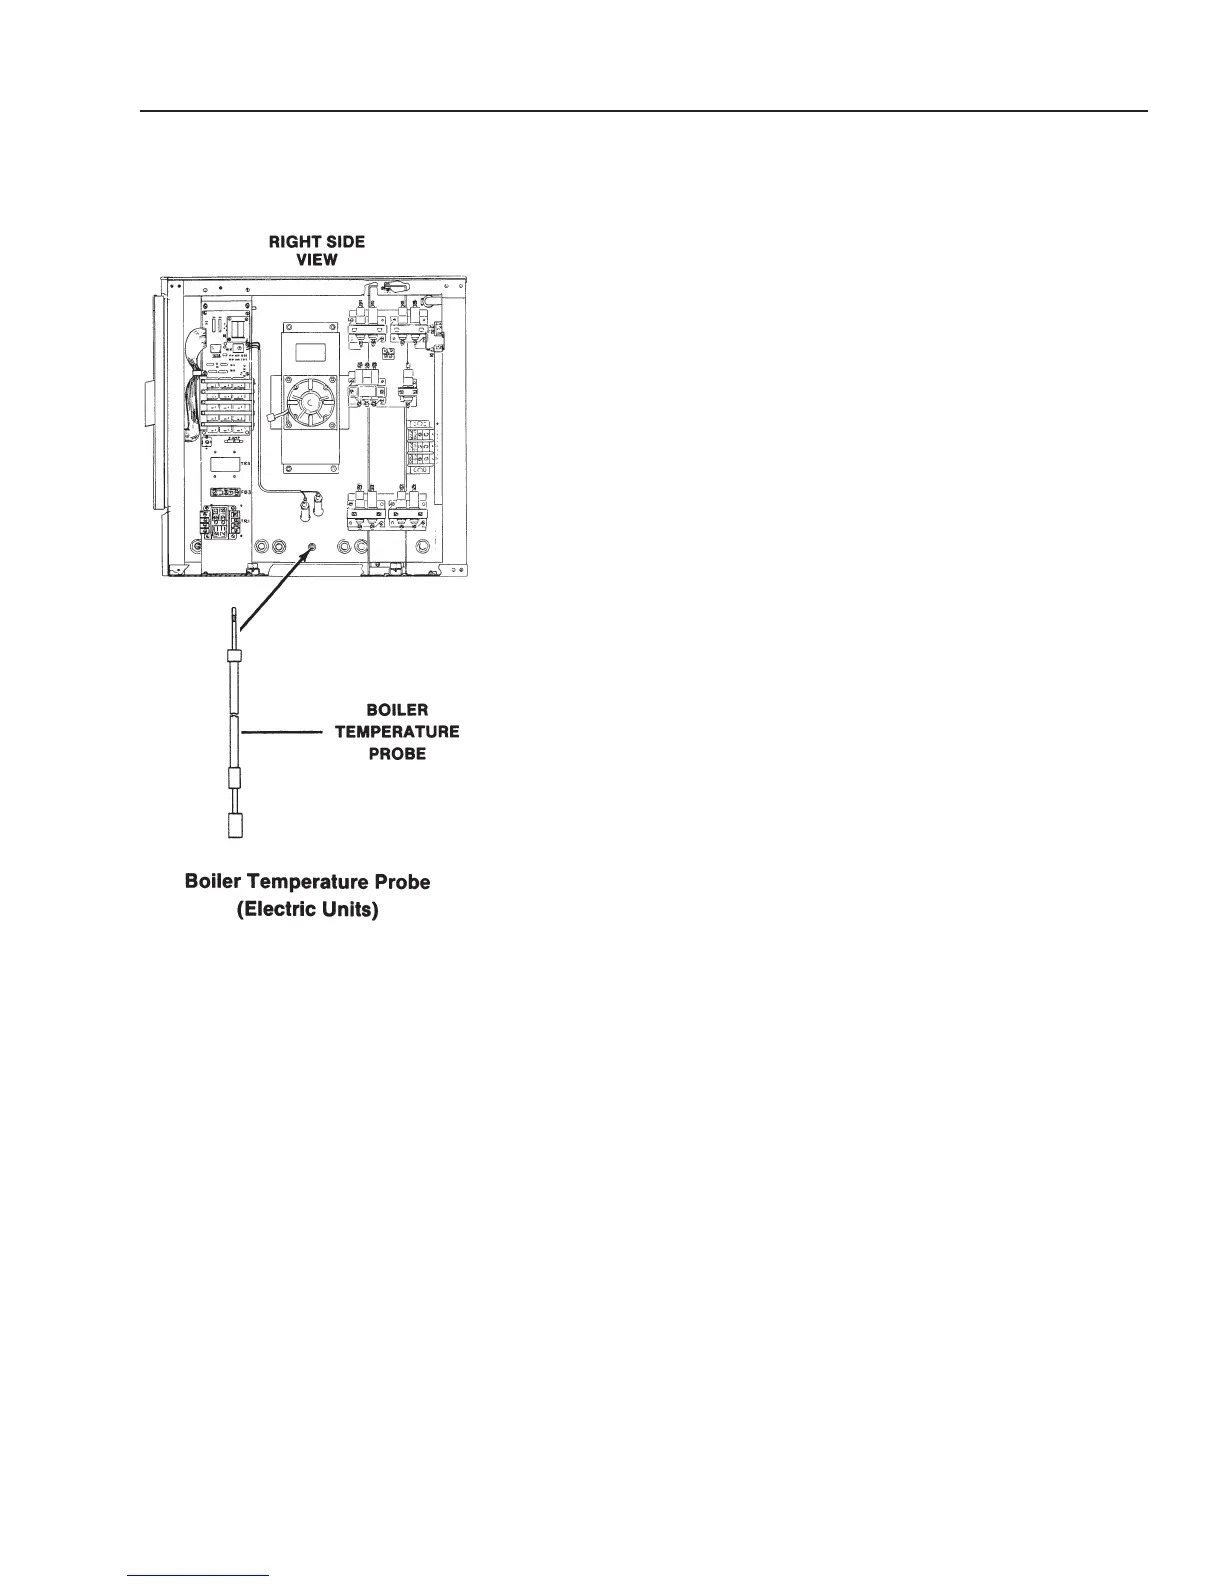
Boiler Temperature Probe
Removal - Electric Units
WARNING
Be sure oven is disconnected from branch circuit power before
performing any repair work.
1. Turn off oven power and disconnect oven from the branch circuit.
2. Remove boiler cover from inside the oven. Inspect the boiler
temperature probe to make sure it isn’t bent and that it is installed
correctly through the eye of the mounting bracket. If probe is bent
and not correctly installed, it must be replaced.
3. Remove right hand side panel.
4. On the CC20-E unit, disconnect probe ground wire from relay board
mounting bracket.
5. Disconnect boiler temperature probe electrical leads from the control
panel.
6. Loosen brass compression nut on the probe assembly.
IMPORTANT
The probe fitting may turn with the compression nut. If this should
happen, remove fitting with the probe and compression nut. The
probe and compression nut are an assembly.
7. Remove temperature probe. If male fitting was removed with the
probe and compression nut, remove it from the probe.
Installation - Electric Units
WARNING
Be sure oven is disconnected from branch circuit power before
performing any repair work.
1. If male fitting was removed with the probe assembly, install it in the
oven at this time and securely tighten it.
2.
Install
new compression nut and boiler temperature probe. Be
careful not to bend the probe as you insert it through the male fitting
and through the eye of the probe mounting bracket. Securely tighten
probe compresssion nut.
3. Route probe wires away from any high voltage wires and sharp
edges. Connect probe wires to the control panel.
4. On the CC20-E unit, connect probe ground wire to relay board
mounting bracket.
5. Install boiler cover. Install right side cover.
(Revised 1/02)