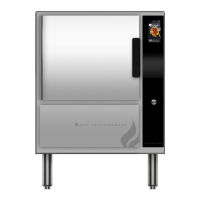
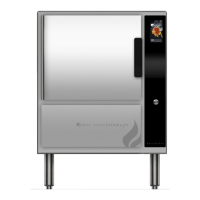
7 SM-GSSP BOILERLESS STEAMER
Do not install rear of unit within 24” radius from the drain outlet to any steam
producing device. Do not install steamer directly above steam venting oor
drains.
If the oor drain “only” services this steamer, then the drain may be located
within the steam-free zone. The steam-free zone must be covered if other
appliances cause steam at the oor drain.
INSTALLATION CHECKLIST
General
Refer to Installation on page 6
Do not install steamer directly above steam venting oor drain
Make sure the unit rear vents are not blocked and the unit is not within 2” of
a heat source
Make sure the steamer is level or pitched slightly forward
Check that fan is clean and clear of foreign materials
Gas Connection Checks
Make sure installation conforms to local codes
Make sure steamer is installed under a ventilation hood. Check that the ue
and all vents are free of obstruction
Check that gas supply is 5” W.C. (min) to 14” W.C. (max) for natural gas, and
12” “W.C. (min) to 14” W.C. (max) for propane
Check that gas supply piping is ½” NPT
Verify operating gas pressure per chart on page 6
Electrical Checks
Make sure the steamer is properly grounded
Verify that the electrical connections conform to all local codes and the NEC
requirements
Make sure the power supply branch circuit conforms to the specications
indicated on the steamer nameplate
Steamer Door Check
Make sure the door gasket is making good contact with the cavity frame
Instruct operators to leave the door open when the steamer is shut down
overnight or longer
Cold Water Supply Connections
Make sure plumbing connections conform to local codes
If permitted by local codes, check that hose connection is exible to allow
steamer movement for servicing
Check inlet water pressure is 30-60 PSIG
Check that the water feed line is a minimum on ½” inside diameter
Check water ow per Installation on page 6
Drain Connections
Make sure drain plumbing connections comply with local codes
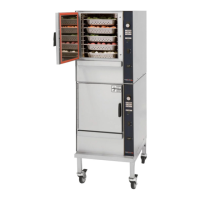
Make sure drain line is 1- 1/12” and 2- 1/2” on stacked units
Check that drain line is suitable for boiling water. Make sure PVC is not being
used for drain plumbing
Check that drain line is pitched downward
Make sure drain line is free of obstruction
Make sure drain is not connected to a building drain
GENERAL CLEANING
WARNING: DISCONNECT THE POWER SUPPLY BEFORE CLEANING THE OUTSIDE OF THE
STEAMER. KEEP WATER AND CLEANING SOLUTIONS OUT OF CONTROLS
AND ELEVTRICAL COMPONENTS. NEVER HOSE OR STEAM CLEAN ANY PART
OF THE UNIT.
AVOID CONTACT WITH ANY CLEANSER, DELIMING AGENT OR DEGREASER
AS RECOMMENDED BY THE SUPPLIER. MANY ARE HARMFUL. READ THE
WARNINGS AND FOLLOW THE DIRECTIONS.
EVEN WHEN THE UNIT HAS BEEN SHUT OFF, DON’T PUT HANDS OR TOOLS
INTO THE COOKING CHAMBER UNTIL THE FAN HAS STOPPED TURNING.
DON’T OPERATE THE UNIT UNLESS THE REMOVABLE PARTITION HAS BEEN
PUT BACK IN ITS PROPER LOCATION.
DO NOT USE ANY CLEANING AGENT THAT CONTAINS ANY SULFAMIC AGENT
OR ANY CHLORIDE, INCLUDING HYDROCHLORIC ACID (HCI). TO CHECK FOR
CHLORIDE CONTENT, SEE ANY MATERIAL SAFETY DATA SHEETS PROVIDED
BY THE CLEANING AGENT MANUFACTURER.
WARNING: DO NOT DISASSEMBLE PROBES DURING CLEANING AS BREAKAGE WILL
RESULT. USE HOT WATER TO WASH OUT PIVOT JOINTS OF PROBE.
To keep your SmartSteam Pro Boilerless Steamer in proper working condition, us
the following procedure to clean this unit. This regular cleaning will reduce the
effort required to clean the steam reservoir and cavity.
SUGGESTED TOOLS
• Mild detergent or vinegar
• Stainless steel exterior cleaner such as Zepper
• Cloth of sponge
• Spray bottle
• Nylon pad
• Towels
• Plastic disposable gloves
PROCEDURE EXTERIOR CLEANING
1. Prepare a warm solution of the mild detergent as instructed by the supplier.
Wet a cloth with this solution and wring it out. Use the moist cloth to clean
the outside of the unit. Use the moist cloth to clean the outside of the unit.
Do not allow freely running liquid to touch the controls, the control panel, any
electrical part, or on the side or rear panels.
2. To remove material which may be struck to the unit use a ber brush, or a
plastic or rubber scraper with a detergent solution.
3. Stainless steel surfaces may be polished with a recognized stainless steel
cleaner such as “Zepper”.
PROCEDURE INTERIOR CLEANING
Clean the unit daily or as residue builds upon the bottom of the oven cavity.
1. Press OFF push button to turn the steamer off. Open the door.
2. Allow unit to shutdown, drain the water and allow the unit to cool before
cleaning.
3. After the unit has cooled, remove steam lid, pan racks, and drain guard from
the cavity.
4. Use a mild detergent to wipe down the steamer cavity and the probes on
the right side wall. Clean steam lid, pan racks and drain guard. Use brush
provided to clean out condensate and overow drains.
5. Rinse the unit to remove detergent.
6. Reinstall drain guard, pan racks and steam lid. Unit is ready for use.