7.6 CONFIGURING A WIFI- CONNECTION
After the scanner has been connected to the internet, and it has obtained the registration information, a Wi-Fi connection can
be configured. This can be done while the Ocus Scanner is connected to the internet.
1.
Open the browser in your computer or tablet and type the following in the browser’s address field:
https://www.grundium.net
2.
Sign in with your user account. (If you do not have an account, see section 7.2 “Creating user account”.
3.
Go to Settings.
4.
On the network tab of the settings page, click on WLAN.
5.
From the list of available networks, choose your network.
6.
Click “Edit”
7.
On the password popup, enter your network password, and click “Save”.
8.
After the password popup has closed, click “Connect”.
The Ocus Scanner is connected to the chosen network when a “Connected” text appears next to the signal strength icon.
8 LOGGING IN TO THE SCANNER
8.1 LOGGING IN TO THE SCANNER WITH INTERNET CONNECTION
This connection method works when the power button light is steady green or steady yellow.
Note. If the light is steady yellow, the end device used to operate the Ocus scanner needs to be connected to the same
network (VLAN) as the Ocus scanner, or routed connection must be allowed by the network administrator. (See section
7.1 “Setting up the network firewall configuration based on the MAC-address”).
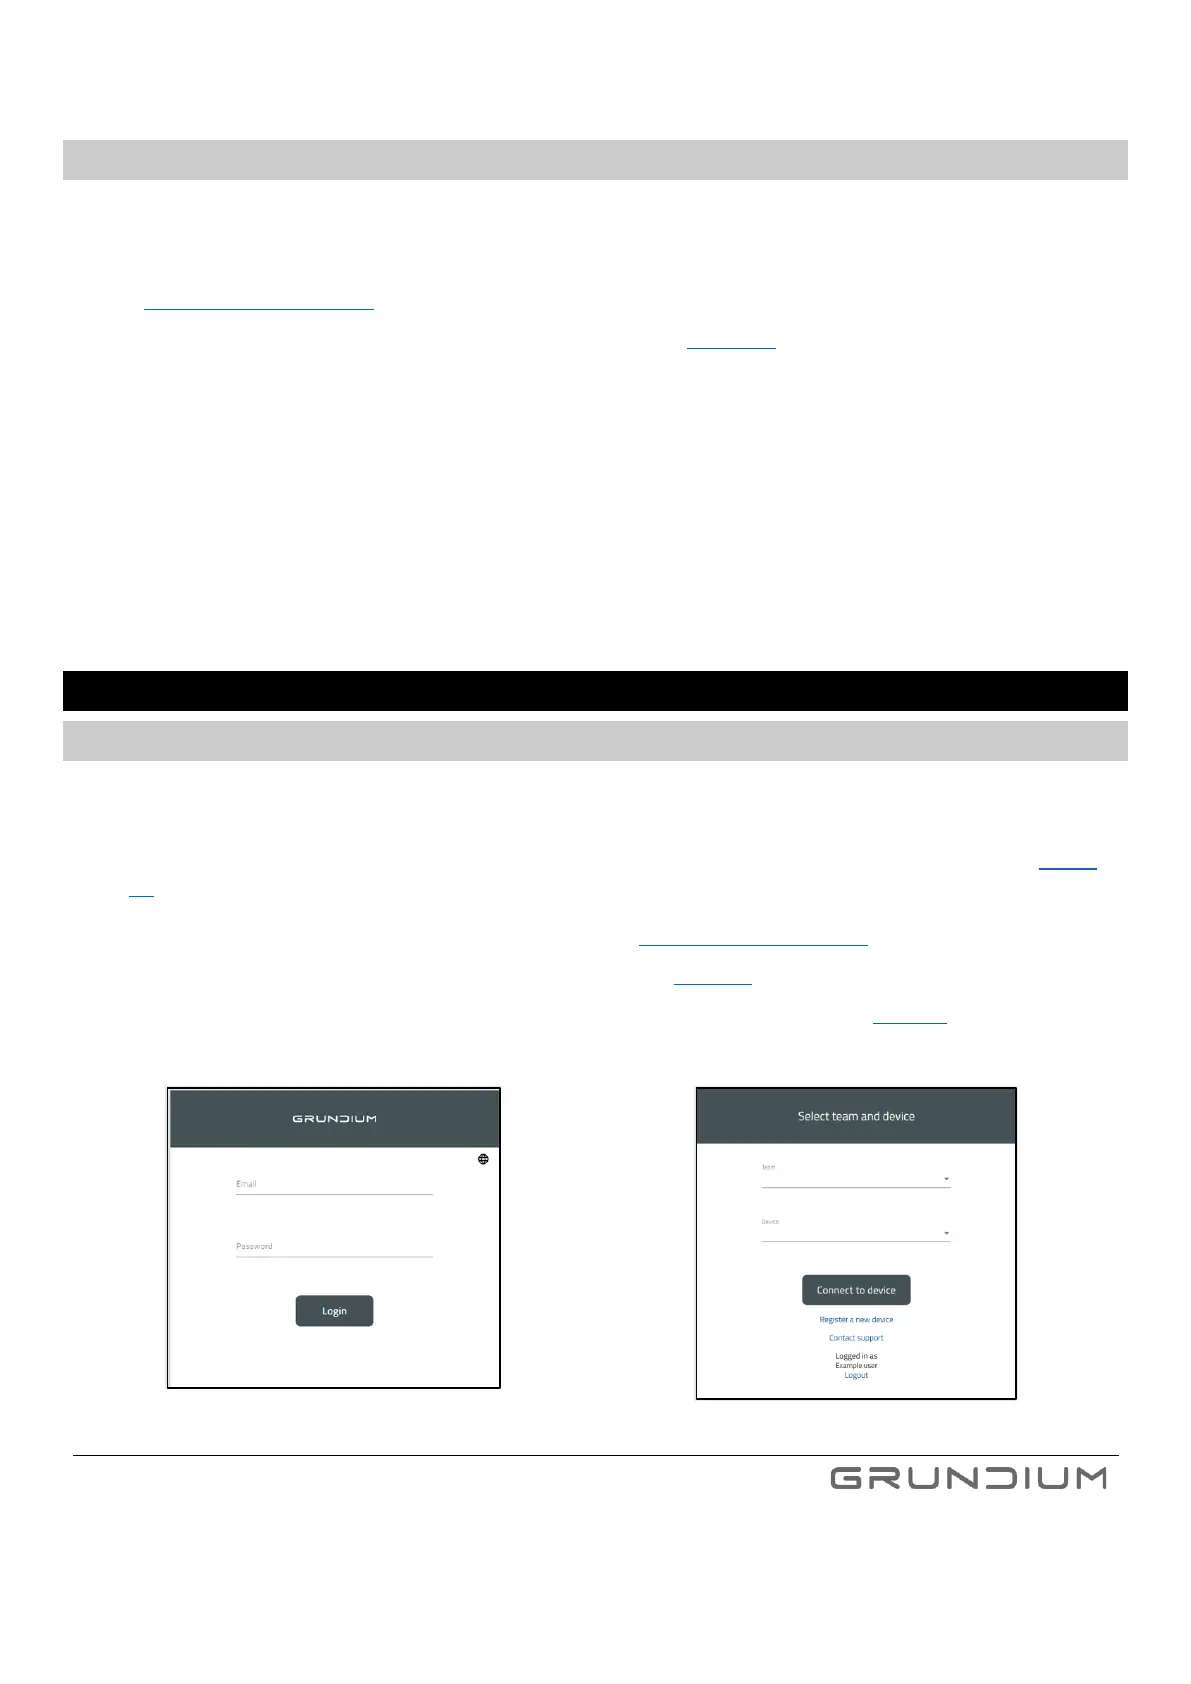
1.
Open the browser on your computer or tablet and go to https://www.grundium.net
2.
Enter your e-mail address and password and click Login. (See image 12).
3.
Select your team and the scanner you want to use, then click Connect to device. (See image 13).