Saavutustenkatu 3, 33720 Tampere, Finland
©2022 Grundium. All rights reserved.
6-8G, 33720 Tampere, Finland
©2022 Grundium. All rights reserved.
• Edof – User is able to select the number of layers utilized to produce extended depth of field image.
The following can be set in scan mode view:
o 3 EDOF layers
o 5 EDOF layers
o 7 EDOF layers
o 9 EDOF layers
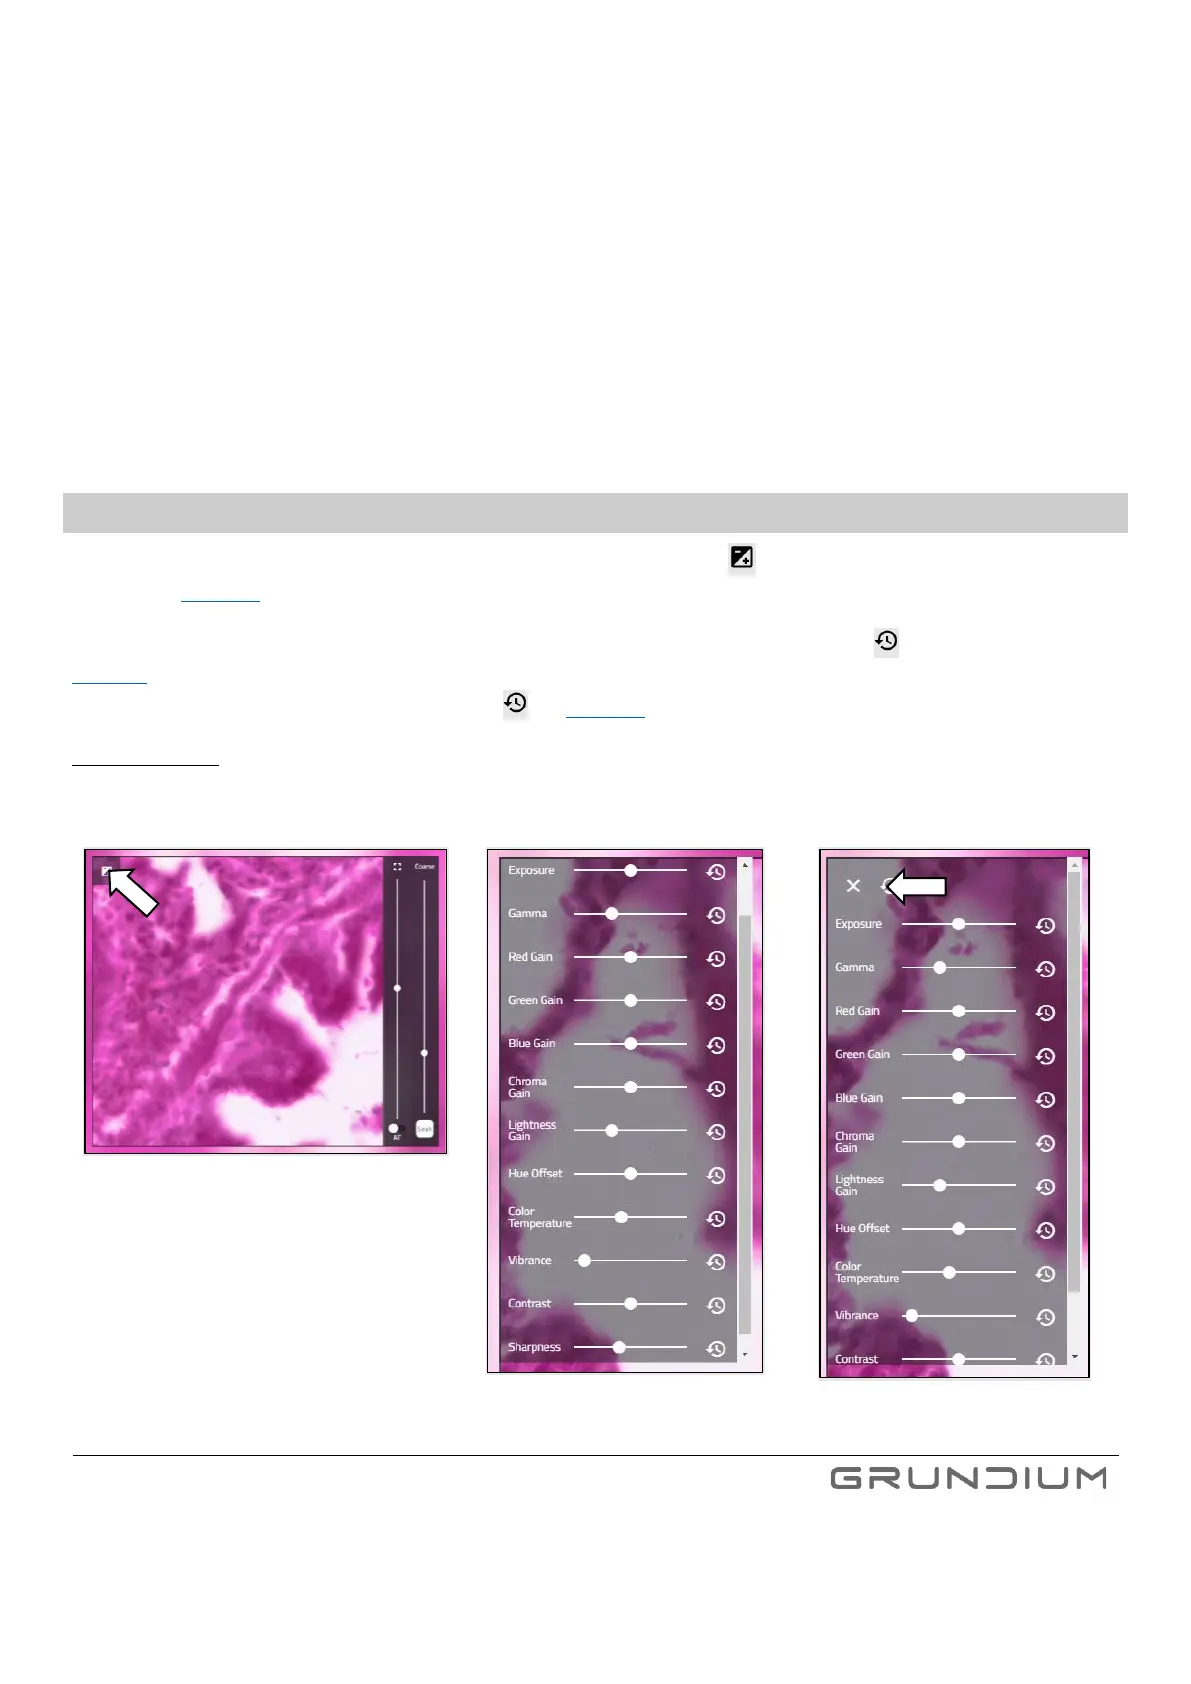
9.2 IMAGE ADJUSTMENTS
To adjust the image parameters used in live view and scanning, click the +/- icon in the top left corner of the live view
window. (See image 21.)
The parameters can be adjusted by using the sliders and returned to their default value by clicking next to the slider (see
Image 22). The outcome of adjustment is immediately seen in the live view and the parameters are applied to upcoming scans.
To return all parameters to their default values, click (see Image 23).
Important notice: The adjustments are stored to the scanner and will be applied for live view and upcoming scans. If there are
several users for the scanner, please make sure that the adjustments are set correctly for your use case every time you start
using the Ocus Scanner.
 Loading...