7. TRANSFER MENU
7.1. Communication Speed
1. Simultaneously press and hold the MENU
SELECT up- and down-arrow keys for 5 sec-
onds to display the transfer menu.
1. MemoryCard -> Control
2. Control -> MemoryCard
3. Update Firmware
4. Save EventBuffer
5. Comm speed
6. Contrast
2. Choose 5. Comm Speed and press MODIFY.
3. Set the communication speed to the right
value: select the high speed mode if the con-
troller uses the A-BOX communication system
or select the low speed if it uses AGNET.
4. Press MODIFY to validate the new value.
5. Simultaneously press and hold the MENU
SELECT up- and down-arrow keys for 5 sec-
onds to exit from the transfer menu.
7.2. Screen Contrast
1. Simultaneously press and hold the MENU
SELECT up- and down-arrow keys for 5 sec-
onds to display the transfer menu.
2. Choose 6. Contrast and press MODIFY.
3. Set the contrast of the LCD screen to the
desired value.*The contrast can also be adjusted in the
setup menu on some controllers.
4. Press MODIFY to validate the new value.
5. Simultaneously press and hold the MENU
SELECT up- and down-arrow keys for 5 sec-
onds to exit from the transfer menu.
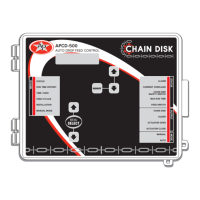
7.3. Update/Backup with a
USB drive
The USB drive allows upgrading the firmware
or software of your controller. It can also be
used to make a backup of your controller
settings or to copy these settings on another
controller of the same type.
Turn off power each time you open
the controller’s enclosure. This pre-
vents accidental exposure to areas
of high voltage.
1. Turn off power to the controller.
2. Lift the latch to open the front door of the
controller.
3. Insert the USB drive in the connector
behind the front door.
USB drive
Figure 1 : USB Connector
4. Close the front cover and reapply power
to the controller.
5. Simultaneously press and hold the MENU
SELECT up- and down-arrow keys for 5 sec-
onds to display the transfer menu.
1. MemoryCard -> Control
2. Control -> MemoryCard
3. Update Firmware
4. Save EventBuffer
5. Comm speed
6. Contrast
42
APCD-500, rev10
APCD-500