14
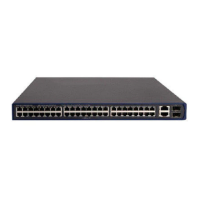
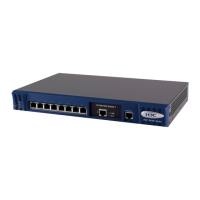
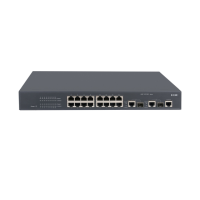
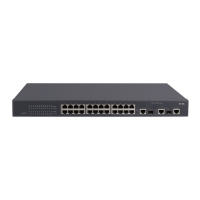
Table 7 S3100V2 Switch Series installation methods
Switch model Installation methods Installation accessories
1. Installing the switch into the 19-inch rack
• Rack mounting by using front mounting
brackets
• Rack mounting by front mounting
brackets and a support tray
• Rack mounting by using front mounting
brackets and slide rails
Front mounting bracket. See callout A
in Figure 17 (supplied).
Support tray: User supplied
Slide rail: See Figure 19 (optional).
S3100V2-26TP-SI
S3100V2-26TP-EI
2. Mounting the switch on a workbench
Rubber pad:
See Figure 20 (su
pplied).
1. Installing the switch into the 19-inch rack
• Rack mounting by using front mounting
brackets
• Rack mounting by front mounting
brackets and a support tray
Front mounting bracket. See callout C
in Figure 17 (o
ptional).
Support tray: User supplied
S3100V2-16TP-SI
S3100V2-16TP-EI
2. Mounting the switch on a workbench
Rubber pad: See Figure 20 (su
pplied).
1. Installing the switch into the 19-inch rack
• Rack mounting by using front mounting
brackets
• Rack mounting by front mounting
brackets and a support tray
Front mounting bracket. See callout B
in Figure 17 (o
ptional).
Support tray: User supplied
S3100V2-8TP-SI
S3100V2-8TP-EI
2. Mounting the switch on a workbench
Rubber pad: See Figure 20 (su
pplied).
1. Installing the switch into the 19-inch rack
• Rack mounting by using front and rear
mounting brackets
• Rack mounting by front mounting
brackets and a support tray
• Rack mounting by using front mounting
brackets and slide rails
Front mounting bracket. See callout A
in Figure 17 (supplied).
Rear mounti
ng bracket: See Figure 18
(supplied).
Support tray: User supplied
Slide rail: See Figure 19 (optional).
S3100V2-26TP-PWR-
EI
S3100V2-16TP-PWR-
EI
2. Mounting the switch on a workbench
Rubber pad:
See Figure 20 (su
pplied).
1. Installing the switch into the 19-inch rack
• Rack mounting by using front mounting
brackets
• Rack mounting by front mounting
brackets and a support tray
Front mounting bracket. See callout D
in Figure 17 (o
ptional).
Support tray: User supplied
Slide rail: See Figure 19 (optional).
2. Mounting the switch on a workbench
Rubber pad: See Figure 20 (su
pplied).
3. Mounting the switch on a wall
Wall mounting bracket: See Figure 21
(supplied).
S3100V2-8TP-PWR-EI
4. Magnet mounting
Magnet kit: See Figure 23 (op
tional).
Installation accessories
Mounting brackets for rack mounting
The S3100V2 Switch Series provides different mounting brackets for different models. Select them as
required.

 Loading...
