Install in the direction
of an arrow (↑)
x 4
Install in the direction of an arrow (↑)
x 4
3
■
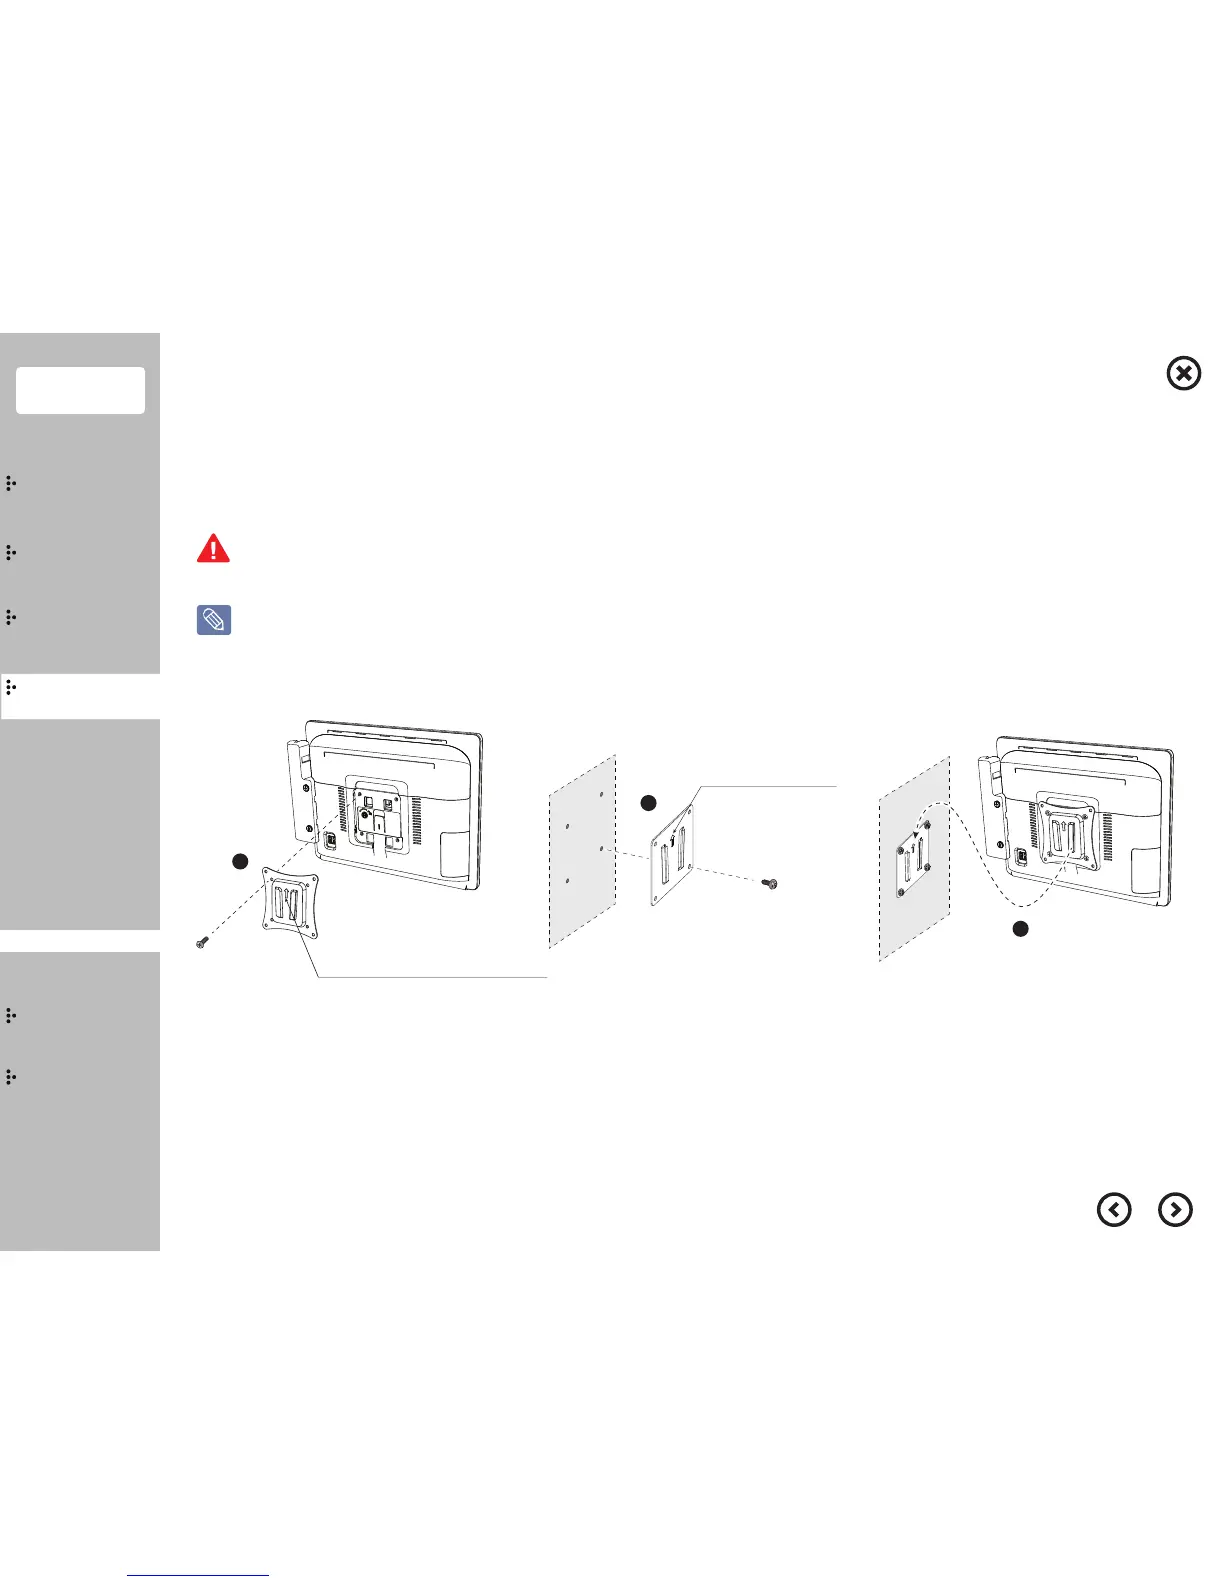
Wall Mount
1
2
Contents
System
Installation
Using
the product
Assembly &
Disassembly
BIOS
Appendix
System
Introduction
MSR
Stand
Storage(HDD/SSD)
Cover Rear
EMI
Second Monitor
VFD
Wall Mount
Progress after disassembling the stand.
1)
Connect the power cable to the adaptor firmly. Use only the adaptor supplied with the product.
2) You may be injured by using various tools so please ask experts for help when installing.
Wall Mount installation
① Make sure that the direction of an arrow of the display bracket is upward and then fix it by 4 screws.
※ Screw specification : Machine type M4, length 13~16mm
② Make sure that the wall bracket's arrow is upward and fix the wall bracket on the wall with 4 screws.
③ Insert the main body from the top to the bottom.