17
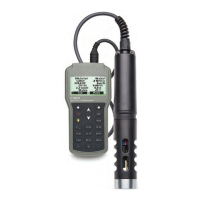
SENSOR PREPARATION & INSTALLATION
3. Insert the sensor into the correctly color-coded opening while positioning the connector key
toward the center of the probe. Make sure the connector is seated correctly (the sensor will no
longer move freely) before tightening the locking threads with your fingers.
4. Continue to tighten the locking thread with the small hex key supplied in the maintenance kit
until the sensor is secured tightly against the probe body.
5. All sensors have to be conditioned and calibrated before use.
6. Screw the protective shield onto the probe body, to protect the sensors.
7
2
1
3
4
5
6
8
9
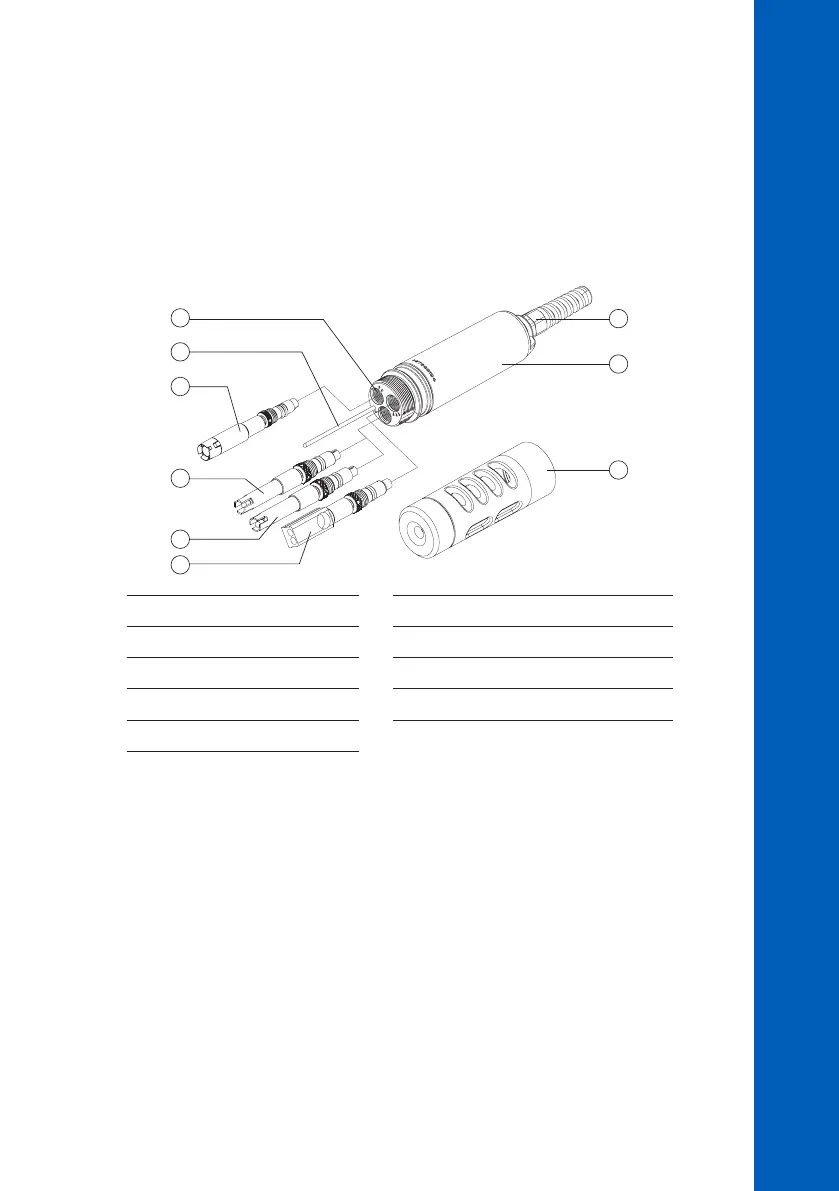
1 Sensor sockets 6 EC / TDS / Resistivity / Salinity sensor
2 Temperature sensor 7 Strain relief
3 opdo
®
sensor 8 Sensor body
4 pH sensor 9 Protective shield
5 pH / ORP combination sensor
Note: To maintain a waterproof probe, if a sensor is not installed a plug must be inserted.
 Loading...