2 Setting up a system
MX Modules A04089_07_E00_02 HBM: public 15
2 Setting up a system
2.1 Getting started with the MX module
To set up a CX23-R controlled system, refer to Connecting MX modules to a CX23-
R. Otherwise, proceed to get started using the following information.
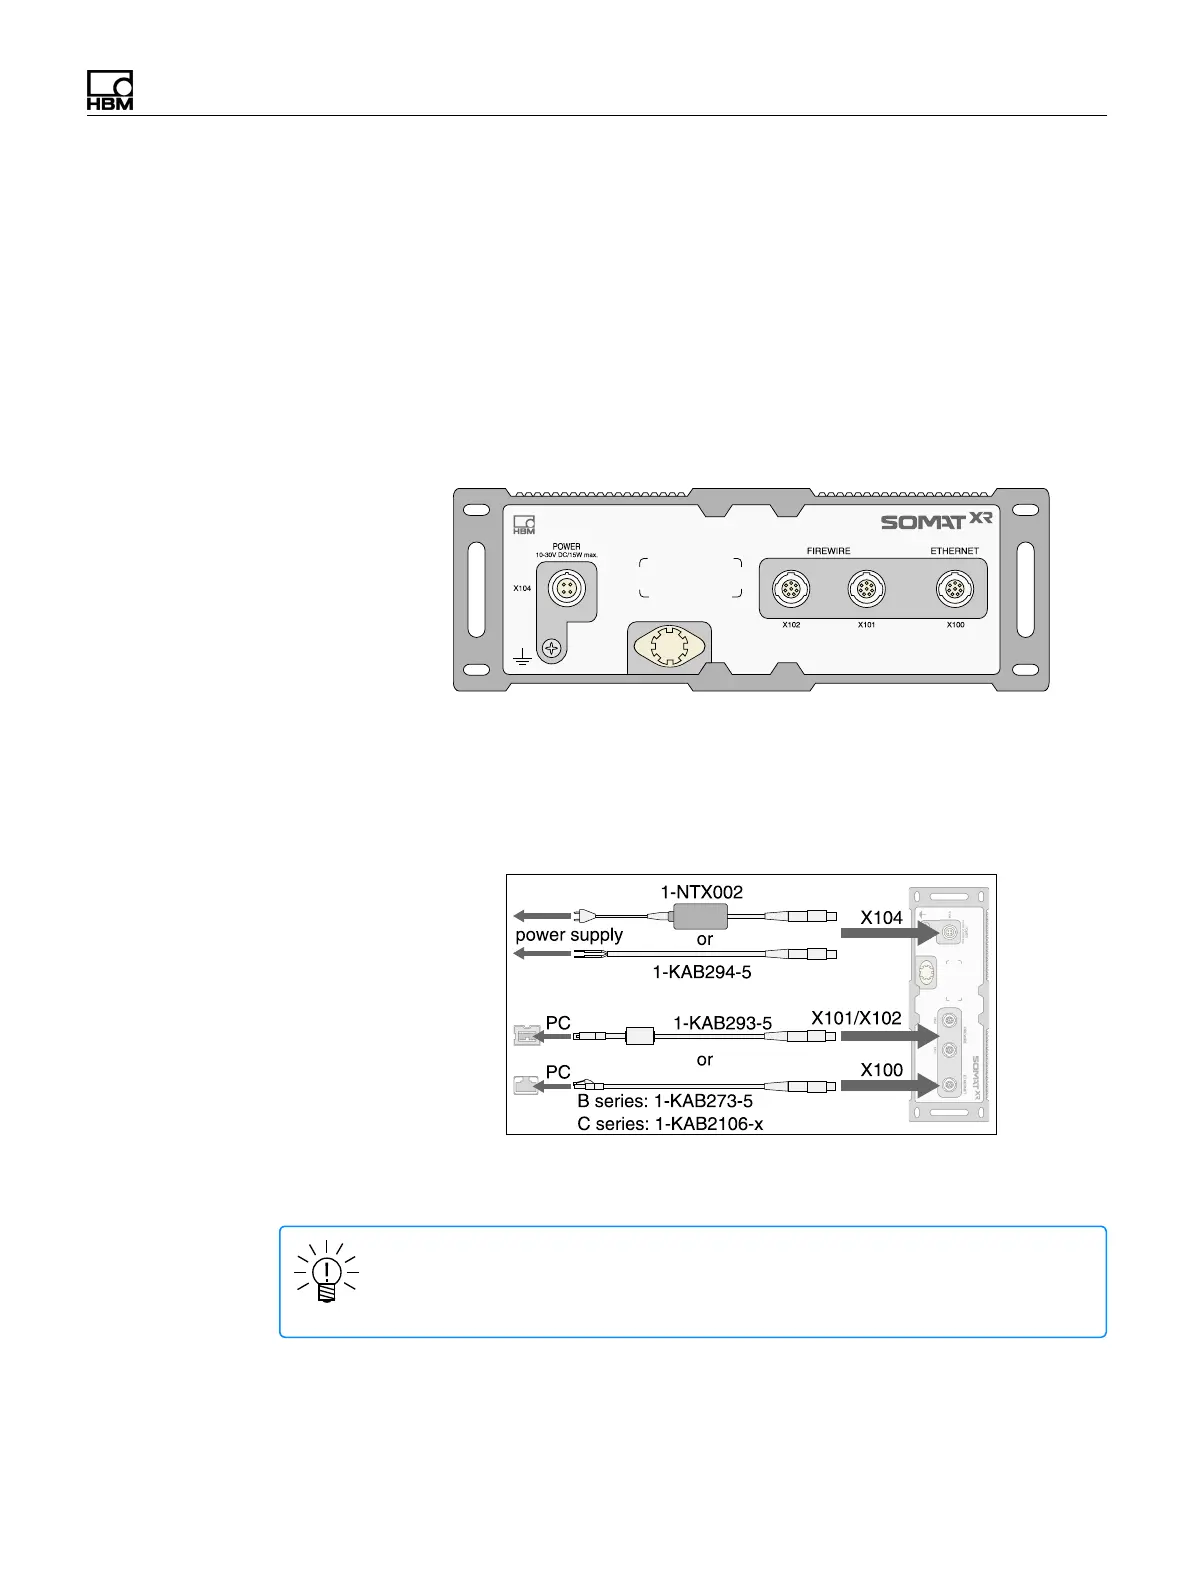
Each MX module has a similar back panel with a power connector, two FireWire
connectors, and one Ethernet connector. B series modules have a 100 MBit Ethernet
connection with an 8 pin ODU socket. C series modules have a 1 GBit Ethernet
connection with an 8 pin M12 x coded socket.
To get started, connect a DC voltage source of 10 to 30 volts (24 recommended) to
the X104 power supply port using the 1-NTX002 AC/DC power supply unit or the 1-
KAB294-W-5 power supply cable. Connect the host PC to the Ethernet (X100) or
FireWire (X101 or X102) ports of the module using the 1-KAB273-5 (B series) or 1-
KAB2106-x (C series) Ethernet cable or 1-KAB293-5 FireWire cable, respectively.
For more information on connecting the module to a host PC, see Connecting a
single module to a host PC and Connecting multiple modules to a host PC.
NOTE
Older computers require the use of an Ethernet crossover cable. Newer
computers have Ethernet interfaces with autocrossing functions.
SomatXR MX modules can be used as standalone devices or in a network for
centralized control, data synchronization and shared voltage supply through