22
5.12 REMOVING SUPPORT STRUCTURES
For sophisticated geometry models the printer also prints support structures, i.e. parts of the print which are not parts of your model
and should be removed mechanically. In most cases simple tools such as pliers, at screwdriver, or tweezers will do.
For safety reasons, it is recommended to wear protective gloves and glasses included in the kit.
5.13 NOZZLE REPLACEMENT
STEP 1
Prepare the necessary items included in the kit:
1. Protective gloves
2. Nozzle Kit (Special 10 mm at wrench, 8 mm socket adapter, ratchet or adapter handle)
3. 2 mm Allen key
4. Replacement nozzle
STEP 2
If lament have already been loaded, remove it (refer to chapter Removing lament on page 18).
STEP 3
In the SETUP menu select the NOZZLE EXCHANGE option and conrm by selecting OK. The carriage will travel to the middle
position and the print head will start warming up to the nozzle exchange temperature.
The print head is hot! Be sure to wear protective gloves!
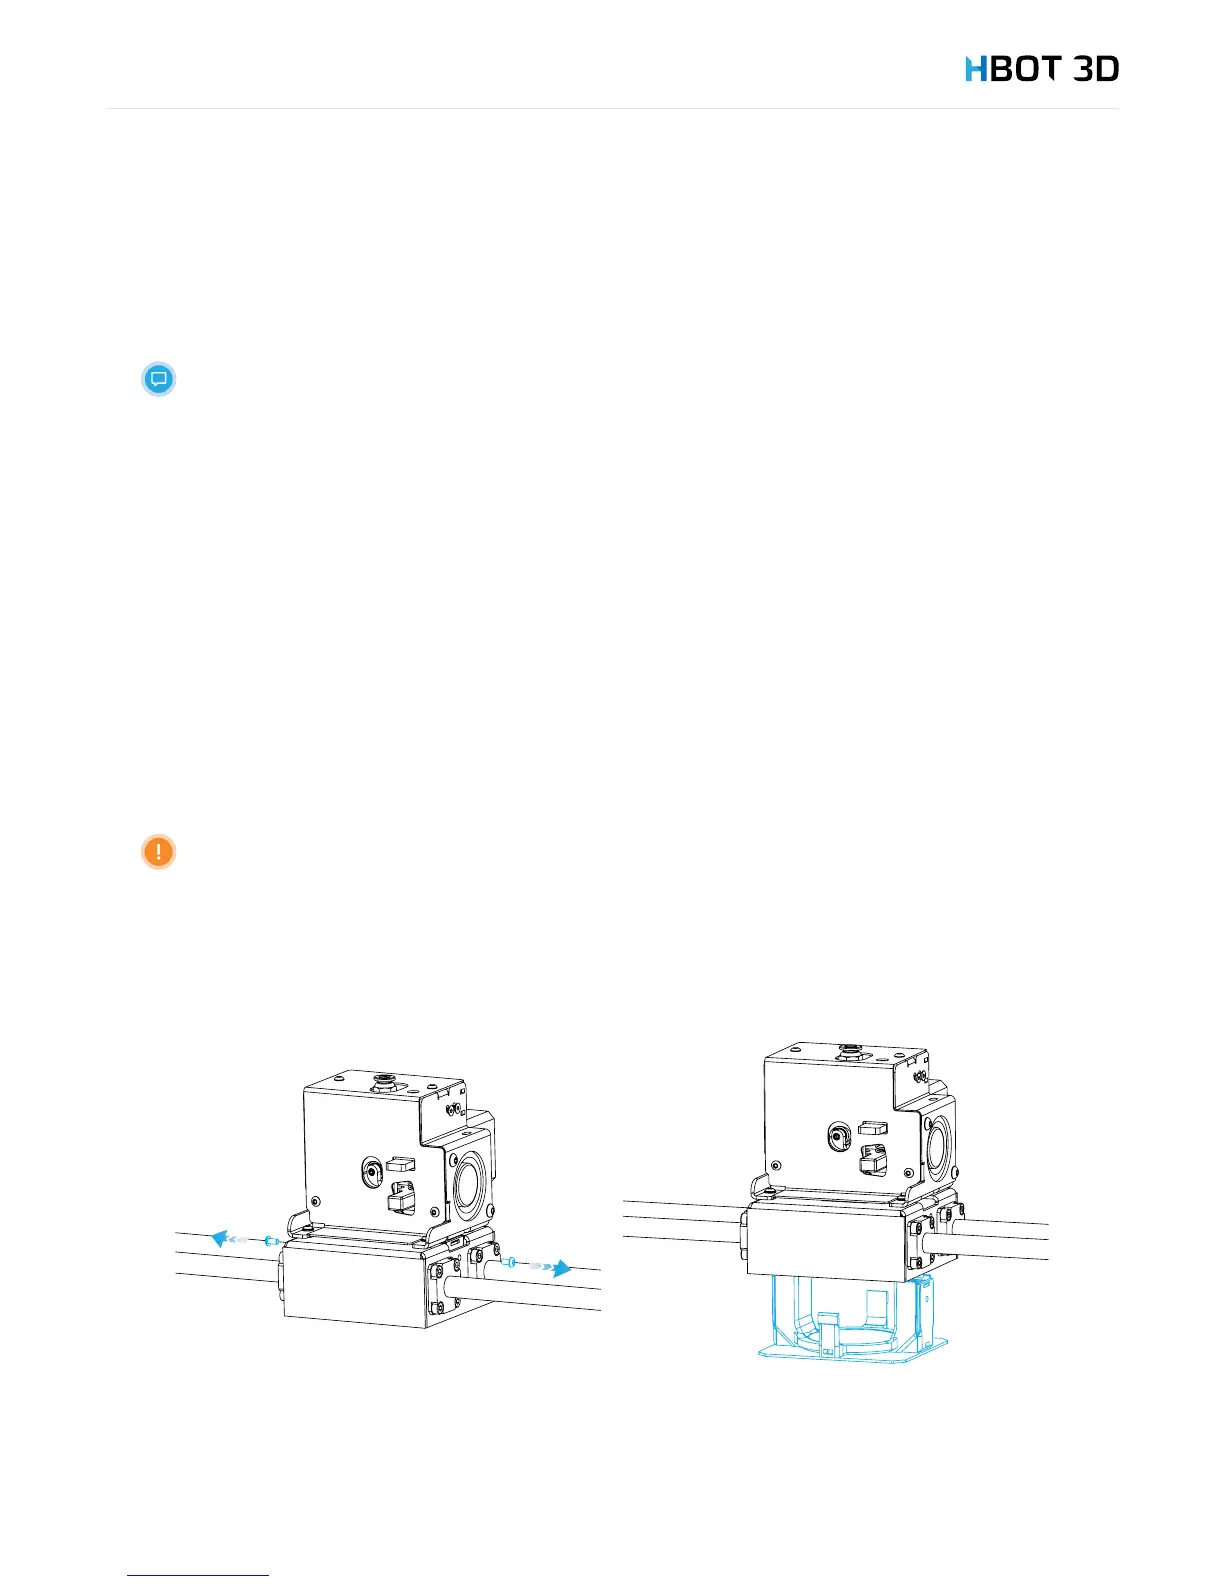
STEP 3
Once the message “Change nozzle now” appears on the screen, use the 2 mm Allen key to remove two M3 screws located between
bearings on both sides of the carriage and remove the carriage cover with cooling channels.