Assembly Assembly
32 33
➜ Insert coupling of adaptor into coupling
of pump drive.
➜ Insert supplied screws through holes
of adaptor.
➜ Tighten screws with a cross headed
screw driver.
Caution:
Possible damage of device
(Pump head C 4, C 8 only)
Without plastic sleeve mounted
on metal bar the pump head can
be damaged.
Ensure plastic sleeve is mounted
on metal bar for operation.
➜ Align metal bar (with plastic sleeve) to
mounting slot of adaptor.
➜ Push pump head onto adaptor in a way
that metal bar glides into mounting
slot of adaptor.
Screws
Mounting slotMetal bar (with plastic sleeve)
➜ Level pump head via adjusting foot for
support.
➜ Insert allen screws into 4 holes and
tighten with supplied allen key onto
adaptor.
Holes for allen screws
Adjusting foot
➜ Tighten screw nut at adjusting foot of
pump head.
Adjusting foot Screw nut
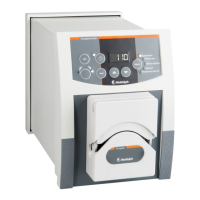
Mount tubes: Single-channel pump heads
Warning:
Risk of crushing!
While mounting and demounting tubes you can crush your ngers, if
rotation starts accidentally.
Always switch device OFF at main switch before mounting tubes.
Only use tubes with appropriate wall thickness. Using an inadequate
tube can damage tube or pump might not operate.
To extend life-cycle of tubes pre-tension tube after mounting. Pull
slightly and simultaneously at both ends of tube.
Pre-tension guarantee the rollers running centered over tube.
You will nd corresponding tube sizes to variants of pump heads in chapter „Technical
data, Table tubes” as well as in our general catalogue.
Tubes: pump head SP standard
✓ Protection shield is removed.
➜ Loosen clamping screw to take off
clamp.
➜ Mount tube in a curve of 180° into
tube bed.
➜ Turn rotor by hand to engage tube
between rollers and tread.
➜ Turn rotor repeatedly till tube is
crushed by total width of rollers.
➜ Secure clamp with clamping screws.
➜ Mount protection shield and secure
with knurled screws.
➜ Check correct mounting by running a
short test.
Clamping screw
Rotor
Clamp
Rollers