42
Table 1. Recommended Cleaning Cloths
Name Disinfectant Size
PDI SaniCloth
Plus
®
Quaternary/low–alcohol
formula (14.85% IPA).
8" x 14" or
6" x 6.75"
CaviWipes
®
Quaternary/low–alcohol
formula (17.2% IPA).
9" x 12" or
6" x 6.75"
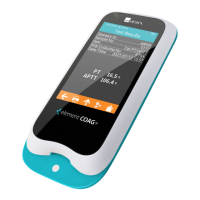
11.1.5 Cleaning and disinfecting the analyzer housing.
1. Use the recommended cloth in Table 1 to clean and disinfect the
analyzer exterior.
2. Remember to apply the solutions and allow a contact time of 2
minutes.
3. Turn the analyzer off.
4. Pre-clean: Using a clean cloth, gently remove any gross debris and
wipe the entire surface of the analyzer.
5. Disinfecting: Using a new cloth, gently wipe the analyzer housing
surfaces. Wipe the entire analyzer housing including the LCD
screen, sample, and button areas.
5.1. Wipe the analyzer twice top to bottom, then twice left to right.
With the cleaning cloth in the palm of your hand, hold the
analyzer with the LCD screen side up (battery side on the
cloth) and wipe the analyzer twice top to bottom, then left to
right. Wipe each of the sides of the analyzer twice from top to
bottom then from left to right.
5.2. Next wipe the sample area in an up and down motion, and
repeat. Do not insert or press the cloth into the Test Strip
Guide, Data Port or Power Supply Jack areas.
5.3. Do not let liquid accumulate near any opening. Make sure no
liquid enters the analyzer.
5.4. Leave analyzer “wet” for 2 minutes or the recommended time.
5.5. With a fresh dry cloth (like a Kimwipe
®
) remove any residual
moisture.
5.6. Once the analyzer is dried with the Kimwipe it is ready for use.