41
11. Maintenance
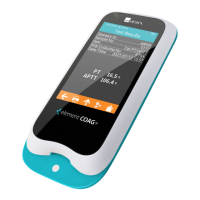
11.1 Screen Care and Cleaning
Follow these steps for cleaning the analyzer:
11.1.1 Cleaning Frequency
1. Clean the analyzer after every patient and when there are visible
signs of soil and/or organic material prior to disinfecting. Also
follow any facility disinfection SOPs.
2. The exterior of the analyzer and test strip guide area should be
cleaned and disinfected before being used between each patient.
3. The exterior of the analyzer and test strip guide area should be
cleaned and disinfected if too much blood (> 20 uL) has been
applied to the strip in the case of sampling the same patient.
4. Disinfect the analyzer when it is soiled, and per your facility's
guidelines.
5. Routine cleaning should be performed a minimum of once a month
when the analyzer is in regular use or per any facility SOP.
11.1.2 Areas to be Cleaned and/or Disinfected
1. The area around the test strip insert port.
2. The analyzer display.
3. The analyzer housing (front and back).
4. The button area on the face of the analyzer.
11.1.3 Precautions to Avoid Moisture
1. Make sure that no liquid enters the analyzer. If moisture enters the
analyzer it may cause a malfunction of the analyzer.
1.1. Ensure the analyzer is turned off.
1.2. Never spray anything onto the analyzer.
1.3. Never immerse the analyzer in liquid.
1.4. Do not use saturated cloths or swabs. Remove any excess
solution before wiping the surface of the analyzer.
11.1.4 Recommended Cleaning/Disinfecting Solutions
1. Disposable wipes containing a quaternary ammonium compound
up to 0.5% (single compound or mixture) in isopropyl alcohol up to
55%.
2. Do not use other disinfectants or cleaning solutions on the
analyzer.
3. Recommended cleaning cloths are listed in Table 1.