Table of Contents
Section 1 Safety
Serial Number . . . . . . . . . . . . . . . . . . . . . . . . . . . . . . . . . . . . . . . . . . . . 1
Safety Sign-off Form . . . . . . . . . . . . . . . . . . . . . . . . . . . . . . . . . . . . . . . 2
Safety Alert Symbol . . . . . . . . . . . . . . . . . . . . . . . . . . . . . . . . . . . . . . . . 3
General Safety . . . . . . . . . . . . . . . . . . . . . . . . . . . . . . . . . . . . . . . . . . . . 4
Safety Decal Locations . . . . . . . . . . . . . . . . . . . . . . . . . . . . . . . . . . . . . 9
Section 2 - Transporting the Rockpicker
Adjust the Position of the Clevis Tongue . . . . . . . . . . . . . . . . . . . . . . . 1
Lift the Hitch with the Jack . . . . . . . . . . . . . . . . . . . . . . . . . . . . . . . . . . . 2
Connect the Hitch to the Tractor Drawbar . . . . . . . . . . . . . . . . . . . . . . 2
Connect the Safety Chain to the Tractor . . . . . . . . . . . . . . . . . . . . . . . . 2
Rotate the Hitch Jack into the Storage Position . . . . . . . . . . . . . . . . . . 2
Connect the Hydraulic Hoses . . . . . . . . . . . . . . . . . . . . . . . . . . . . . . . . 3
Connect the Electrical Connection . . . . . . . . . . . . . . . . . . . . . . . . . . . . 3
Fully Raise the Pickup Apron . . . . . . . . . . . . . . . . . . . . . . . . . . . . . . . . . 3
Remove the Left Apron Lock from the Storage Position . . . . . . . . . . . 4
Install the Apron Lock on the Left Side . . . . . . . . . . . . . . . . . . . . . . . . 4
Remove the Right Apron Lock from the Storage Position . . . . . . . . . . 4
Install the Apron Lock on the Right Side . . . . . . . . . . . . . . . . . . . . . . . 5
Move the Hitch into the Transport Position . . . . . . . . . . . . . . . . . . . . . . 5
Ensure the Hitch Lock Is Lowered . . . . . . . . . . . . . . . . . . . . . . . . . . . . 6
Check the Condition of the Tires . . . . . . . . . . . . . . . . . . . . . . . . . . . . . . 6
Section 3 - Preparing the Rockpicker
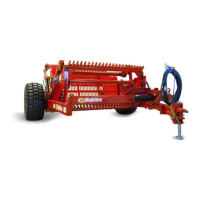
Preparing the Rockpicker . . . . . . . . . . . . . . . . . . . . . . . . . . . . . . . . . . . 1
Check the Condition of the Apron and the Rock Bucket. . . . . . . . . . . . 2
Check the Upper and Lower Bolts on Each Tine . . . . . . . . . . . . . . . . . 2
Remove Any Rocks That Are Wedged in the Bat Teeth. . . . . . . . . . . . 3
Remove from the Bucket Any Debris or Rocks . . . . . . . . . . . . . . . . . . 3
Remove Any Rocks or Debris Sitting on the Frame Tubes . . . . . . . . . . 3
Inspect the Motor, Hydraulic Cylinders and Hoses . . . . . . . . . . . . . . . . 4
Check the Condition of the Tires . . . . . . . . . . . . . . . . . . . . . . . . . . . . . . 4
Torque Wheel Bolts . . . . . . . . . . . . . . . . . . . . . . . . . . . . . . . . . . . . . . . 4
Check and Adjust the Tire Air Pressure . . . . . . . . . . . . . . . . . . . . . . . . . 4
Hitch Working Positions . . . . . . . . . . . . . . . . . . . . . . . . . . . . . . . . . . . . . 5
Setting the Hitch for Position 1 - Dual Tractor Tires . . . . . . . . . . . . . 6
Setting the Hitch for Position 2 - Single Tractor Tires . . . . . . . . . . . . 7