EasyManuals Logo
Home>HIKVISION>Security Camera>DS-2CD2432F-I

HIKVISION DS-2CD2432F-I Installation Manual

HIKVISION DS-2CD2432F-I
131 pages
To Next Page IconTo Next Page
To Previous Page IconTo Previous Page
Page #103 background imageLoading...
Page #103 background image
Installation Manual of Network Camera
102
Figure 4-36 Install the Junction Box
4. Route the cables of the camera.
Route the cables through the junction box and the cable hole if there is a cable hole
drilled on the ceiling.
Route the cables through the side outlet of the junction box to the surface of the ceiling if
there is no cable hole drilled on the ceiling.
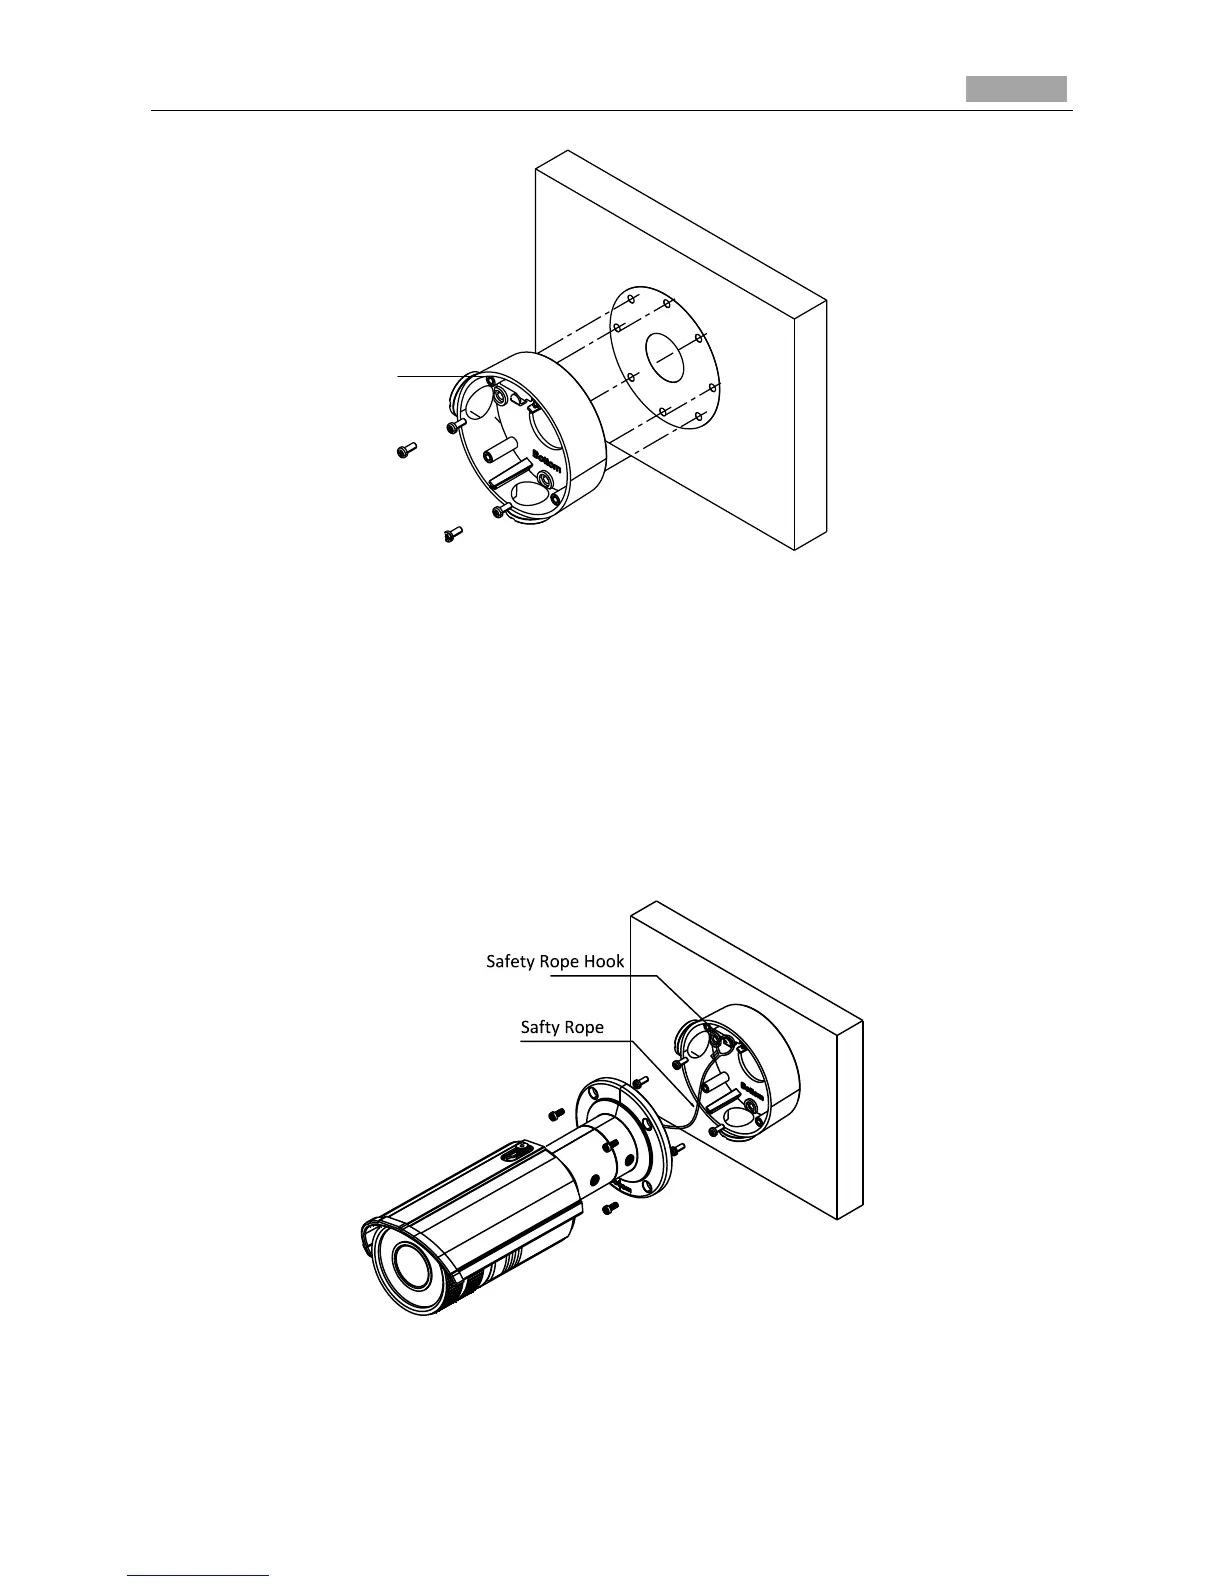
5. Hook the camera to the junction box with the safety rope.
6. Tighten the screws to fix the camera to the junction box.
Figure 4-37 Fix the Camera to the Junction Box
7. Adjust the camera to the desired surveillance angle and then tighten the screws on bracket to
fix the camera.
Junction Box
Lo-Call 1890 866 900
www.cctvireland.ie
shop@cctvireland.ie

Table of Contents

Other manuals for HIKVISION DS-2CD2432F-I

Questions and Answers:

Question and Answer IconNeed help?

Do you have a question about the HIKVISION DS-2CD2432F-I and is the answer not in the manual?

HIKVISION DS-2CD2432F-I Specifications

General IconGeneral
BrandHIKVISION
ModelDS-2CD2432F-I
CategorySecurity Camera
LanguageEnglish

Related product manuals