EasyManuals Logo

HIKVISION DS-2CD2432F-I Installation Manual

HIKVISION DS-2CD2432F-I
131 pages
To Next Page IconTo Next Page
To Previous Page IconTo Previous Page
Page #26 background imageLoading...
Page #26 background image
Installation Manual of Network Camera
25
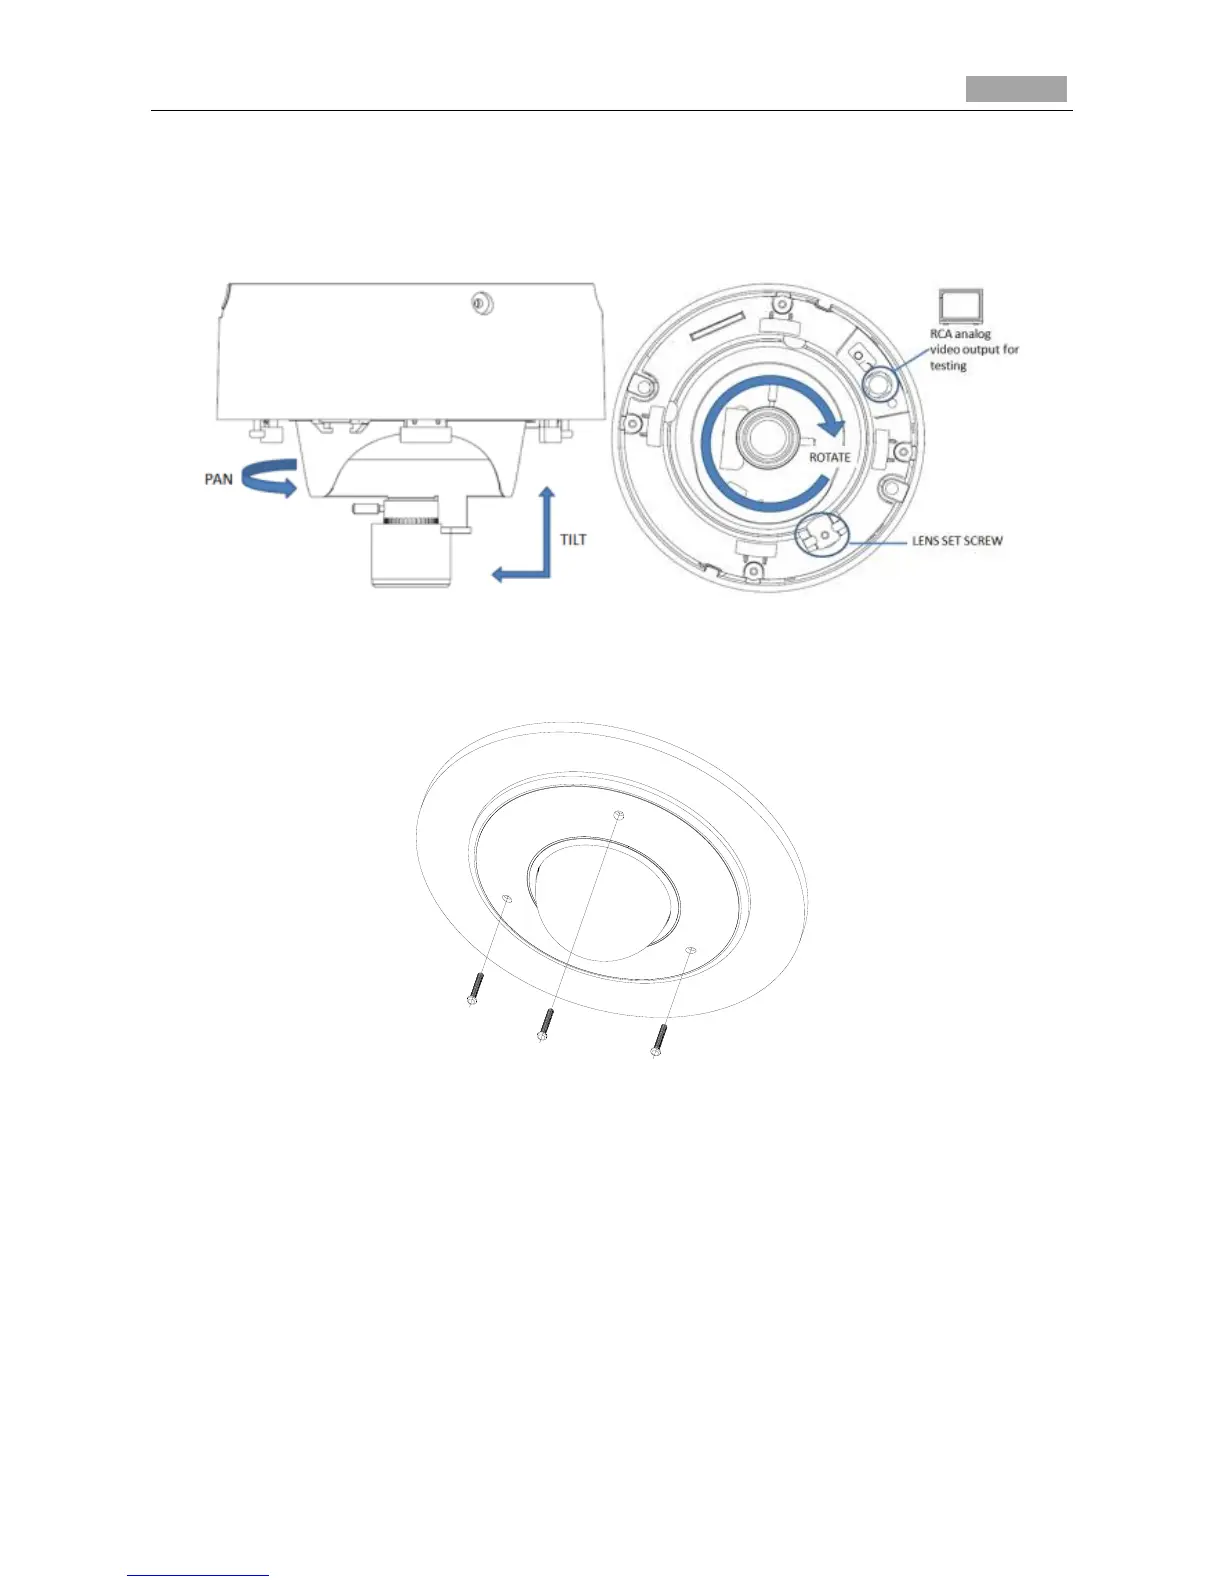
6. Remove the bubble and connect the RCA analog video output with a monitor to view the image of
the camera. Loosen the lens set screw and pan, tilt or rotate the lens to get a desired surveillance
angle. Adjust the lens focus to obtain a perfect image. Fasten the lens set screw. Reinstall the
bubble.
Figure 3-14 Image Adjusting
7. Install the trim plate with screws to finish the installation.
Figure 3-15 Trim Plate Installing
Lo-Call 1890 866 900
www.cctvireland.ie
shop@cctvireland.ie

Table of Contents

Other manuals for HIKVISION DS-2CD2432F-I

Questions and Answers:

Question and Answer IconNeed help?

Do you have a question about the HIKVISION DS-2CD2432F-I and is the answer not in the manual?

HIKVISION DS-2CD2432F-I Specifications

General IconGeneral
BrandHIKVISION
ModelDS-2CD2432F-I
CategorySecurity Camera
LanguageEnglish

Related product manuals