DS-7108HI-S series Net DVR User Manual
34
Step 3: Press [ENTER] key to exit edit status.
Move “Active Frame” to “Confirm” button, press [ENTER] to save the modification and you
can see the new camera name. Press “Cancel” button or [ESC] key to invalidate.
Camera Name Position
If you do not want to display camera name, just disable the check box beside camera name
edit box. The disable flag is “×”. If you enable the check box, you can setup the camera name
position. You can copy the position to any other camera. The setup steps are:
Step 1: Enter “Camera” menu.
Step 2: Select one camera.
Step 3: Enable the check box on the right side of camera name, then you move “Active
Frame” to “Position” button, press[ENTER]to enter camera name position setup interface, as
picture below in that interface, you can use[][][][]keys to move camera name position.
When the position is fixed, press [ENTER] and return “Camera” menu, and press “Confirm”
button to save it. In the “Camera” menu, press “Cancel” button or [ESC] key, you can invalidate
the modification.
OSD is the abbreviation of “On Screen Display”. For our embedded DVR/DVS, it includes
displaying system time and camera name.
OSD settings include: System time, time format, time display position, camera name, camera
name display position, etc.
System Time
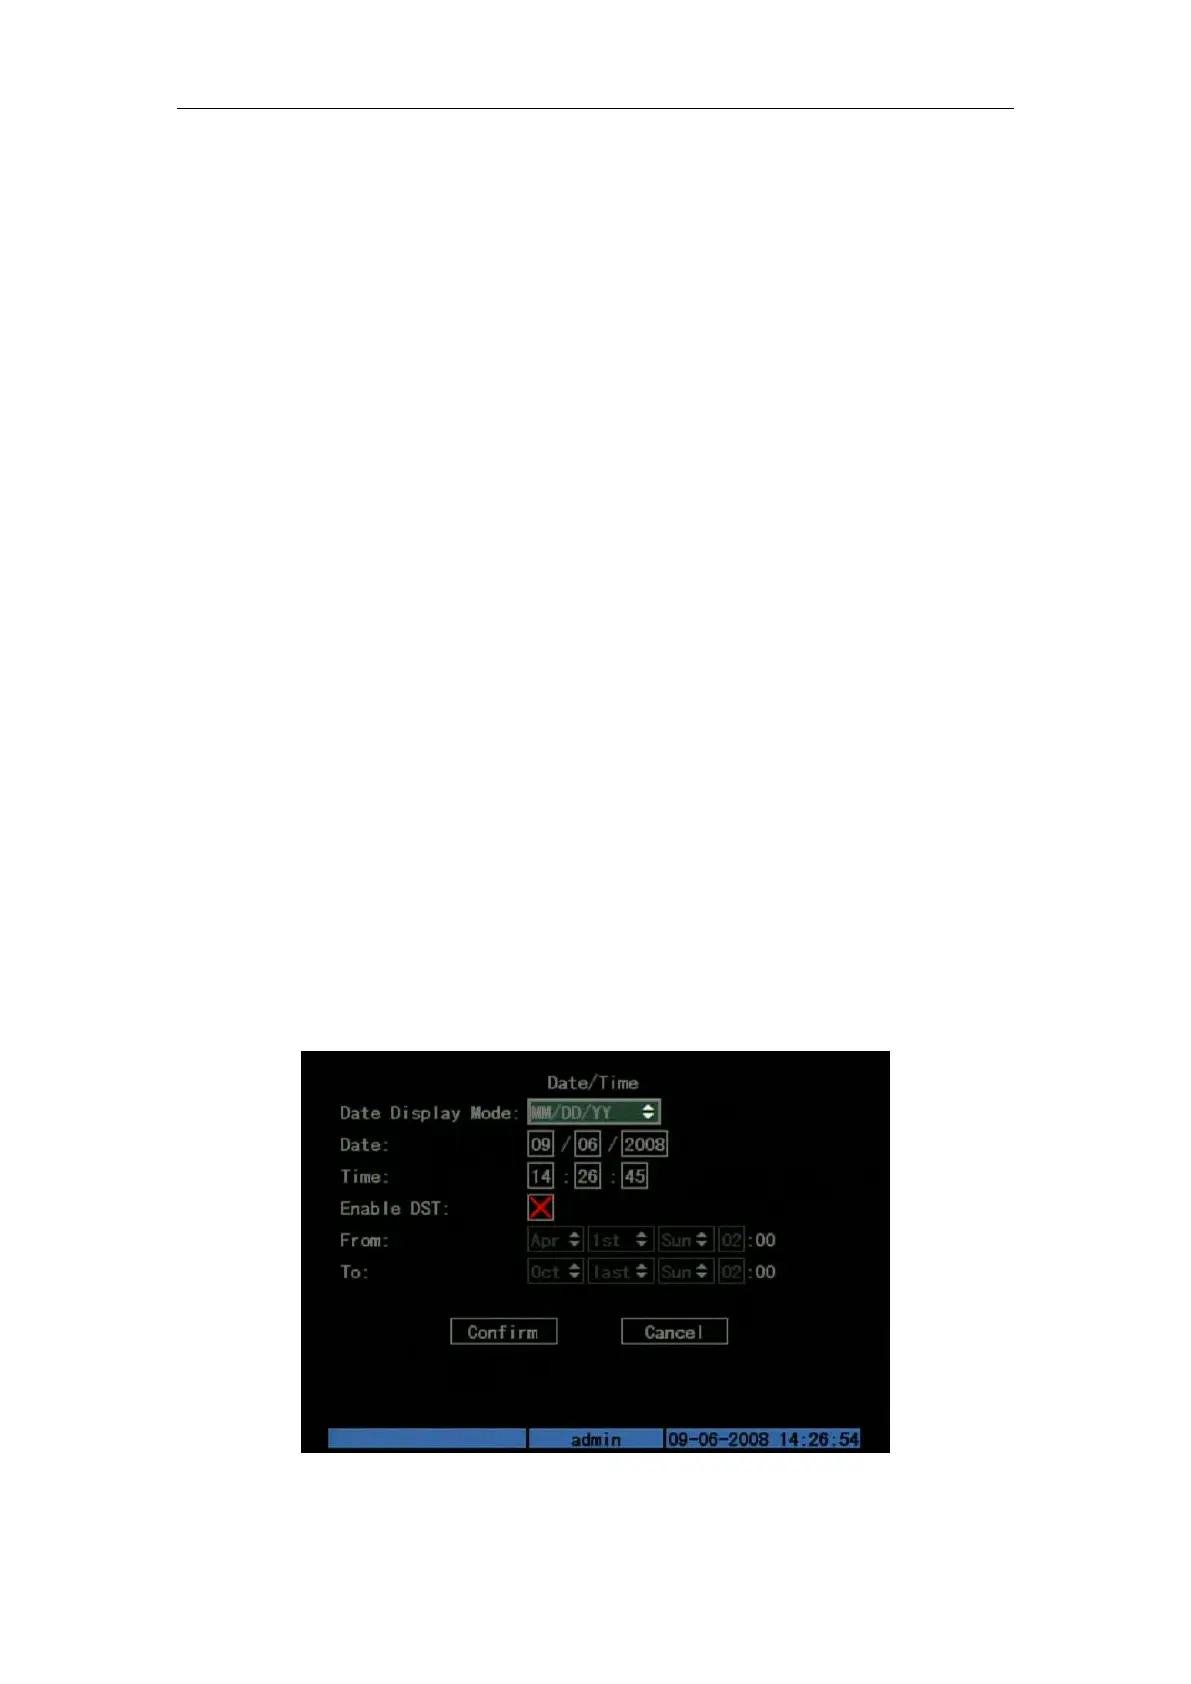
In “Display” menu, you can setup DVR system date and time.
Move your active frame to “Date/Time” item, and press enter.
Date Display Mode: Move the active frame to Date Display Mode then press [EDIT] then use
[↑] [↓] key to select OSD format. There are following OSD formats:
MM DD YY
MM DD YY
YY MM DD
YY MM DD Here YY means year, MM means month, DD means day.
You can also enable DST (Daylight-saving Time) function here. Shown as Fig.5.11 below
Fig. 5.11 Date/time setup
Date OSD Position

 Loading...