DS-7108HI-S series Net DVR User Manual
40
Step 6: Save alarm setup: After your setup, press “Confirm” button and return “Advanced
setting” interface. Press “Confirm” button to save current camera parameters and return main
menu.
Step 7: Save all cameras: If you want to setup other cameras, please repeat from step2 to
step 6. In “Camera” menu, press “Confirm” key to save all cameras parameters. Press “Cancel”
button or [ESC] key to invalidate.
5.10 Motion Detection
If you enable this function, when there is motion being detected, DVR will trigger alarm.
Step 1: Enter “Camera” menu:
Step 2: Select camera: Use [] [] key to select one camera after pressing [edit] key.
Step 3: Select motion detection sensitivity: On the right side of “Motion Det. Level” item,
there is a list box. That is motion detection sensitivity. There are 7 options, from 0 (the lowest) to
5 (the highest) and “Off”. You can use [↑] [↓] keys to select one. If you select “Off” option, DVR
will not response even if there is motion detection. If you select other options, it will active
“Motion Area Setup” button and “Policy Setup” button. If you select low sensitivity such as 0,
DVR will response only when there is great motion detected. On the other side, for high
sensitivity such as 5, DVR will response with small motion detection.
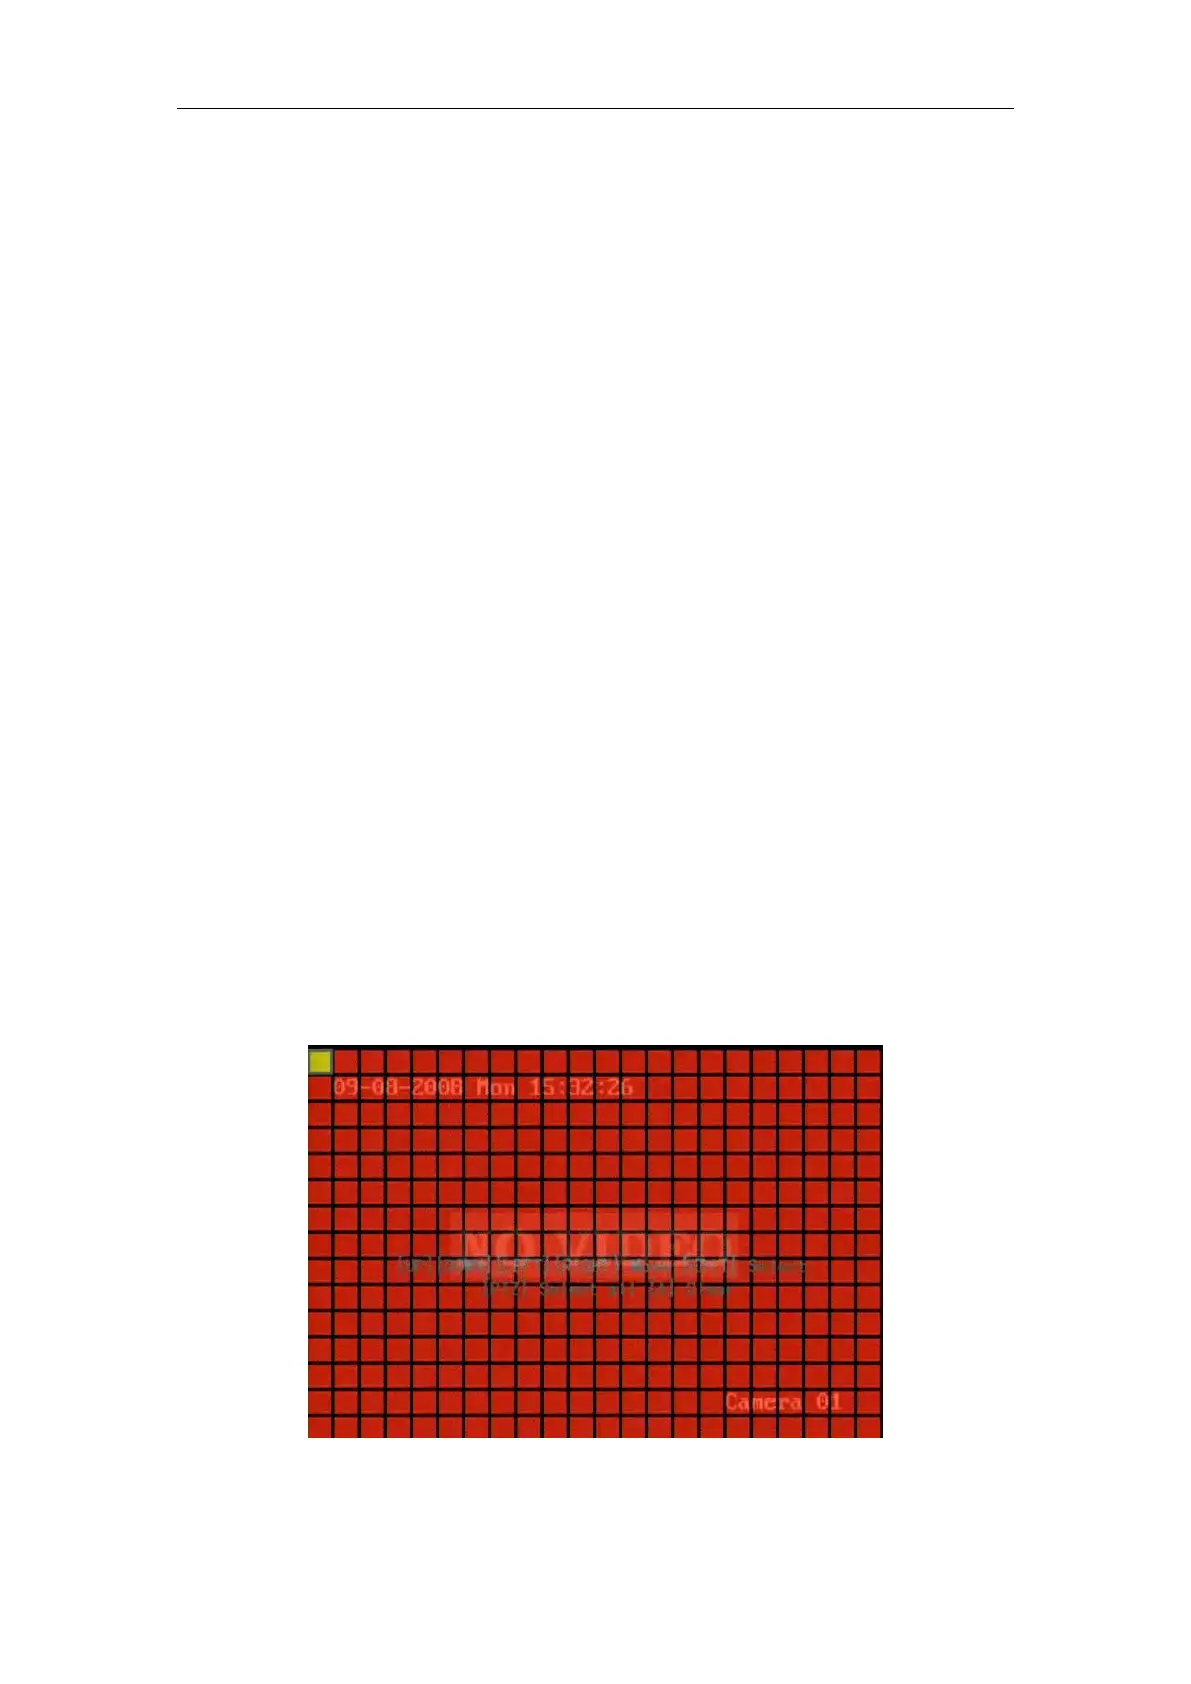
Step 4: Motion area setup: You must define motion areas so that DVR will response when
there is motion in those areas. Move “Active Frame” to “Area” button on the right side of
sensitivity list box, press [ENTER] key, you can enter “Motion Area Setup” interface. Shown as
Fig.5.18 below. The default detection area is full screen.
Fig. 5.18 Motion area setup
The whole screen is divided into 22*18 panes (NTSC: 22*15). There is one yellow panel on
 Loading...