22
Wireless Setting
How to set up automatically
1. On the Network screen, select Configuration and press
the [OK] button to enter the submenu.
2. Set Internet Connection to On and Interface to Wireless.
3.
Select Wireless Setting and press the [OK] button to
enter it. You can select: Scan / Manual / Auto.
4. If you select Scan, a screen will appear listing all of the
wireless networks within range of the TV. Use the [▲/▼]
buttons to select the wireless network with your router
SSID and press the [OK] button to confirm. Proceed to
Step 7.
5. If you select Manual, a screen will appear prompting you
to enter the SSID of your wireless network. Press the [OK]
button and an on-screen keyboard will pop up. Enter the
SSID and select OK. Press the [►] button to confirm and
a screen will appear prompting you select the security
mode for your wireless network. Use the [▲/▼] buttons to
select the proper security mode and press the [OK] button
to confirm. If you selected None for the security mode,
proceed to step 9.
6. A screen will appear prompting you to enter the password
for the selected security mode. Press the [OK] button and
an on-screen keyboard will pop up. Enter the password
and select OK. Press the [►] button to confirm. Proceed
to Step 9.
7. If you select Auto, a screen will appear prompting you
to select PIN (personal identification number) or PBC
(push button configuration) setup. Choose the method
supported by your wireless access point.
If you choose PIN, an identification number will appear
on the screen for you to enter into the access point.
After entering the PIN, press the [►] button. If the PIN
is in use by another device, select "Refresh PIN" to
obtain a new PIN and enter it into the access point.
After entering the PIN, press the [►] button.
If you choose PBC, a screen will appear prompting to
press the [►] button. After pressing the [►] button you
have two minutes to locate and press the Push Button
on your access point to connect to the TV.
8. Press the [Menu] button to return to the previous menu.
9.
Select Connection Test to check the Internet connectivity.
Basic Features
Set the PC Software properly to match one of the below
options.
Resolution
VGA 640×480 60Hz
SVGA 800×600 60Hz
XGA 1024×768 60Hz
SXGA 1280×1024 60Hz
Supported VGA Modes
NOTE
Your PC/Notebook may not be able to display some of
these resolutions.
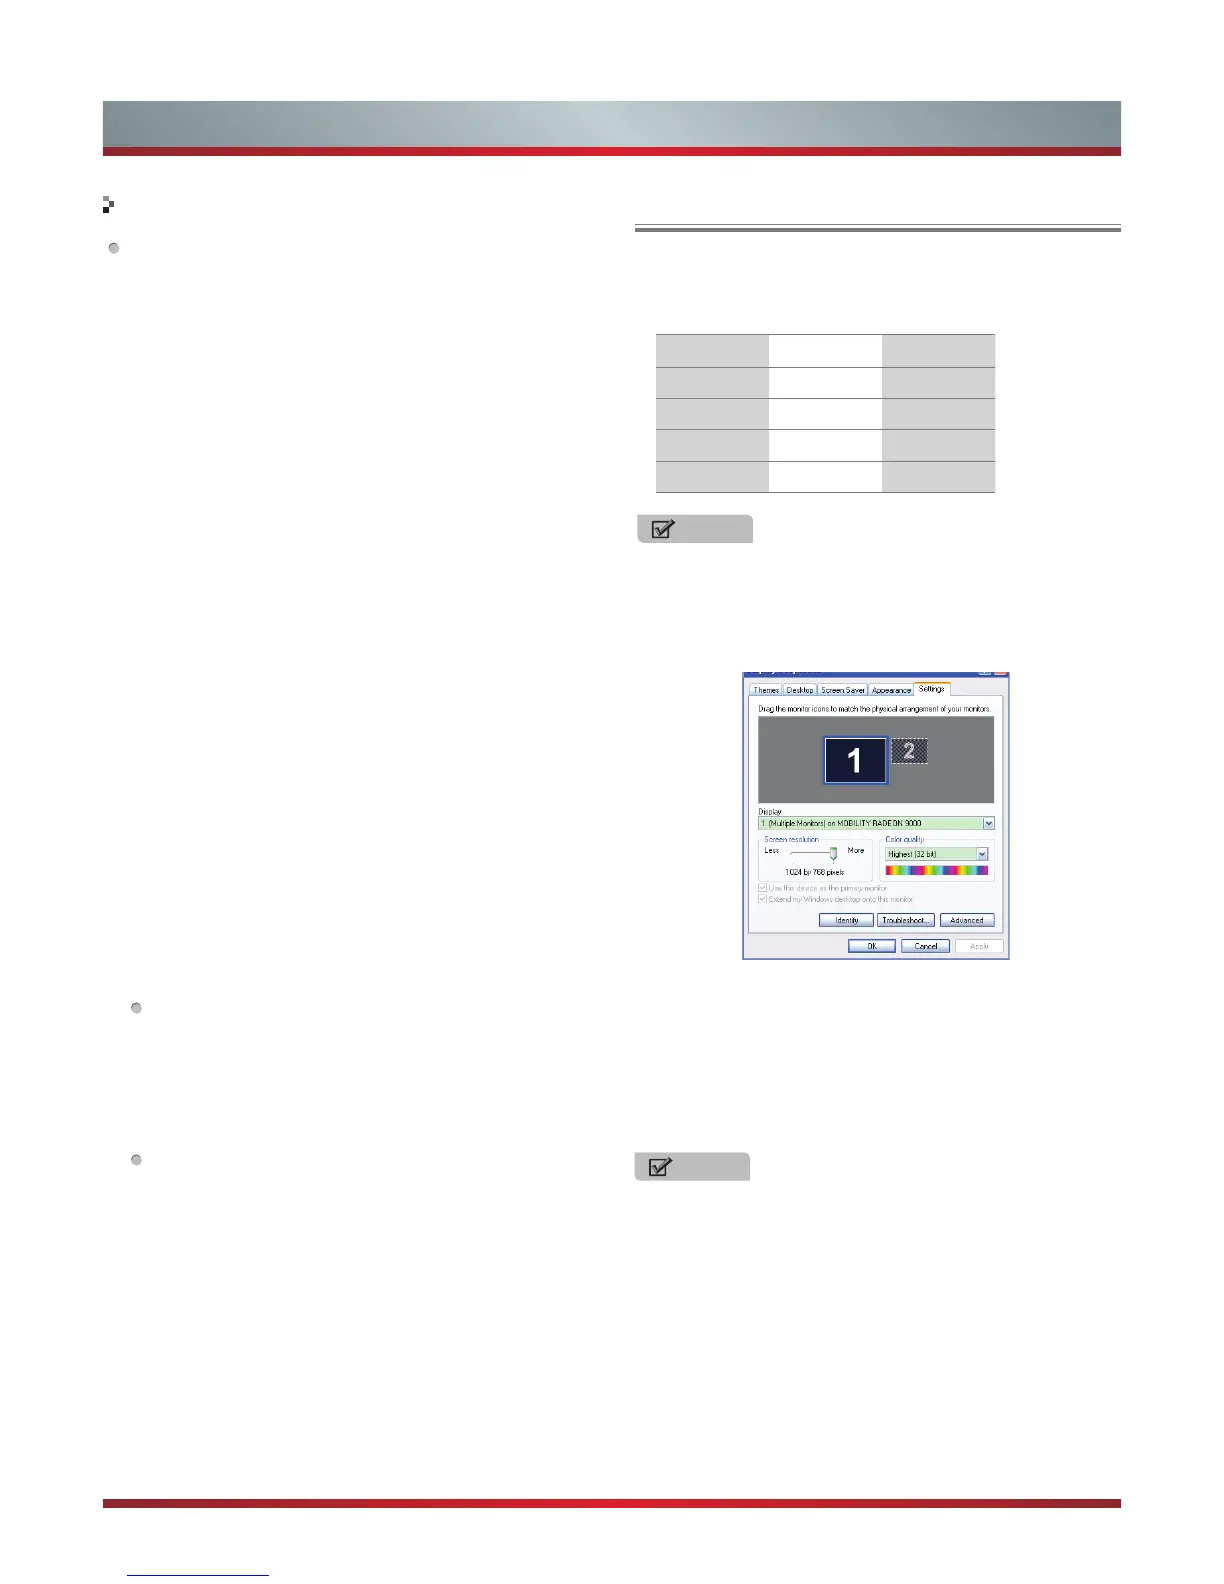
Take Windows XP as an example, and the Windows system
display setting is as illustrated:
1. Right click anywhere on your display, select “Properties”.
2. Find the Settings tab on the dialogue box, set the screen
Resolution.
3. See above details about the resolutions supported by this
unit.
4. Click OK to exit.
NOTE
Primarily this unit is intended for use as an LCD TV.
If compatibility is a problem when using this unit as a
monitor, please contact the manufacturer of the PC Video/
Graphic’s card for further support. Perfect compatibility is
not warranted.
PC Setting