–
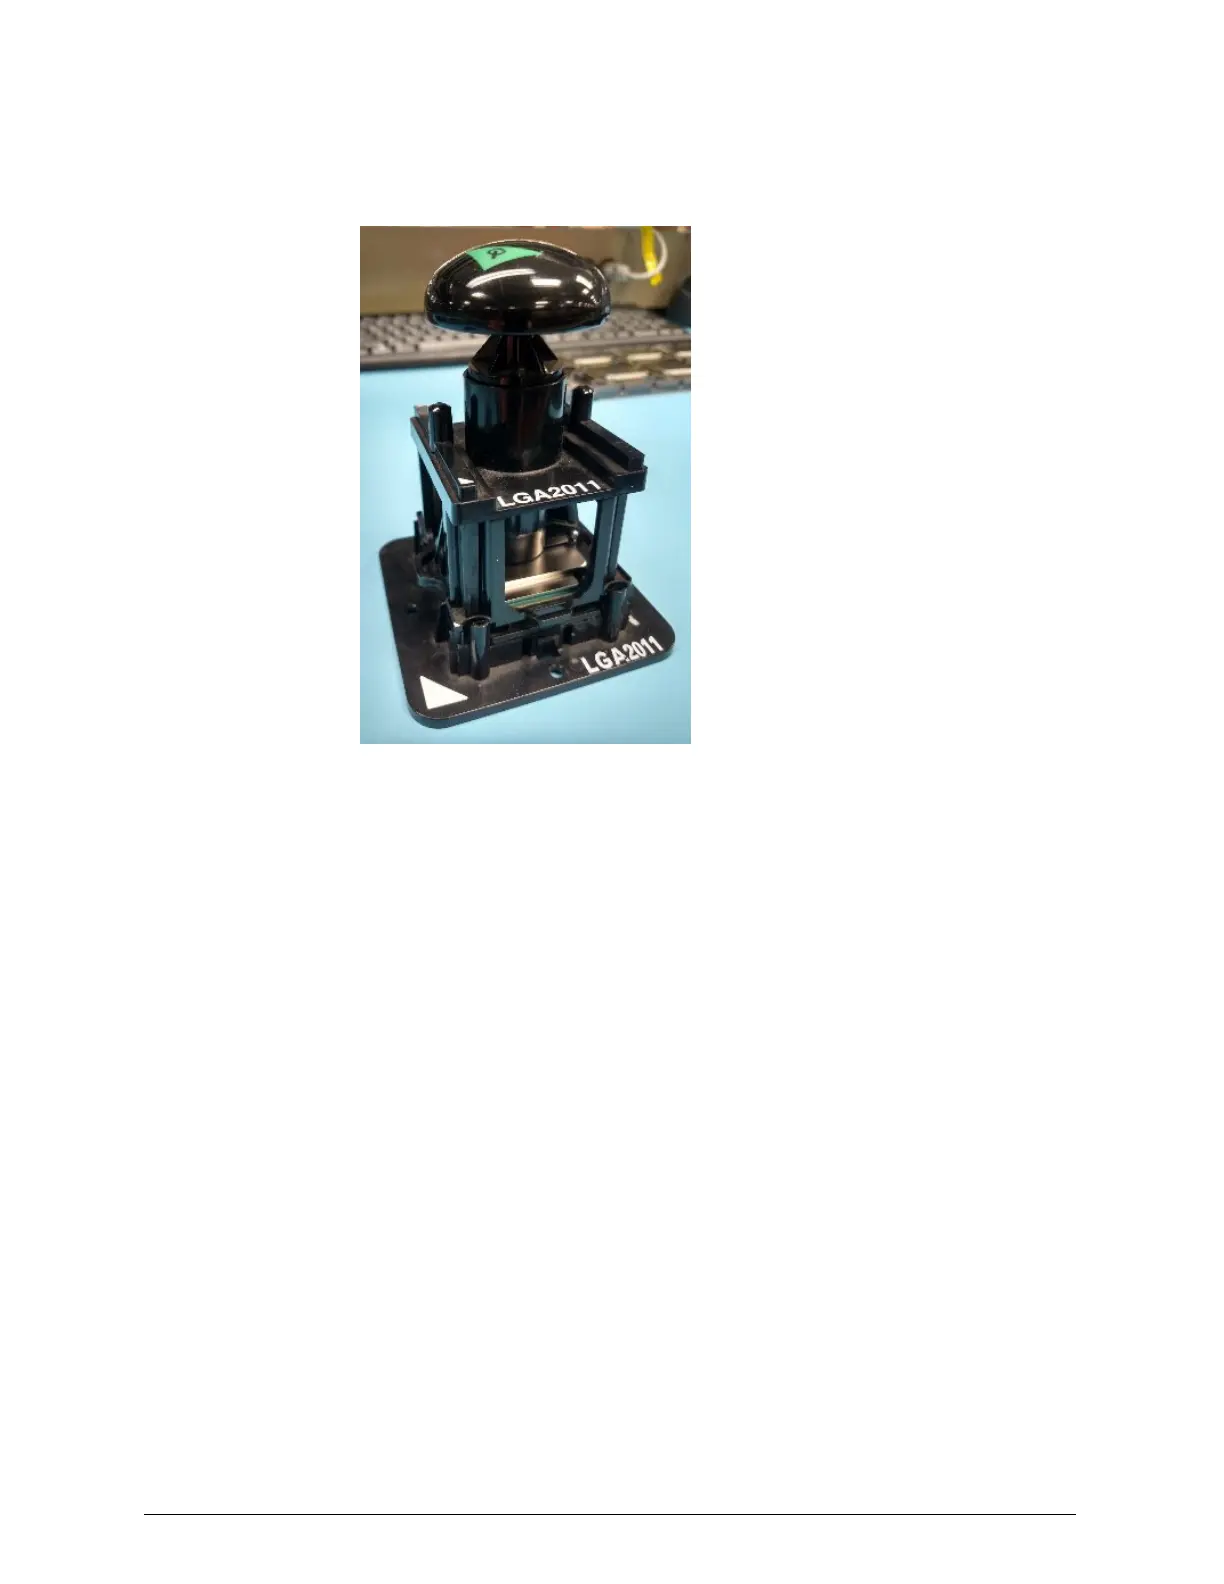
The top part of the tool is centered between the posts on the
bottom part of the tool
b. Press and release the knob on the top part of the CPUinsertion tool
to release the CPUfrom the clamp. When this is done correctly, you
should hear a click.
c. Using the high-purity isopropyl alcohol and the lint-free cloth,
thoroughly clean the thermal paste off the top of the CPU. Always
apply the alcohol to the cloth. Do not apply the alcohol directly to the
CPU.
d. Place the top part of the CPUinsertion tool on the bottom part of the
tool with the same orientation as when you previously placed the top
part on the bottom part.
e. Press and release the knob on the top part of the CPUinsertion tool
to cause the clamp to grip the sides of the CPU. When this is done
correctly, you should hear a click.
f. While holding the tool by the knob, lift the CPU off the bottom part of
the CPUinsertion tool.
9. While holding the CPUinsertion tool by the knob, place the CPU in a slot
the CPU packaging.
Chapter 4: Refurbishing an HCP S30 Node
111
HCP S Series Node Refurbishment
Step 17: Unrack, disassemble, and pack the server modules
 Loading...


