23
A99UE13-1304
Note: Don`t connect main power cord before completely connecting the whole system.
2. LAK2J Installation:
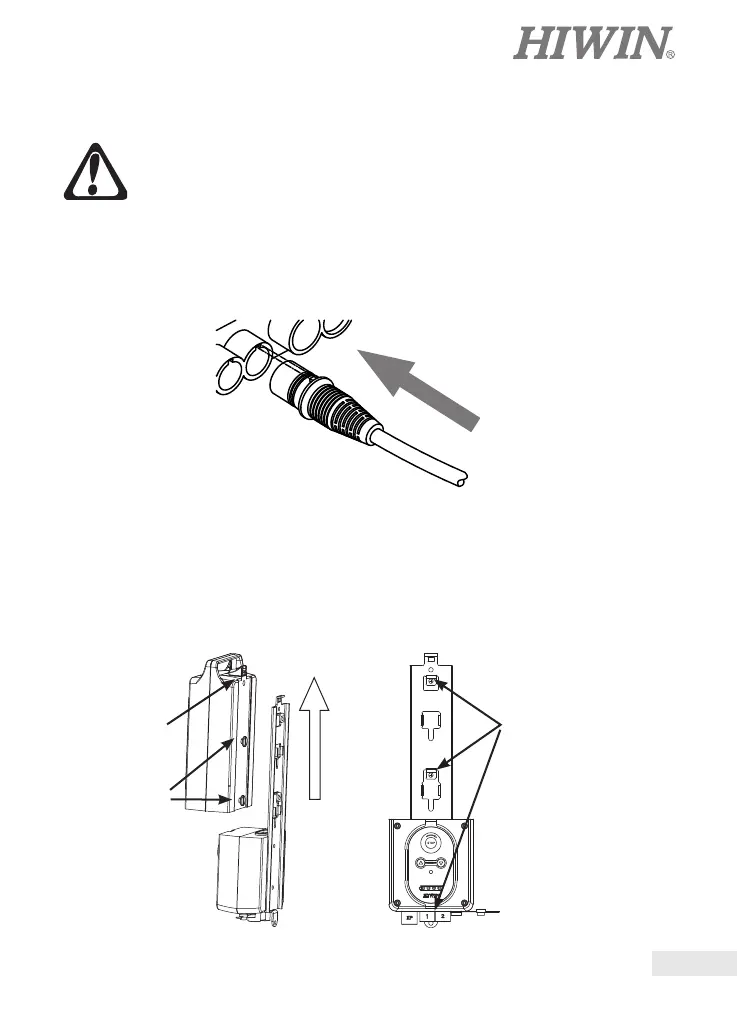
1. Installation of Linear Actuator and Controller Connector: When inserting an
actuator connector to a controller chassis, please ensure a connector bolt aligns
with a housing notch to insert. Push a connector into the bottom of a chassis until
it is sure no gap between a connector and housing to ensure the IP class of the
whole system (The installations of key box and controller are the same as above-
mentioned.).
A
B
C
Fig. 1
Fig. 2
3. Installation Guide
2.1.1 Before assembling, please ensure the EMERGENCY switch is pressed during
the whole assembly.
2.1.2 Push the slider and uplift’ the battery box (A), and loosen the screw (B)*2.
2.1.3 Lightly lift a cover of battery box so that can be separated from a support and
control box (Fig. 1).
2.1.4 Install a support on the position, and x on C point by screws (Fig. 2).
2.1 Step 1:
 Loading...