A99UE13-1304
24
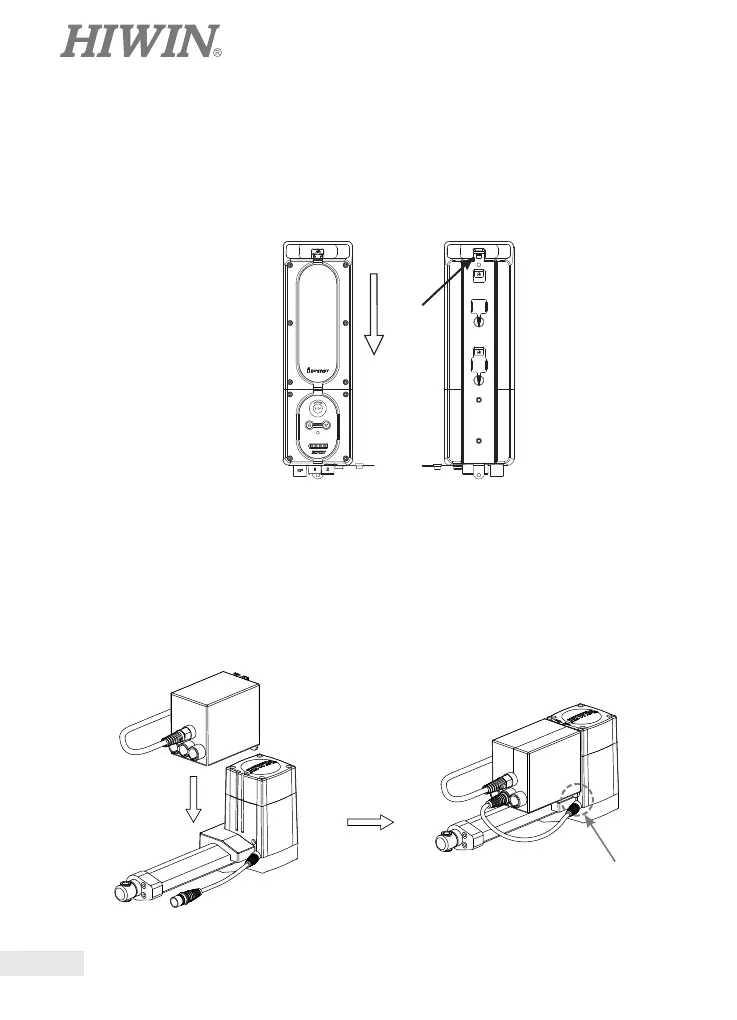
2.2 Step 2:
2.2.1 Before reinstalling a cover of battery box on a support, please lightly tighten
screw B (Fig. 3) so that a cover of battery box will not shake while embedding
the whole device.
2.2.2 Lock up slider (A) , and ensure it is completely and rmly installed on the whole
device (Fig. 4).
2.3 Step 3:
3. LAM3 and LAK2D Installation:
Fig. 3
Fig. 4
A
Lock Screw
Align a bolt on LAK2D controller with a notch on LAM3 to insert downward. There is one
3/16”*15 lock screw circled in the gure below to x an actuator and controller.
2.3.1 Finally, please turn the EMERGENCY switch clockwise so that a controller can start the
operation.
 Loading...