136
Scheduled Maintenance
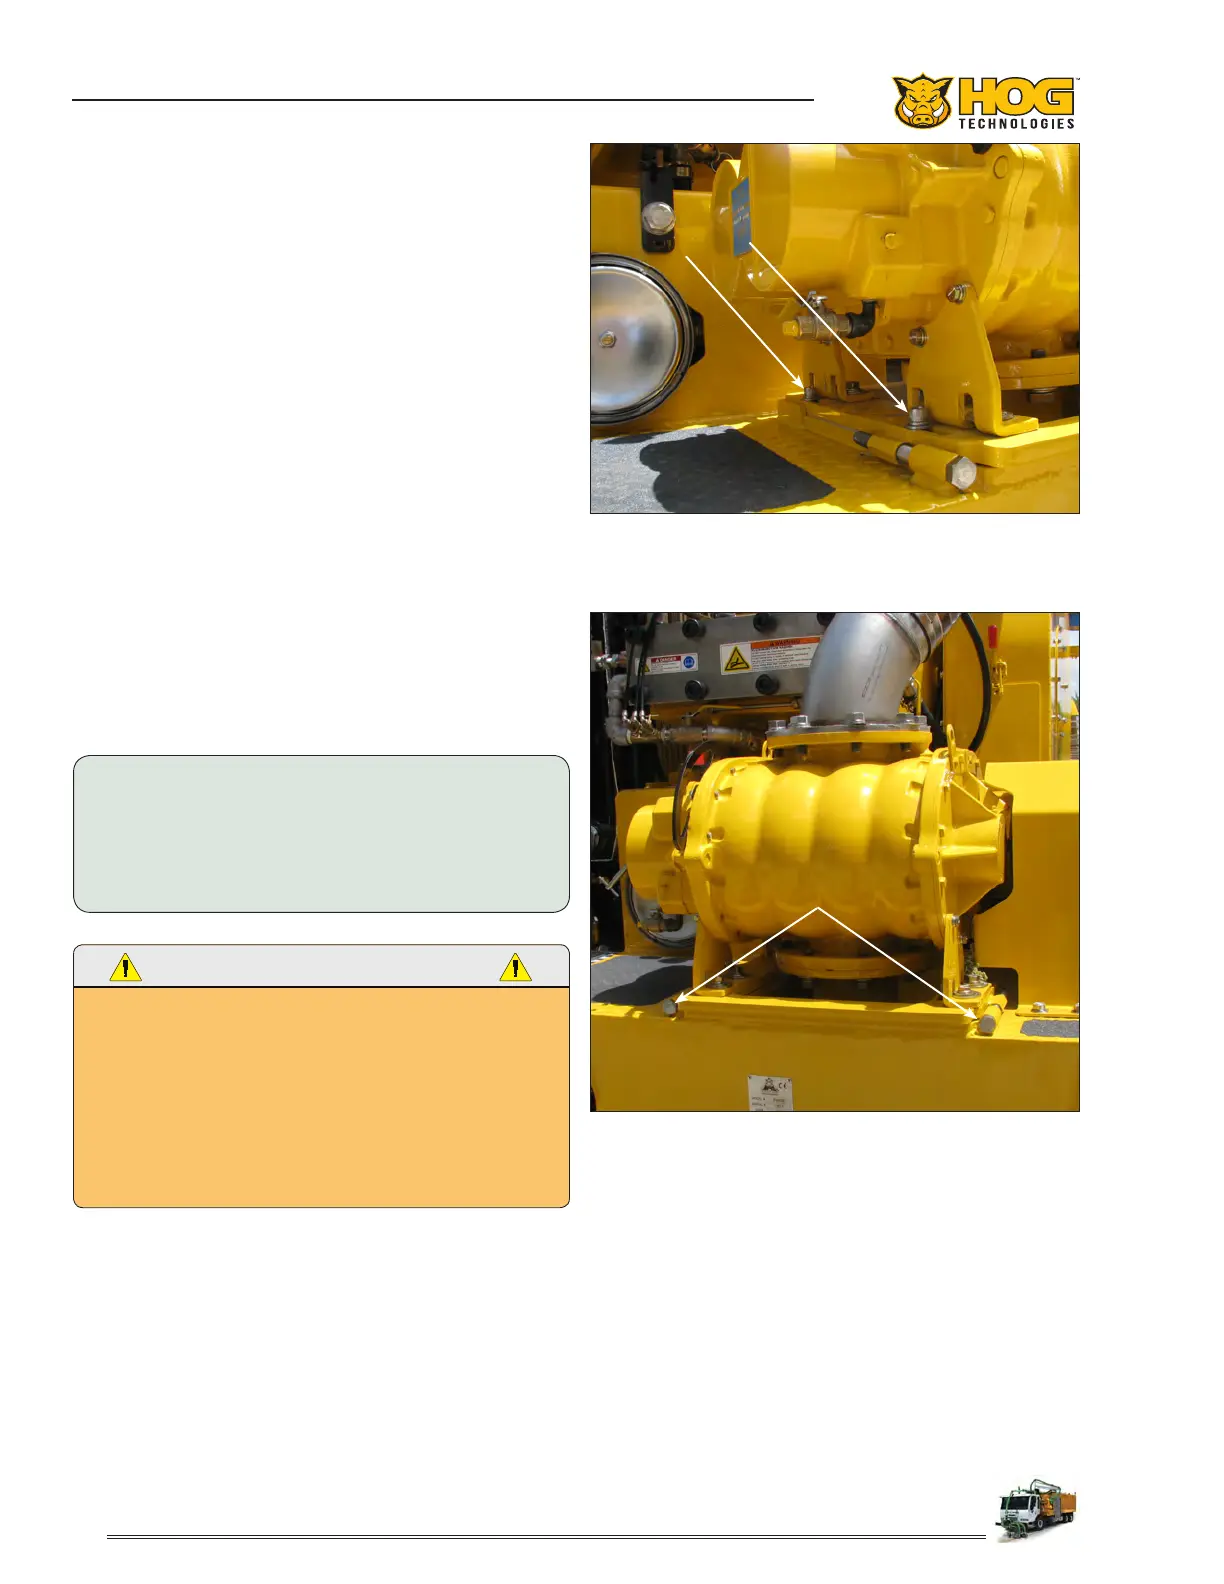
Blower Mounting Plate Bolts
Blower Adjusting Bolts
Blower Drive Belt Tension Adjustment
1. Loosen the four bolts on the slotted hoes on
the mounting plate just enough to allow the
plate to move. Make sure not to loosen them
too much.
2. Rotate the adjusting bolts on each side of the
blower mount equally to adjust the belt to the
proper specication. Use a sonic tension meter
to test for proper tension. (See specications
in this section)
3. Tighten the bolts on the slotted holes.
4. Start the engine, engage the PTO and activate
the 40K clutch at idle speed for 30 seconds.
5. Deactivate the 40K clutch; disengage the PTO
and shutdown the engine.
6. Check that the belt is riding on the center of
the pulleys. If it is riding hard on either side of
the pulleys, the blower will have to be aligned
slightly using the mounting plate adjusting
bolts. Repeat alignment and tension steps
until the belt is set to the proper tension and
centered on the pulleys.
NOTICE:
APPLY GREASE OR ANTI SEIZE TO THE THREADS OF THE
BLOWER AND UHP PUMP ADJUSTING BOLTS EACH TIME
THE BELTS ARE ADJUSTED TO HELP PREVENT CORROSION
AND ENSURE THE ADJUSTING BOLTS WILL TURN WHEN
ADJUSTMENT IS REQUIRED.
THE DRIVE BELTS CAN CAUSE SEVERE DAMAGE TO
PULLEYS, SHAFTS AND BEARINGS IF THEY ARE ADJUSTED
TOO TIGHT OR MISALIGNED. THIS CAN CAUSE SEVERE
DAMAGE TO DRIVE SYSTEM COMPONENTS AND INJURY
TO PERSONNEL IF DAMAGED COMPONENTS ARE
THROWN FROM THE MACHINE. ALWAYS MAKE SURE THE
BELTS ARE PROPERLY ALIGNED AND SET TO THE BELT
MANUFACTURERS SPECIFICATIONS WHEN THEY REQUIRE
ADJUSTMENT. NEVER OVER TIGHTEN THE BELTS.
 Loading...