Rev. 1.50 136 August 28, 2017 Rev. 1.50 137 August 28, 2017
HT66F0175/HT66F0185
A/D Flash MCU with EEPROM
HT66F0175/HT66F0185
A/D Flash MCU with EEPROM
I
2
C Interface
TheI
2
Cinterfaceisusedtocommunicatewithexternalperipheraldevicessuchassensors,
EEPROMmemoryetc.OriginallydevelopedbyPhilips,itisatwolinelowspeedserialinterface
forsynchronousserialdatatransfer.Theadvantageofonlytwolinesforcommunication,relatively
simplecommunicationprotocolandtheabilitytoaccommodatemultipledevicesonthesamebus
hasmadeitanextremelypopularinterfacetypeformanyapplications.
I
2
C Master Slave Bus Connection
I
2
C interface Operation
TheI
2
Cserialinterfaceisatwolineinterface,aserialdataline,SDA,andserialclockline,SCL.As
manydevicesmaybeconnectedtogetheronthesamebus,theiroutputsarebothopendraintypes.
Forthisreasonitisnecessarythatexternalpull-highresistorsareconnectedtotheseoutputs.Note
thatnochipselectlineexists,aseachdeviceontheI
2
Cbusisidentiedbyauniqueaddresswhich
willbetransmittedandreceivedontheI
2
Cbus.
WhentwodevicescommunicatewitheachotheronthebidirectionalI
2
Cbus,oneisknownasthe
masterdeviceandoneastheslavedevice.Bothmasterandslavecantransmitandreceivedata,
however,itisthemasterdevicethathasoverallcontrolofthebus.Forthesedevices,whichonly
operateinslavemode,therearetwomethodsoftransferringdataontheI
2
Cbus,theslavetransmit
modeandtheslavereceivemode.
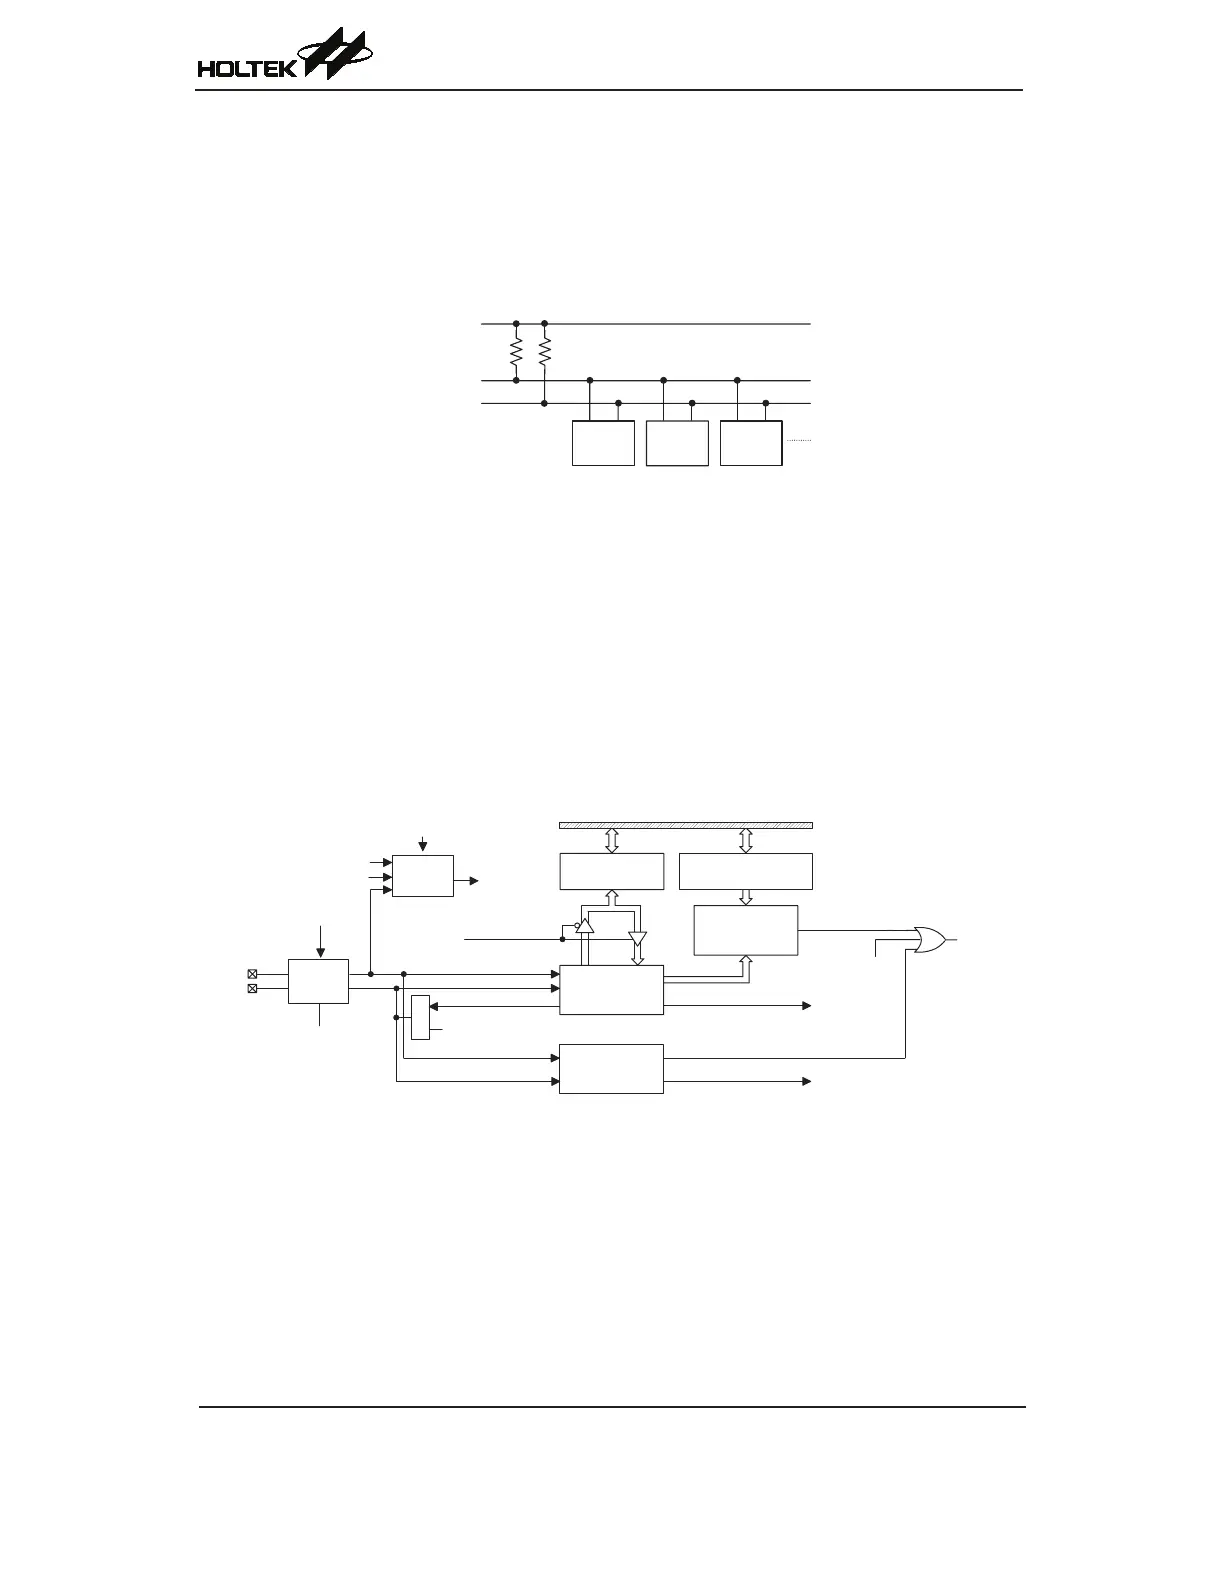
I
2
C Block Diagram