POWER
TILT
ASSEMBLY
REMOVAL
Remove the following:
-
remove the motor wire from the motor
(P.
13-9)
-
engine (section
8).
-
oil case
(P.
12-1).
-
friction adjusting lever (Tiller handle type only
P.
12-3).
-
mount frame
(P.
12-5).
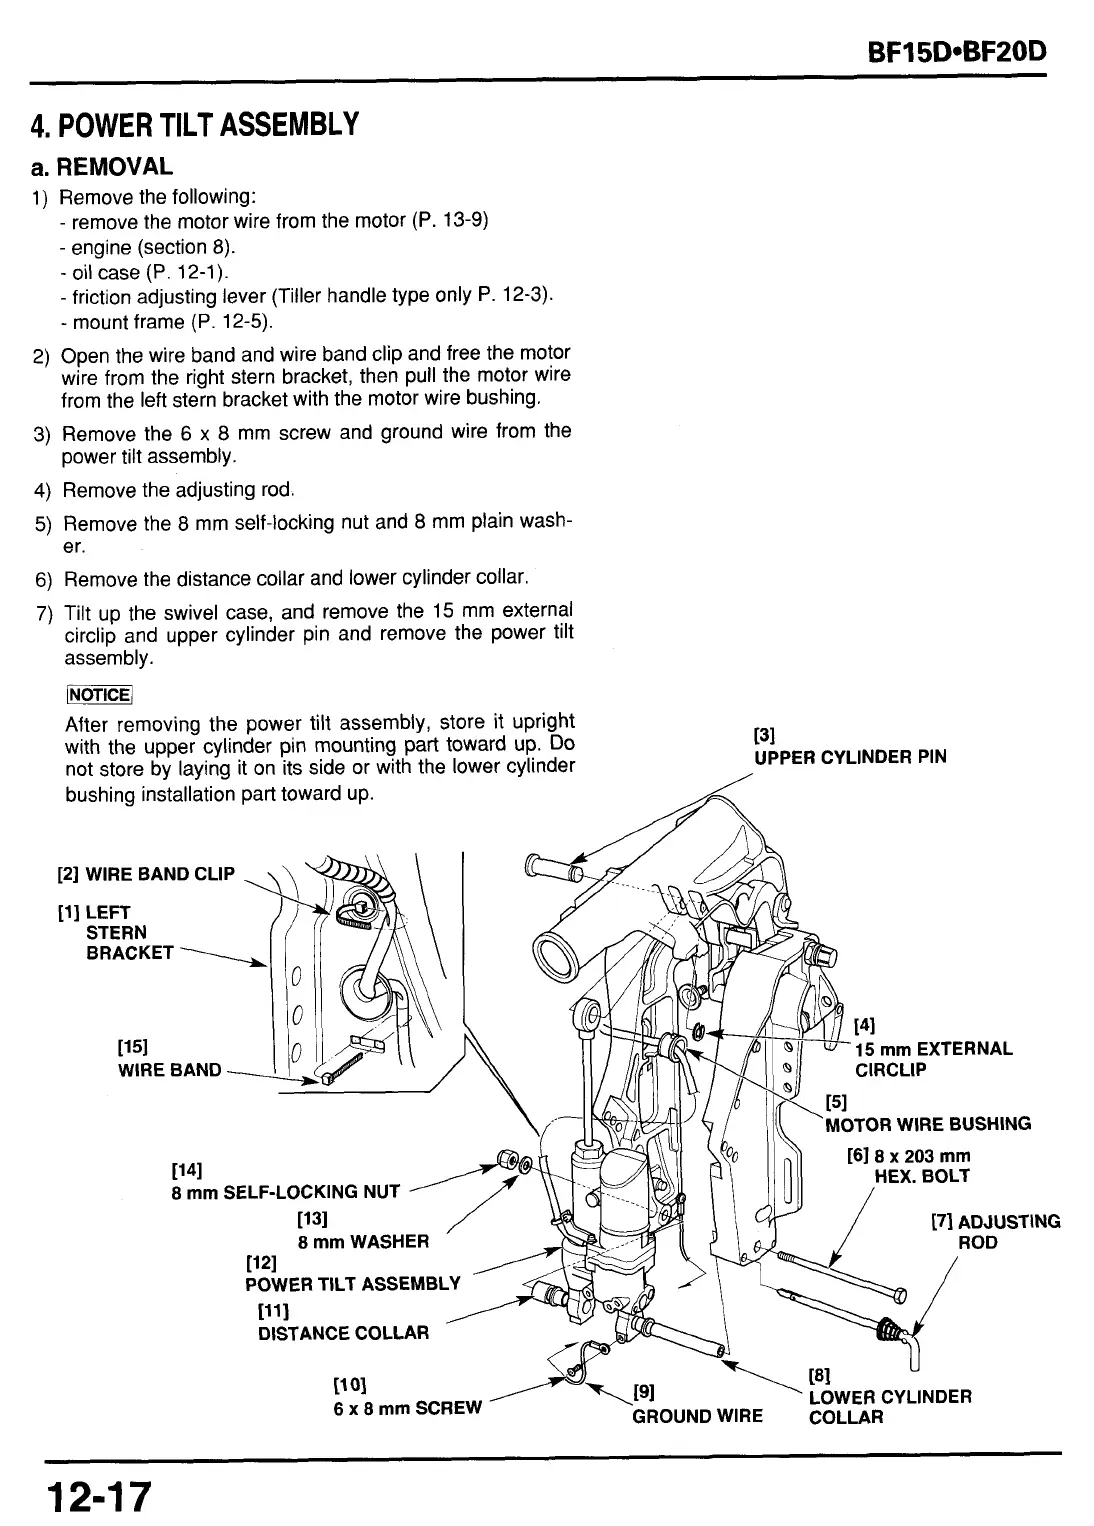
Open the wire band and wire band clip and free the motor
wire from the right stern bracket, then pull the motor wire
from the left stern bracket with the motor wire bushing.
Remove the
6
x
8
mm screw and ground wire from the
power tilt assembly.
Remove the adjusting rod.
Remove the
8
mm self-locking nut and
8
mm plain wash-
er.
Remove the distance collar and lower cylinder collar.
Tilt up the swivel case, and remove the 15 mm external
circlip and upper cylinder pin and remove the power tilt
assembly.
After removing the power tilt assembly, store it upright
with the upper cylinder pin mounting part toward up.
Do
not store by laying it on its side or with the lower cylinder
A
bushing installation part toward up.
PI
UPPER CYLINDER PIN
,
\
[2] WIRE BAND CLIP
[I] LEFT
STERN
BRACKET
\
1151
WIRE BAND
t41
15
rnrn
EXTERNAL
\
161
8
x
203
mm
1141
8
mm
SELF-LOCKING NUT
~31
171 ADJUSTING
8
mm
WASHER
r121
POWER TILT ASSEMBLY
[Ill
DISTANCE COLLAR
\
t8l
U
LOWER CYLINDER
t7
01
GROUND WIRE COLLAR
6
x
8
mm
SCREW
124
7
 Loading...