Configuring Network Settings
35
Components Wizard.
3. Click Details, then select Internet Gateway Device Discovery and Control Client and
UPnP User Interface.
4. Click OK to begin the installation.
To enable UPnP in Windows 7:
1. Go to Start > Control Panel > Network and Internet > Network and Sharing Center.
2. On the left pane, click Change advanced sharing settings.
3. On your current network profile, in the Network discovery area, click Turn on network
discovery, and then click Save changes.
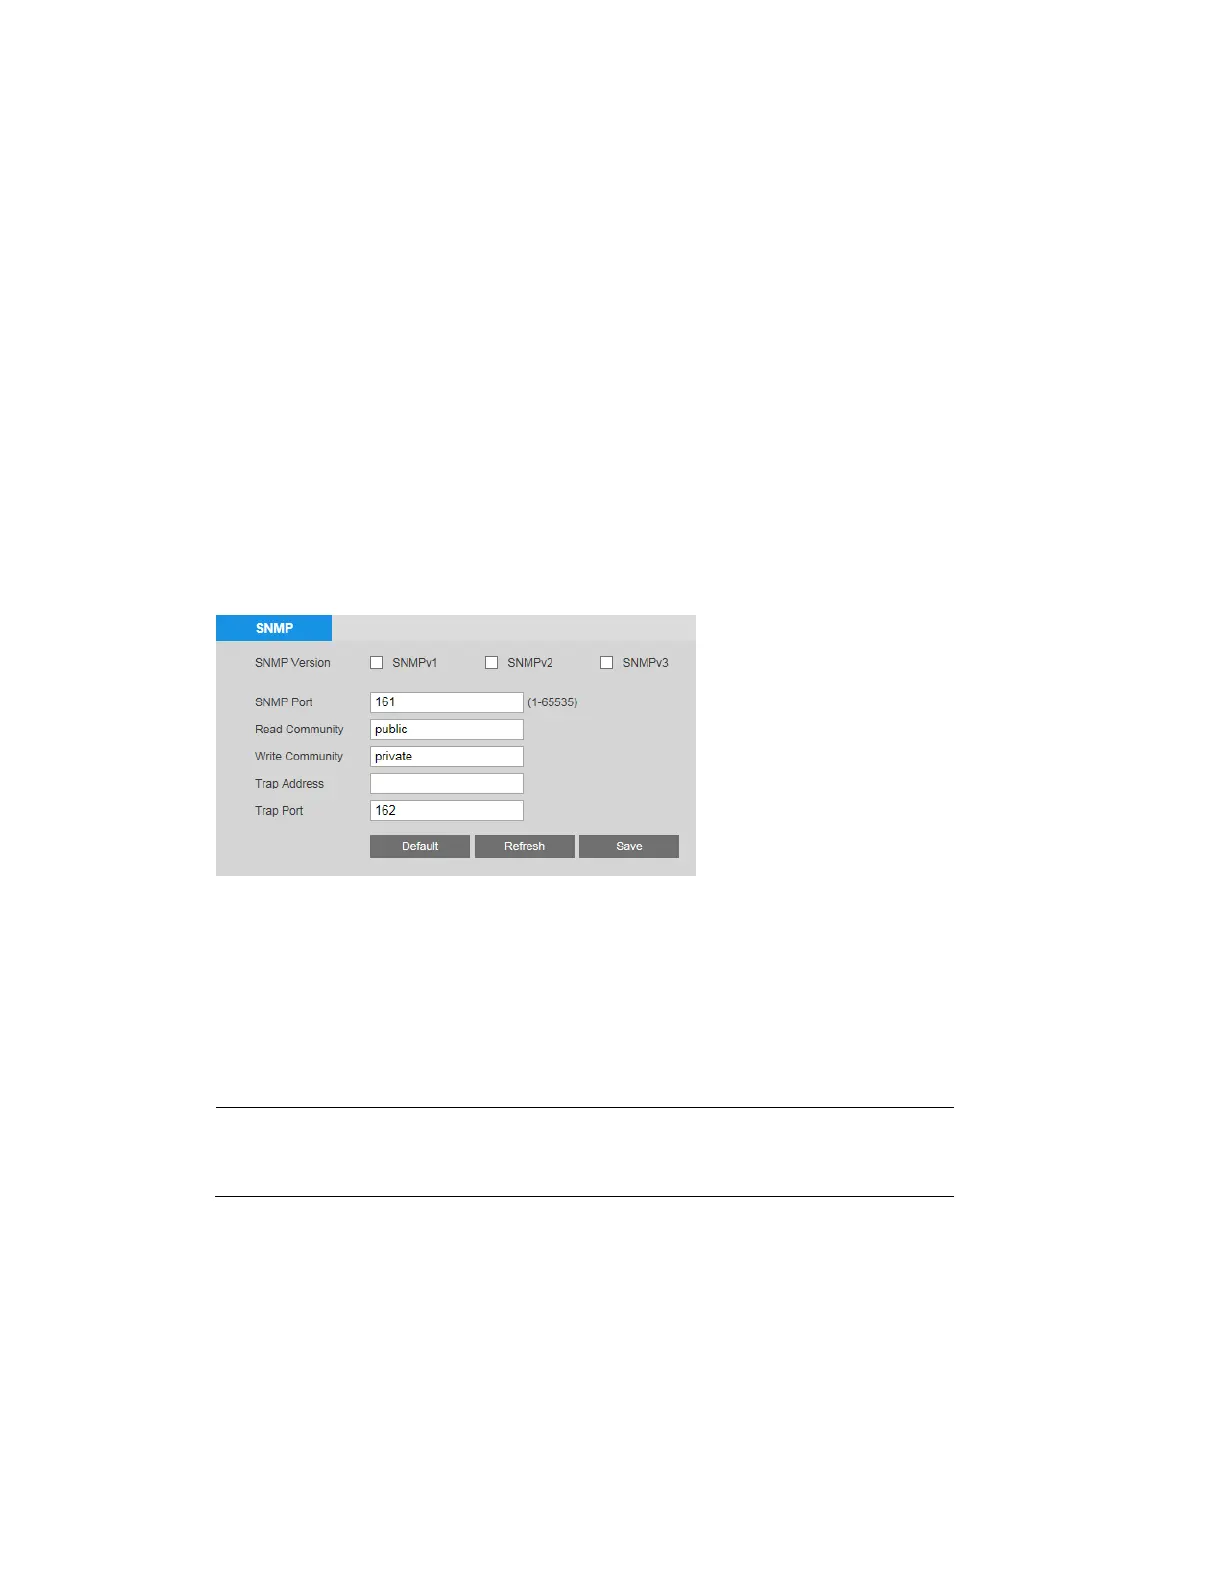
Configuring SNMP Settings
You can configure Simple Network Management Protocol (SNMP) settings on the Setup
Network Setup
SNMP page.
SNMP is a protocol for collecting, organizing, and exchanging management information
between managed devices on a network.
To enable SNMP:
1. Next to SNMP Version, select the SNMP version(s) that you want to use. For best
security, use SNMPv3. You can select SNMPv1 only, SNMPv2 only, both SNMPv1 and
SNMPv2, or SNMPv3 only.
Note If you select SNMPv1 or SNMPv2, a warning message will appear.
2. By default, the SNMP Port is 161. To change the port, enter a number in the range
1–65535.
3. In the Trap Address field, enter the IP address of the SNMP server where trap
notifications will be sent.
4. By default, the Trap Port is 162. To change the port, enter a number in the range
1–65535.
 Loading...