175
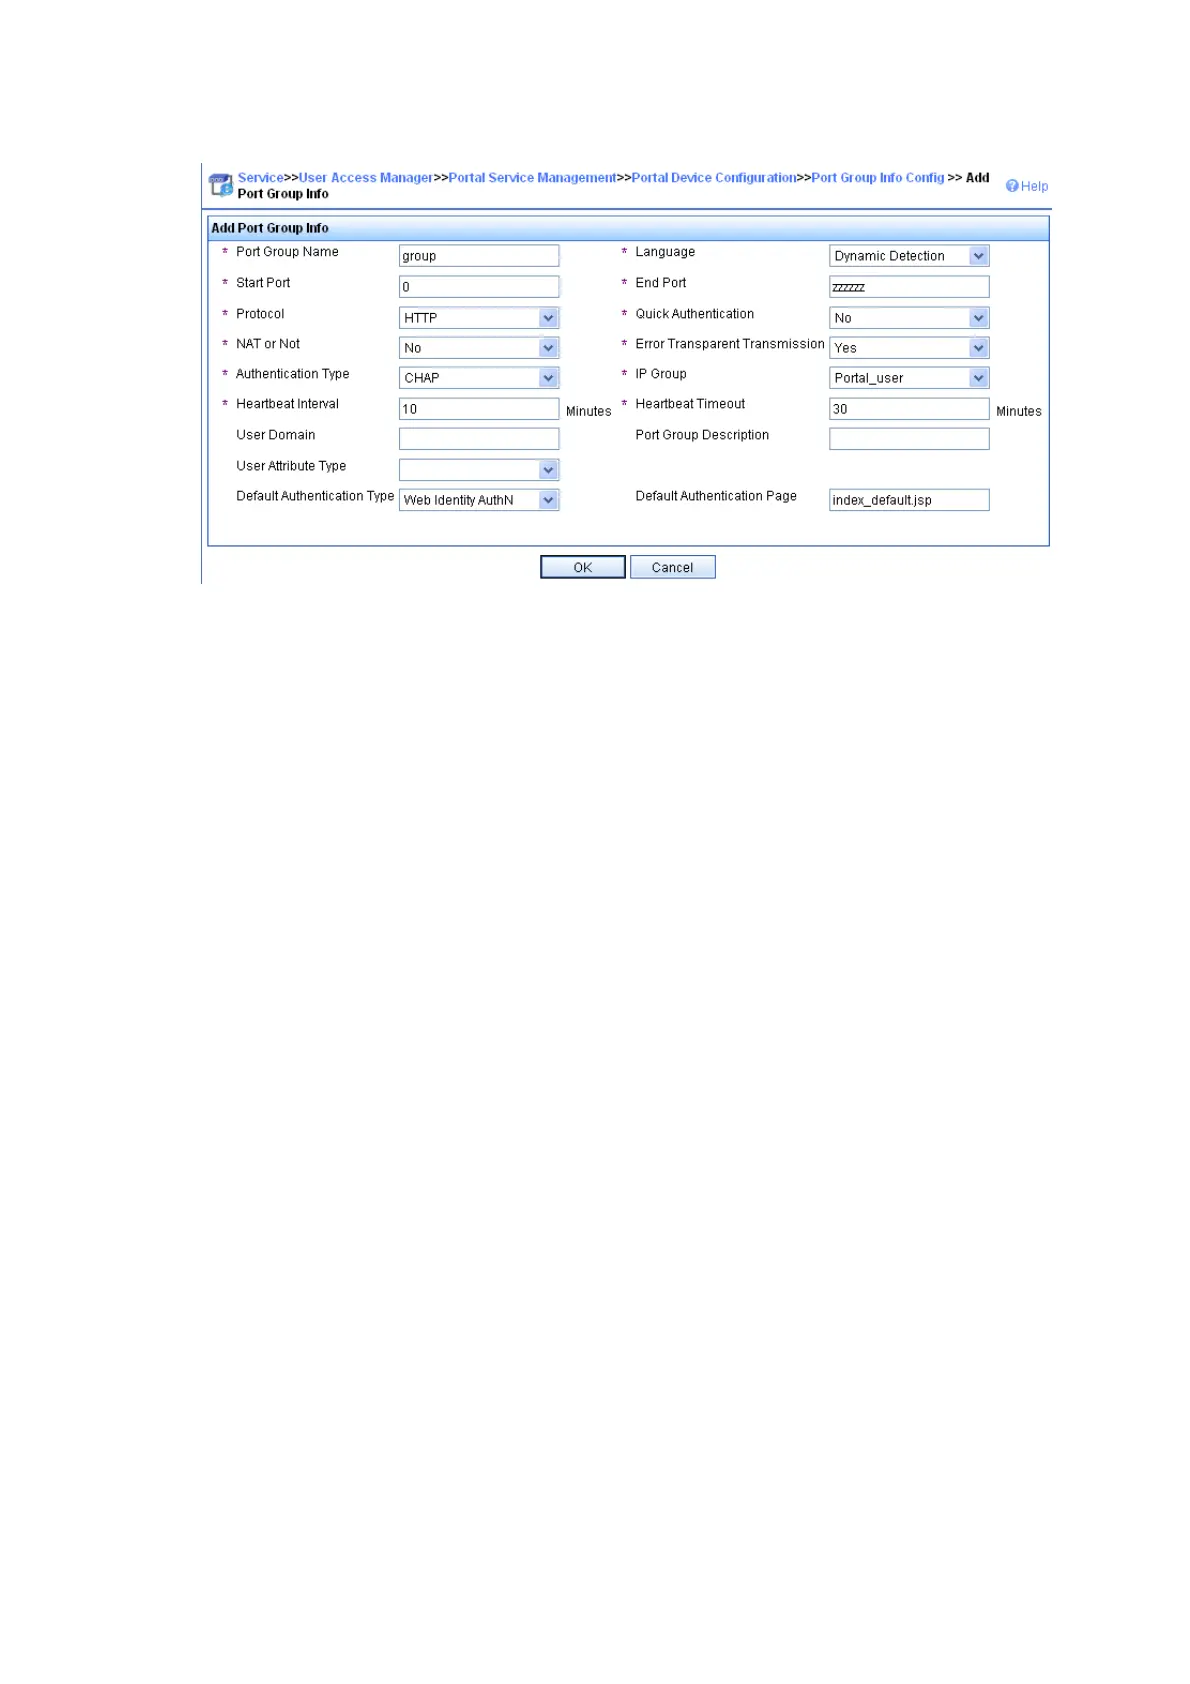
Figure 77 Add a port group
# Select User Access Manager > Service Parameters > Validate System Configuration from the
navigation tree to validate the configurations.
2. Configure Switch A
• Configure VRRP
# Create VRRP group 1, and configure the virtual IP address of the VRRP group 1 as 9.9.1.1.
<SwitchA> system-view
[SwitchA] interface vlan-interface 10
[SwitchA–Vlan-interface10] vrrp vrid 1 virtual-ip 9.9.1.1
# Set the priority of VLAN-interface 10 in VRRP group 1 to 200.
[SwitchA–Vlan-interface10] vrrp vrid 1 priority 200
# On VLAN-interface 10, configure the interface to be tracked as VLAN-interface 20 and reduce the
priority of VLAN-interface 10 in VRRP group 1 by 150 when the interface state of VLAN-interface 20
becomes Down or Removed.
[SwitchA–Vlan-interface10] vrrp vrid 1 track interface vlan-interface20 reduced 150
[SwitchA–Vlan-interface10] quit
# Create VRRP group 2, and configure the virtual IP address of the VRRP group 2 as 192.168.0.1.
[SwitchA] interface vlan-interface 20
[SwitchA–Vlan-interface20] vrrp vrid 2 virtual-ip 192.168.0.1
# Set the priority of VLAN-interface 20 in VRRP group 2 to 200.
[SwitchA–Vlan-interface20] vrrp vrid 2 priority 200
# On VLAN-interface 20, configure the interface to be tracked as VLAN-interface 10 and reduce the
priority of VLAN-interface 20 in VRRP group 2 by 150 when the interface state of VLAN-interface 10
becomes Down or Removed.
[SwitchA–Vlan-interface20] vrrp vrid 2 track interface vlan-interface10 reduced 150
[SwitchA–Vlan-interface20] quit
• Configure a RADIUS scheme
# Create RADIUS scheme rs1 and enter its view.
[SwitchA] radius scheme rs1
 Loading...