6-42 Removal and Replacement
STARGUARD ASSEMBLY REMOVAL
To remove the starguard assembly, perform the following procedure:
1. Remove the window assembly.
2. Remove the left and right endcovers.
3. Remove the cutter assembly.
4. Remove the front panel assembly.
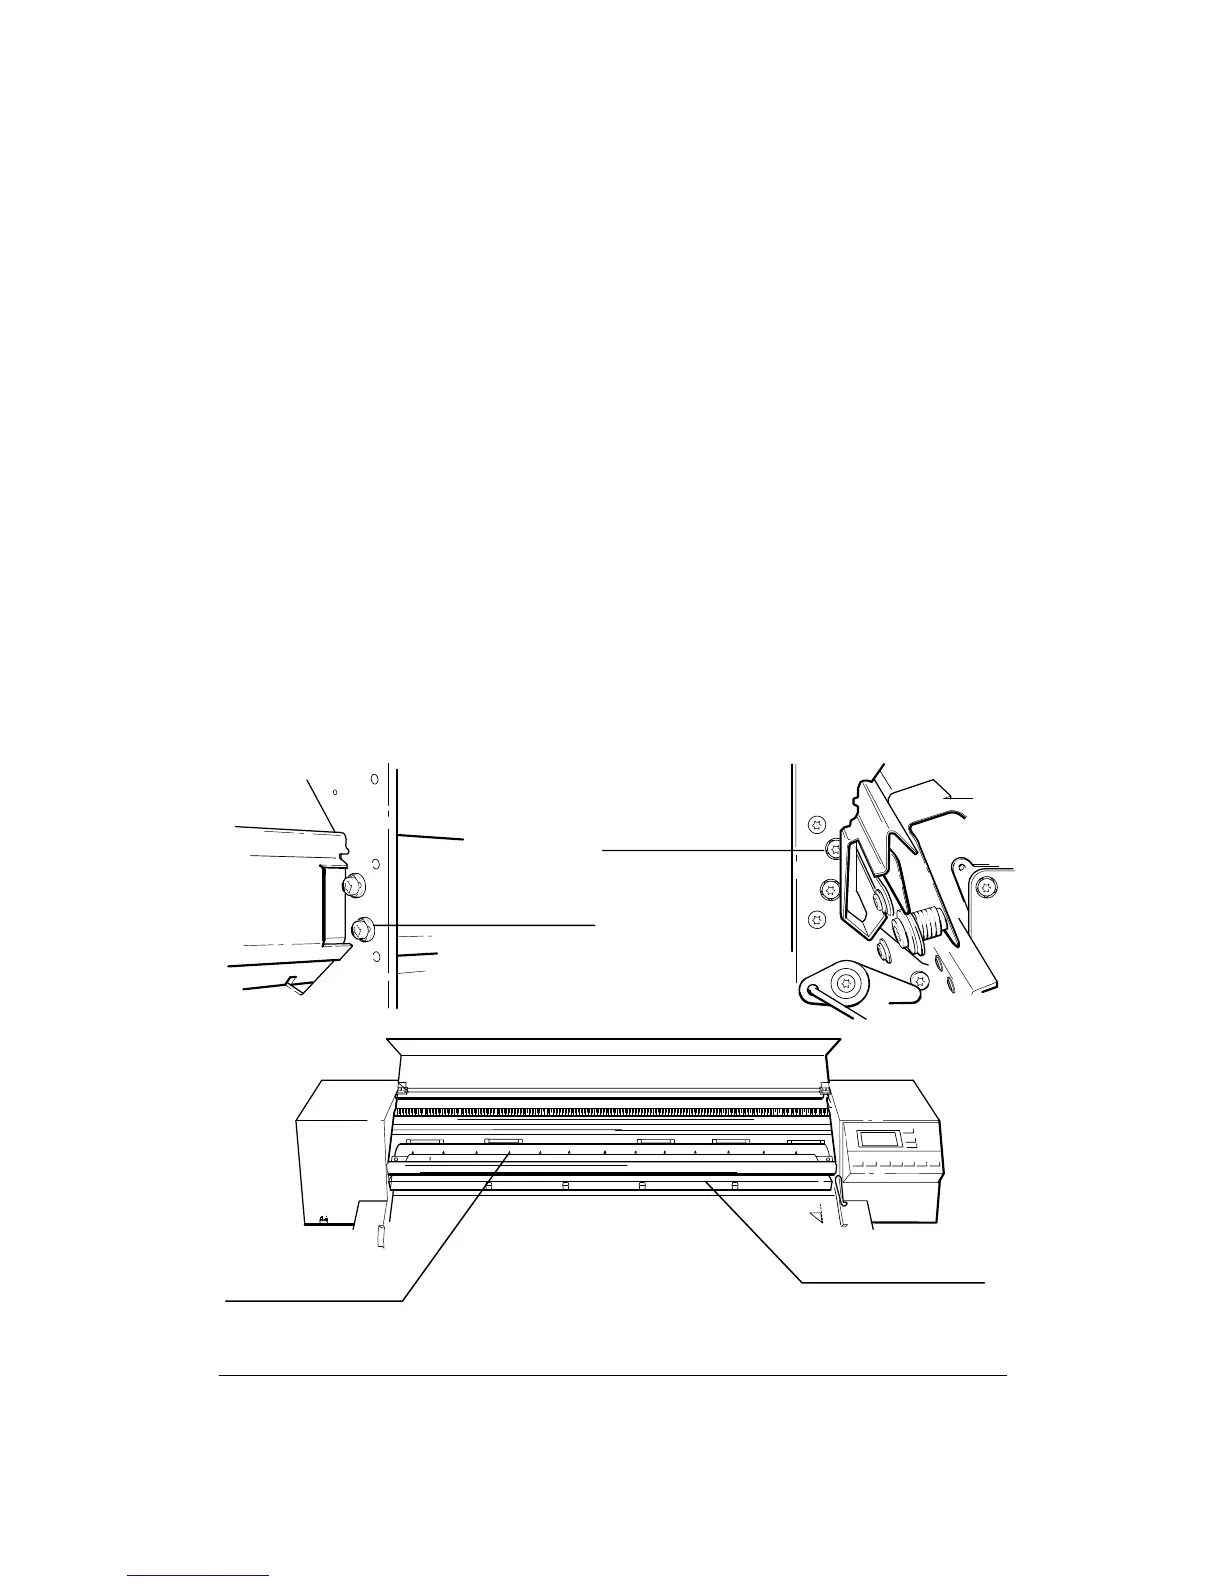
5. Using a TORX T-20 screwdriver, loosen the upper of the two screws that attach the
the starguard assembly to the left and right sideplates until the ends of the screws are
flush with the inner surfaces of the sideplates. See Figure 6-28.
6. Rotate the top of the starguard assembly toward the rear of the plotter so that it clears
the sideplate.
7. Slide the starguard assembly to the left and out of the plotter.
Figure 6-28.
Right Starguard
Screws (2)
Left Starguard
Screws (2)
Starguard Assembly
Star Wheels
C2858A (9)
C2859A (13)
(C)C2858-64
(C)C2858-51a
(C)C2858-71