9
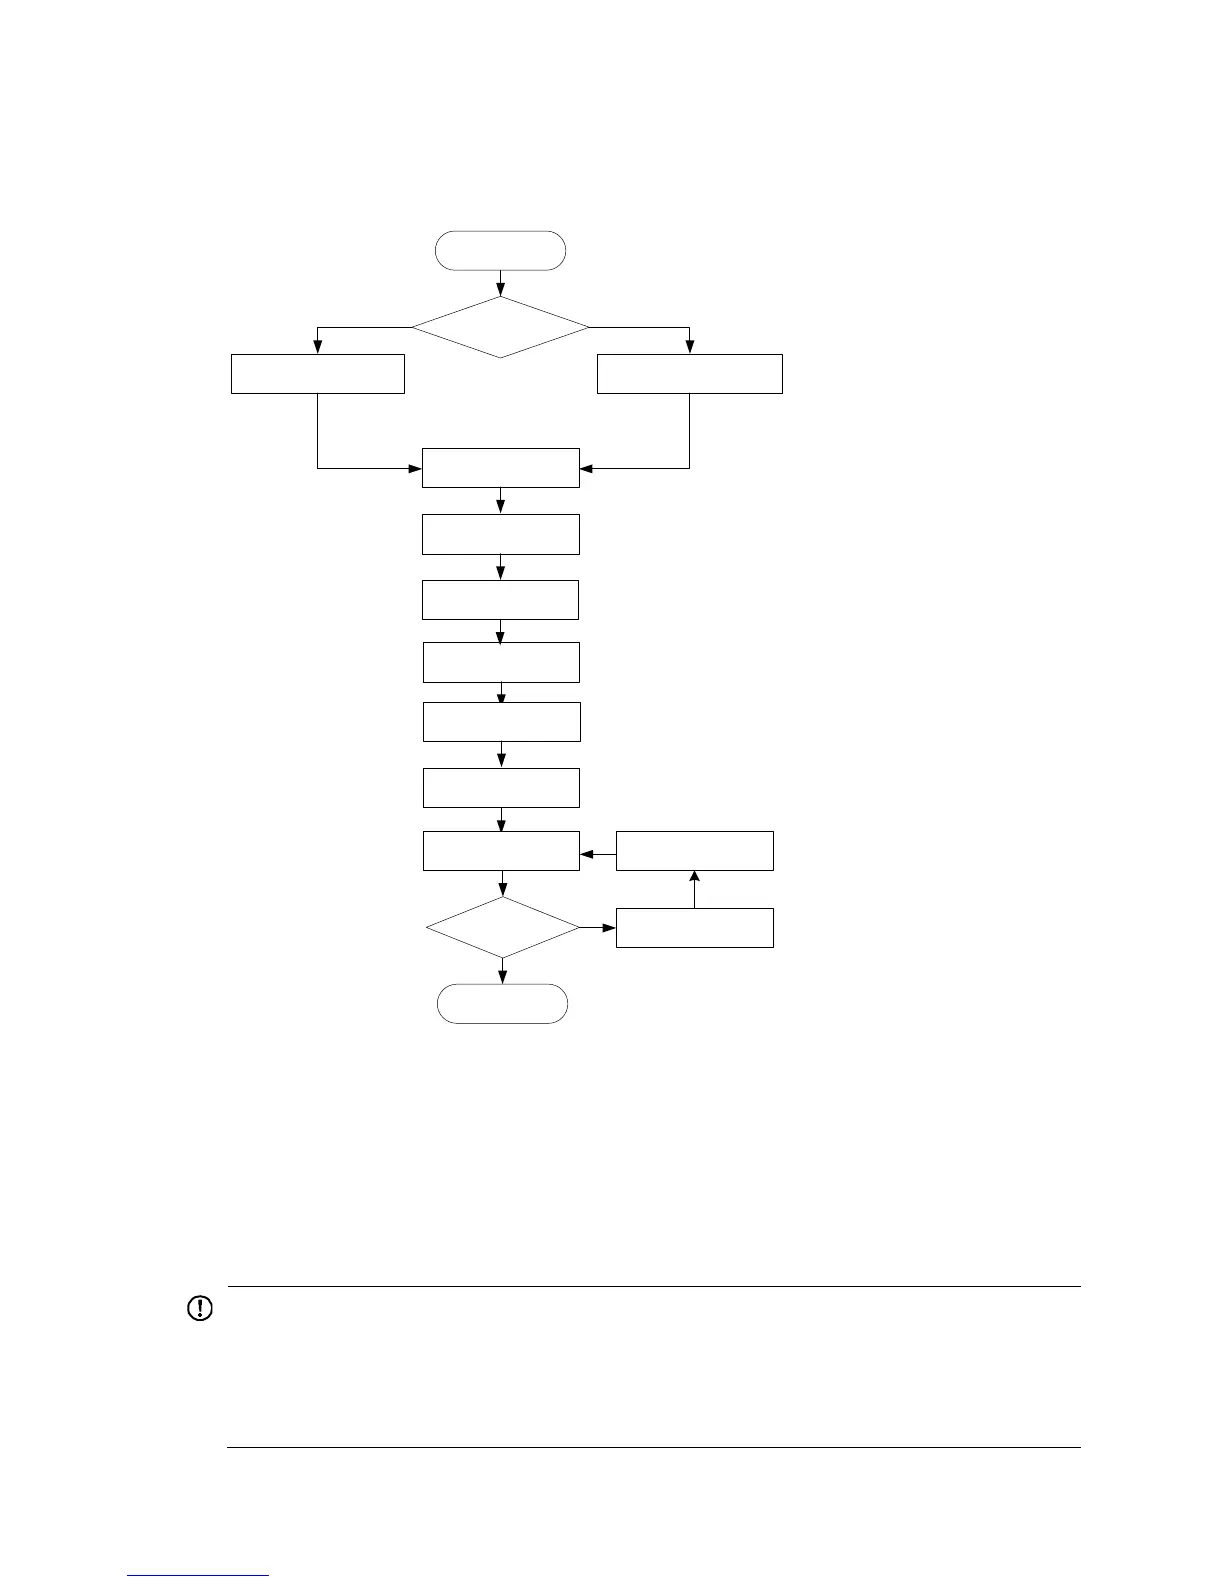
Installation flow
Figure 3 Switch installation flow
Mounting the switch on a workbench
If a standard 19-inch rack is not available, you can place a switch on a clean, flat workbench, as follows:
1. Verify that the workbench is sturdy and well grounded.
2. Attach the four rubber feet to the recessed areas on the chassis bottom.
3. Place the switch on the workbench.
IMPORTANT:
• Ensure good ventilation and at least 10 cm (3.9 in) of clearance around the chassis for heat dissipation.
• Avoid placing heavy objects on the switch.
• Keep at least a vertical distance of 1.5 cm (0.59 in) between switches when they are placed one above
the other.
Install the switch
Install the switch to a 19-in rack
Mount the switch to a
workbench
Ground the switch
Install a lightning protector
for a port (optional)
Connect interface cables
Connect the power cord
Power on the switch
Operating properly?
Yes
End
No
Power off the switch
Troubleshoot the switch
Start
Install interface modules
Connect the AC power
supply to power strip
(optional)

 Loading...