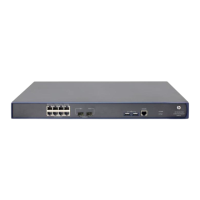
EasyManua.ls Logo

HP 830 - Page 17

HP 830
58 pages
To Next Page IconTo Next Page
To Previous Page IconTo Previous Page
Loading...
13
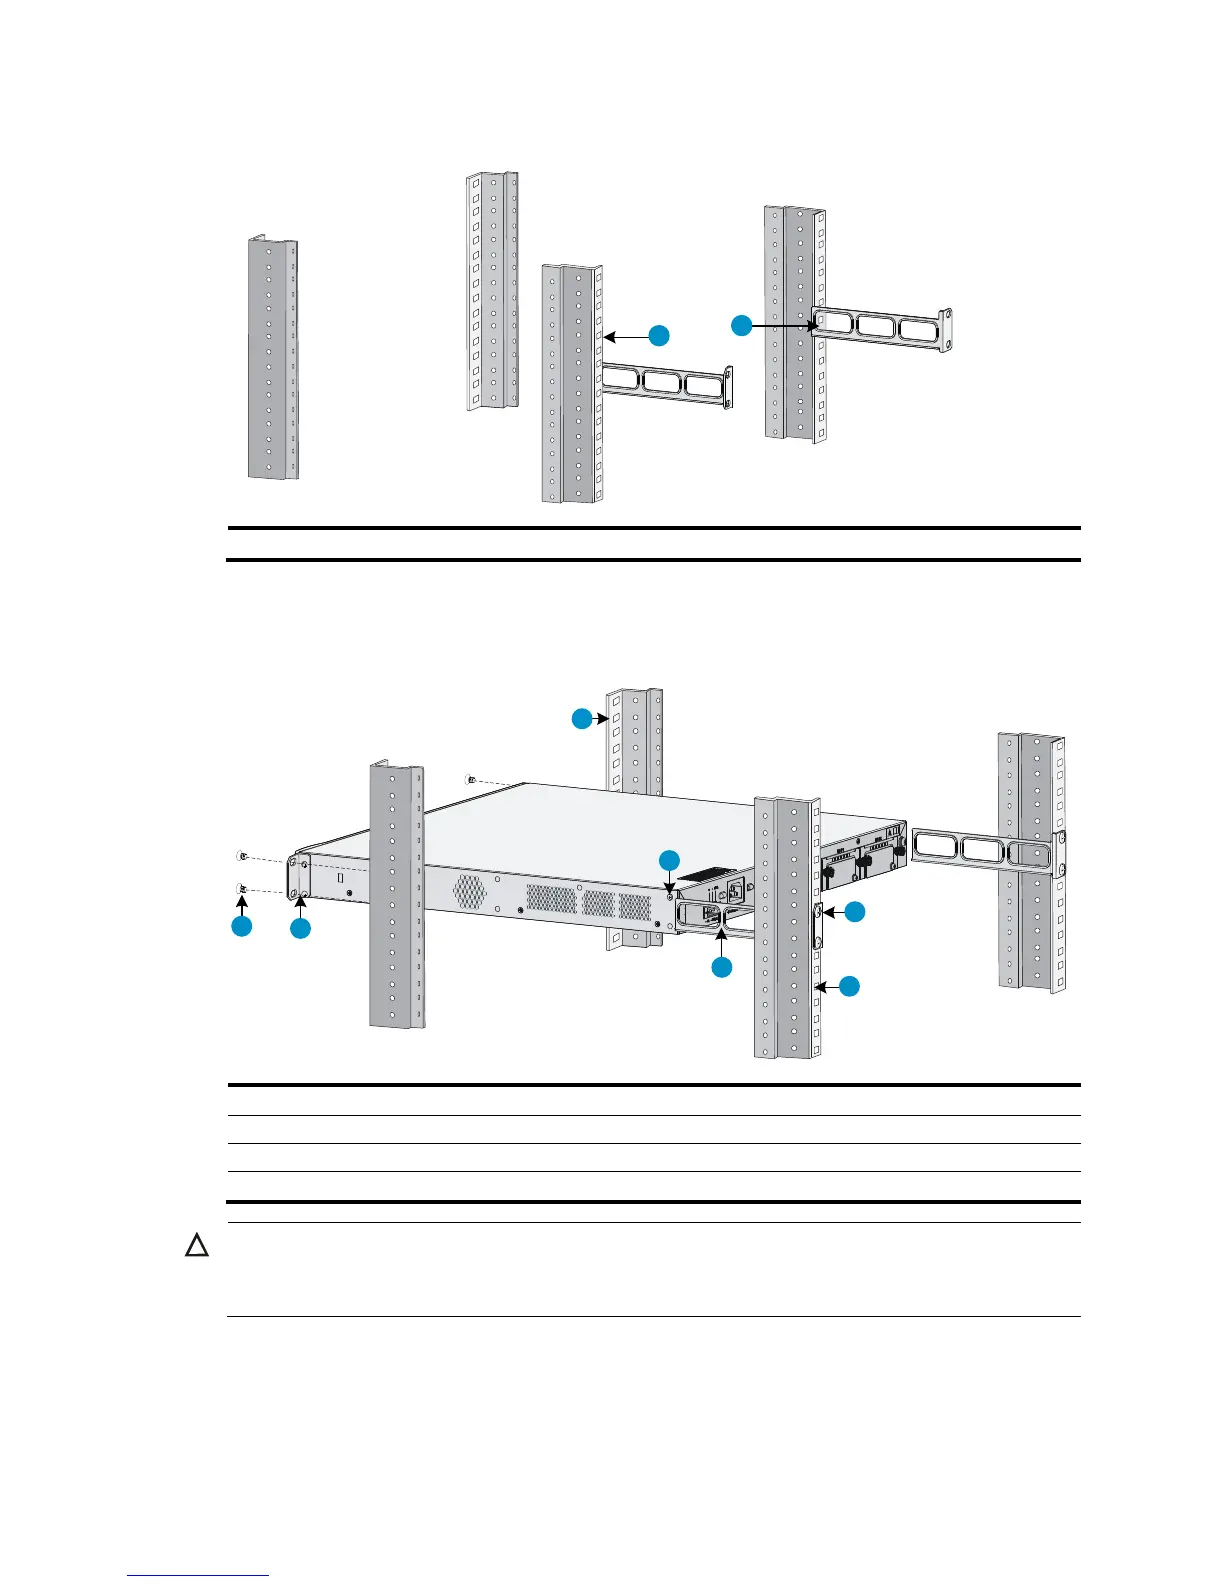
Figure 11 Installing rear mounting brackets
(1) Rear square-holed brackets (2) Rear mounting bracket
6. Hold the bottom of the switch with one hand and the front part with the other hand, and gently push
the switch into the rack. See Figure 12.
Figure 12 Installing the
switch by using front and rear mounting brackets
(1) Screw for fixin
g
the front mountin
g
bracket
(2) Front mountin
g
bracket
(3) Front square-holed bracket (4) Weight-bearing screw
(5) Rear mountin
g
bracket (6) Screw for fixin
g
the rear mountin
g
bracket
(7) Rear square-holed bracket
CAUTION:
A
fter pushin
g
the switch into the rack, make sure the upper ed
g
es of the rear mountin
g
brackets fixed on
the rack have close contact with the weight-bearing screws on the switch. See Figure 13.
2
1
1
2
3
4
5
6
7

Table of Contents

Other manuals for HP 830

Related product manuals