4. Connect the RCM sideband cable to the PDB.
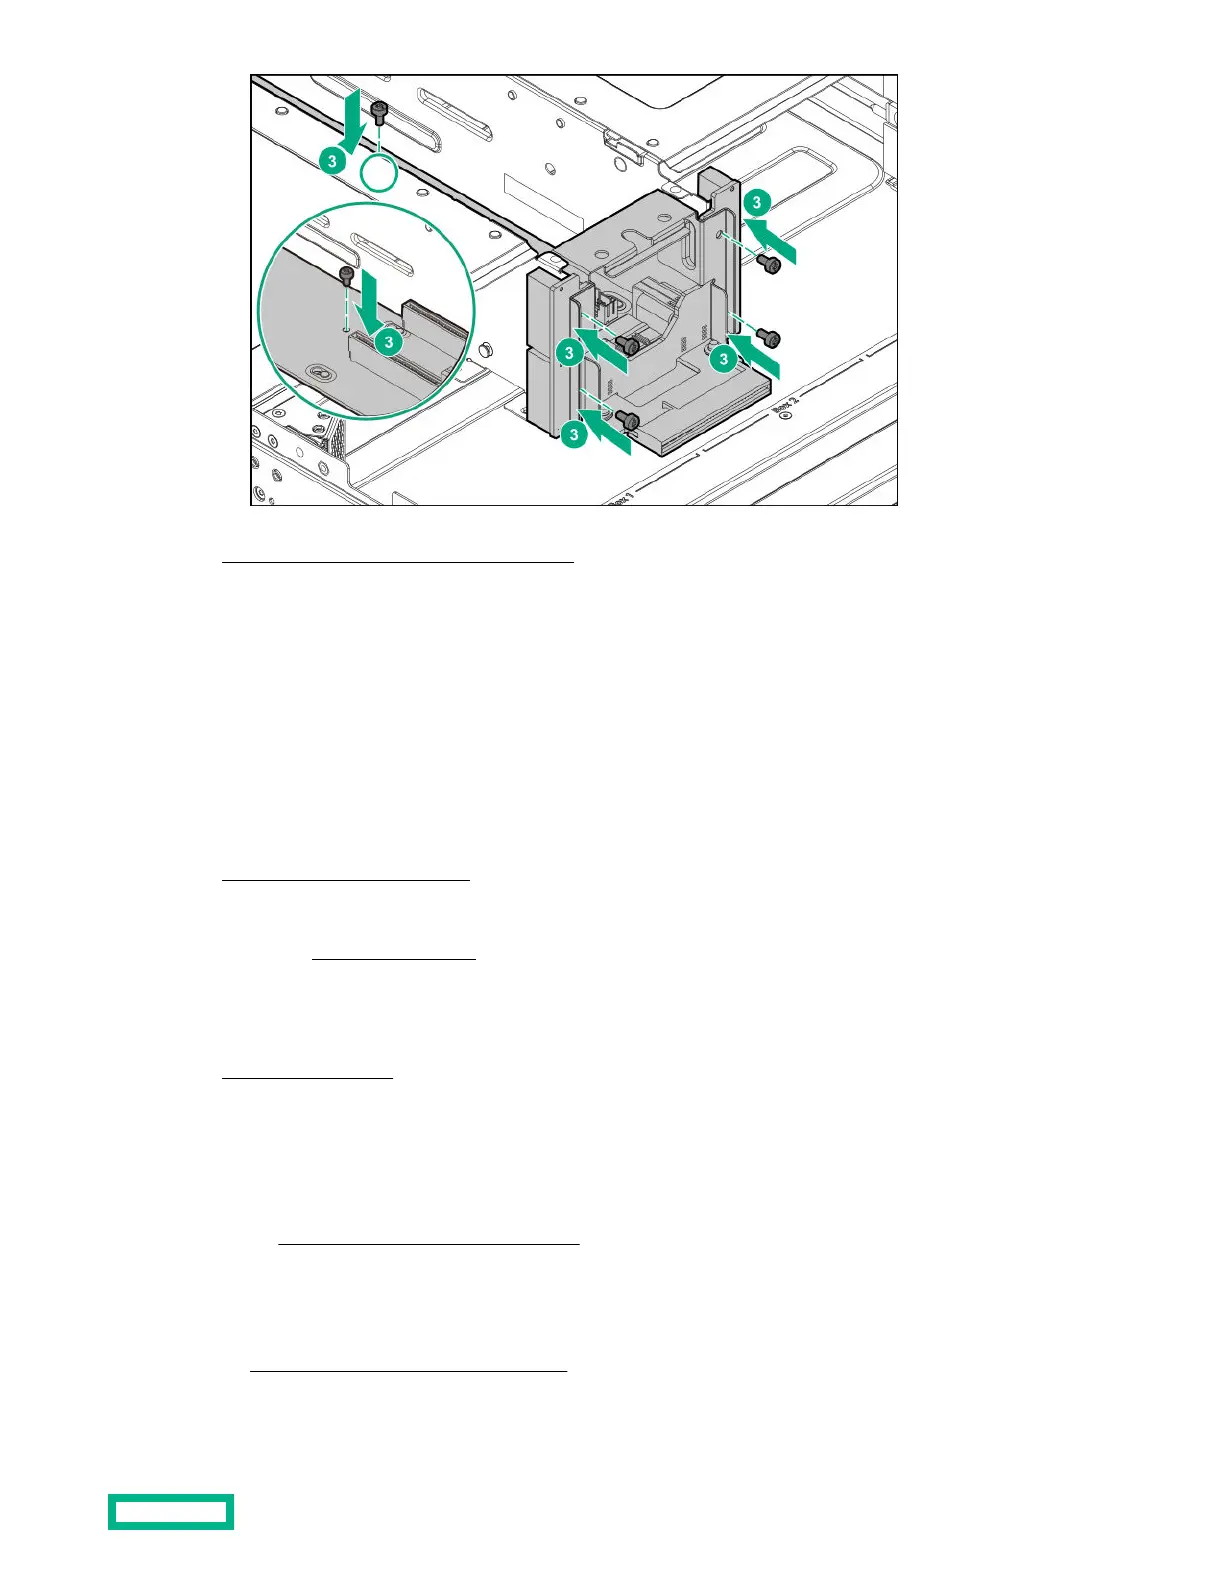
5.
Install the PIB assembly.
6.
If removed, install the energy pack.
7.
Install the PDB cover.
8.
Install the fan board.
9.
Install the fan cage.
10.
Install all fans.
11.
Install the access panel.
12.
Install the chassis into the rack.
13.
Connect all peripheral cables to the servers and chassis.
14.
If removed,
connect the tube set.
15.
Connect each power cord to the chassis.
16.
Connect each power cord to the power source.
17.
Power up the servers.
18. From any server installed in the chassis, perform the following tasks:
a. Use the iLO web interface to update the chassis firmware. Select one of the following options:
• Use the latest firmware version available in the Hewlett Packard Enterprise Support Center:
https://www.hpe.com/support/hpesc
• Use the same firmware version as the other equipment in the chassis production network.
For more information, see the iLO user guide on the HPE website:
https://www.hpe.com/support/ilo-docs
b. Use the ilorest command in the iLO RESTful API to re-enter the chassis serial number and the product ID.
Removal and replacement procedures
64
 Loading...


