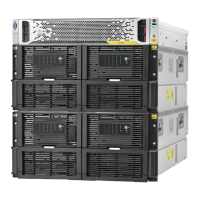
2. Connect the supplied 2m SAS cables from the head server unit to the first disk enclosure, as
follows:
• RAID card 1, port 2 to Drawer 2, I/O module B, port 2
• RAID card 1, port 1 to Drawer 1, I/O module A, port 1
3. Connect the supplied 0.5m SAS cables as follows:
• Drawer 1, I/O module A, port 2 to Drawer 2, I/O module A, port 1
• Drawer 2, I/O module B, port 1 to Drawer 1, I/O module B, port 2
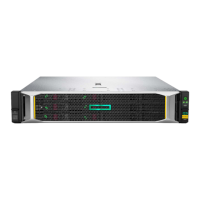
Figure 9 Cabling the first disk enclosure
RAID card 1, port 2 to Disk enclosure 1, Drawer 2, I/O Module B, Port 22m SAS cable1.
RAID card 1, port 1 to Disk enclosure 1, Drawer 1, I/O Module A, Port 12m SAS cable2.
Drawer 1, I/O module A, port 2 to Drawer 2, I/O module A, port 10.5m SAS cable3.
Drawer 2, I/O module B, port 1 to Drawer 1, I/O module B, port 20.5m SAS cable4.
4. If you are installing a second disk enclosure:
The cabling for the second disk enclosure is identical to the cabling for the first disk enclosure,
except it is connected to the second RAID card in slot 4.
Connect the supplied 2m SAS cables from the head server unit to the first disk enclosure, as
follows:
• RAID card 2, port 2 to Drawer 2, I/O module B, port 2
• RAID card 2, port 1 to Drawer 1, I/O module A, port 1
Connect the supplied 0.5m SAS cables as follows:
• Drawer 1, I/O module A, port 2 to Drawer 2, I/O module A, port 1
• Drawer 2, I/O module B, port 1 to Drawer 1, I/O module B, port 2
26 Installing and cabling the HP StoreOnce 4900 Backup system