EasyManuals Logo

HP Z Series User Manual

HP Z Series
118 pages
To Next Page IconTo Next Page
To Previous Page IconTo Previous Page
Page #38 background imageLoading...
Page #38 background image
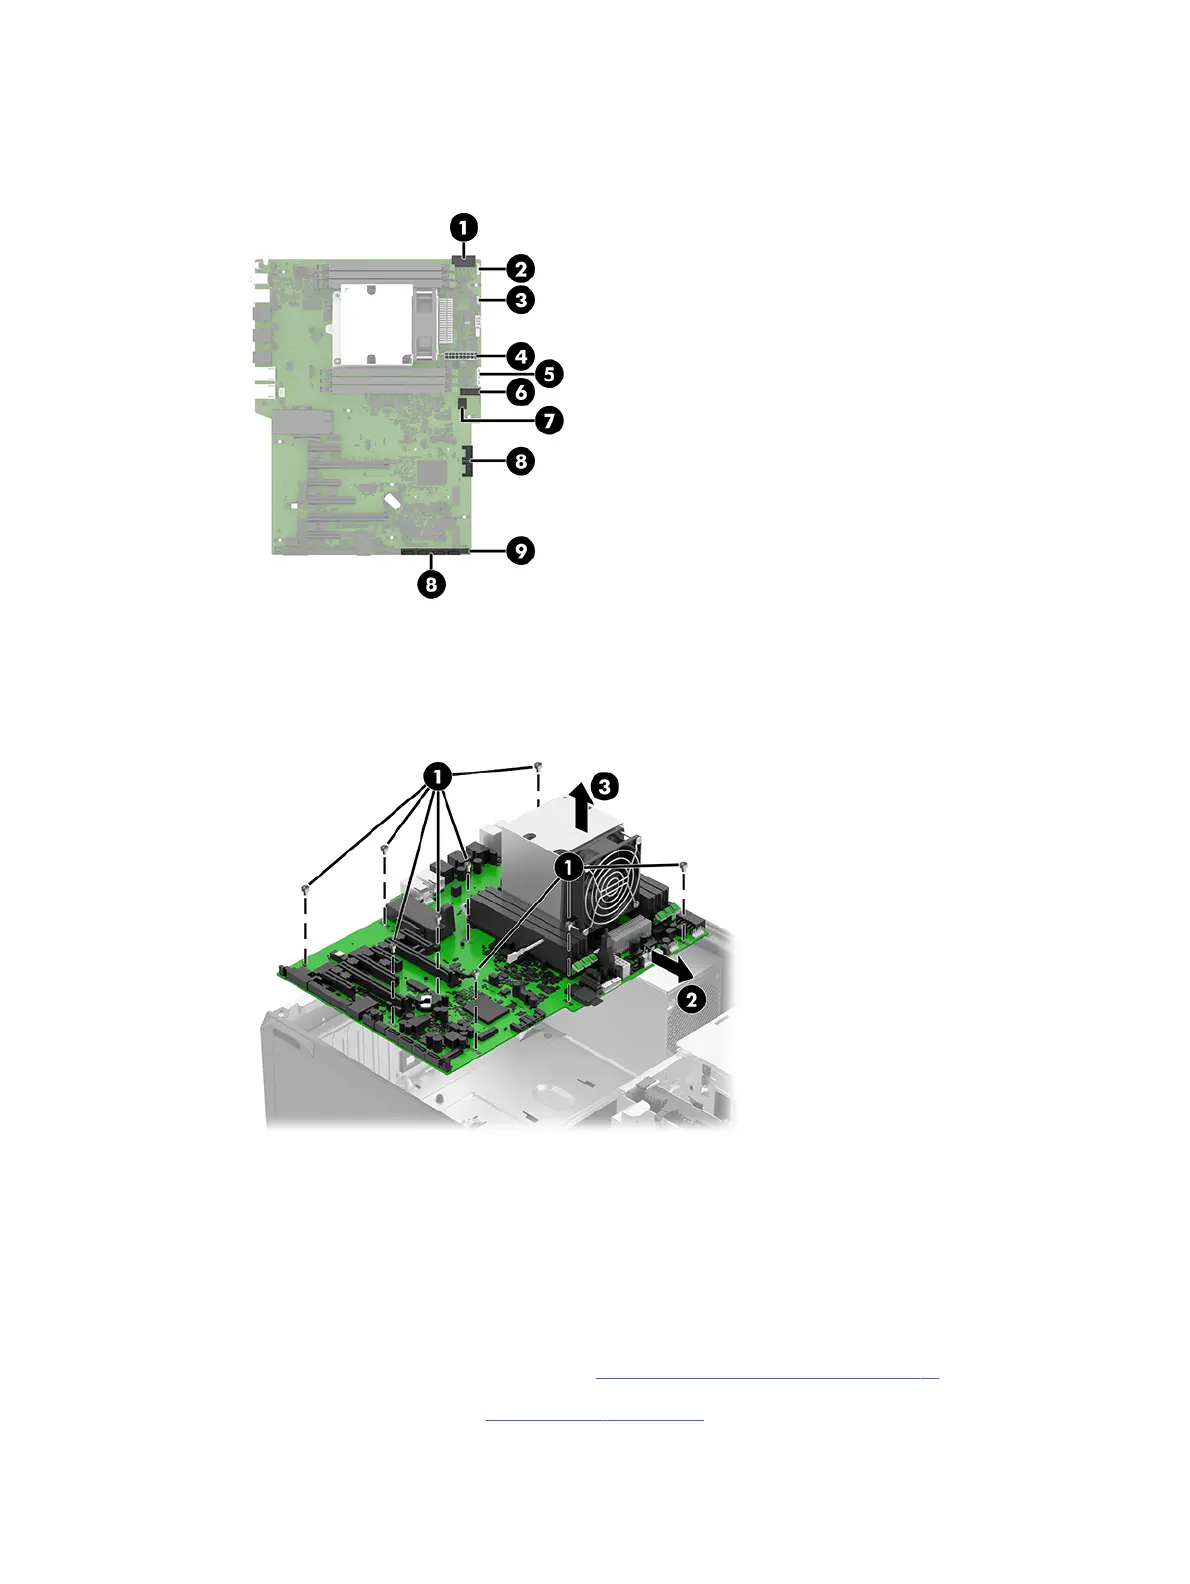
(8) Drive SATA cables (up to 6 locations)
(9) Front card guide and fan cable
2. Remove the nine Torx15 M3.0 × 6.0 screws (1) that secure the system board to the computer.
3. Use the heat sink to slide the system board (2) away from the computer rear chassis, and then
remove the system board (3).
To install the system board, reverse the removal procedures.
Power supply
To remove the power supply, use these procedures.
Before removing the power supply, follow these steps:
1. Prepare the computer for disassembly (see Preparation for disassembly on page 18).
2. Remove the access panel (see Access panel on page 20).
30
Chapter 4 Removal and replacement procedures

Table of Contents

Questions and Answers:

Question and Answer IconNeed help?

Do you have a question about the HP Z Series and is the answer not in the manual?

HP Z Series Specifications

General IconGeneral
SeriesZ Series
CategoryDesktop
ProcessorIntel Xeon or Intel Core (depending on the specific model)
Operating SystemWindows 10 Pro or Windows 11 Pro
StorageSSD or HDD options, up to multiple TB
GraphicsNVIDIA Quadro or AMD Radeon Pro
Expansion SlotsMultiple PCIe slots
PortsUSB, DisplayPort, HDMI
Form FactorTower
MemoryUp to 256 GB DDR4 ECC or non-ECC SDRAM (depending on the specific model)
Power SupplyVarious wattage options, typically 500W to 1000W (depending on the specific model)

Related product manuals