11. Install the system board assembly .
12. Install the chassis cover .
13. If removed, install the security padlock and/or the Kensington security lock.
For more information, see the lock documentation.
14. Connect all peripheral cables to the server.
15. Connect the power adapter to the server, and then secure the power adapter cord in the power cord clamp.
16. Connect the power cord to the AC source.
17. Power up the server .
ResultsResults
The installation is complete.
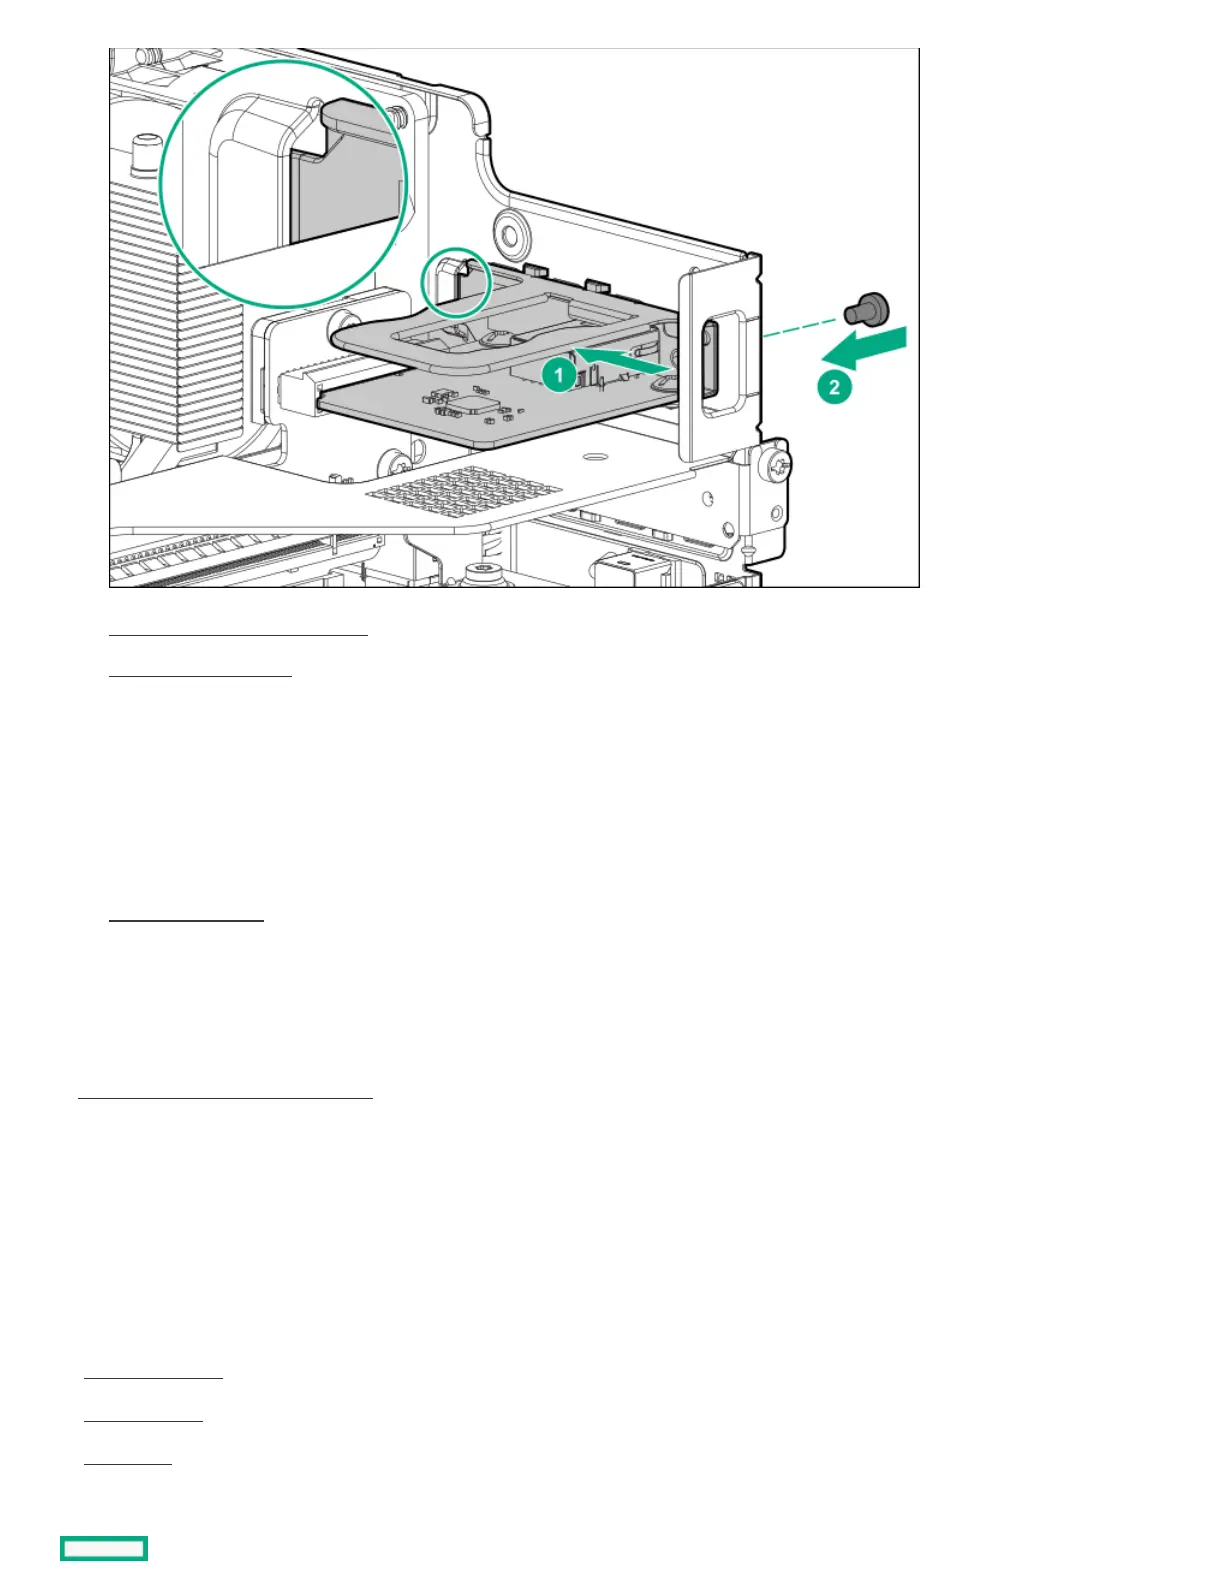
The iLO dedicated network port is now the default port for iLO connection. To configure the iLO dedicated network port settings, see the
iLO user guide:
https://www.hpe.com/support/ilo-docshttps://www.hpe.com/support/ilo-docs
CablingCabling
This chapter includes cabling guidelines and diagrams for internal component cabling.
SubtopicsSubtopics
Cabling guidelinesCabling guidelines
Storage cablingStorage cabling
Fan cablingFan cabling