INSTALLATION — CASSETTE
10
■
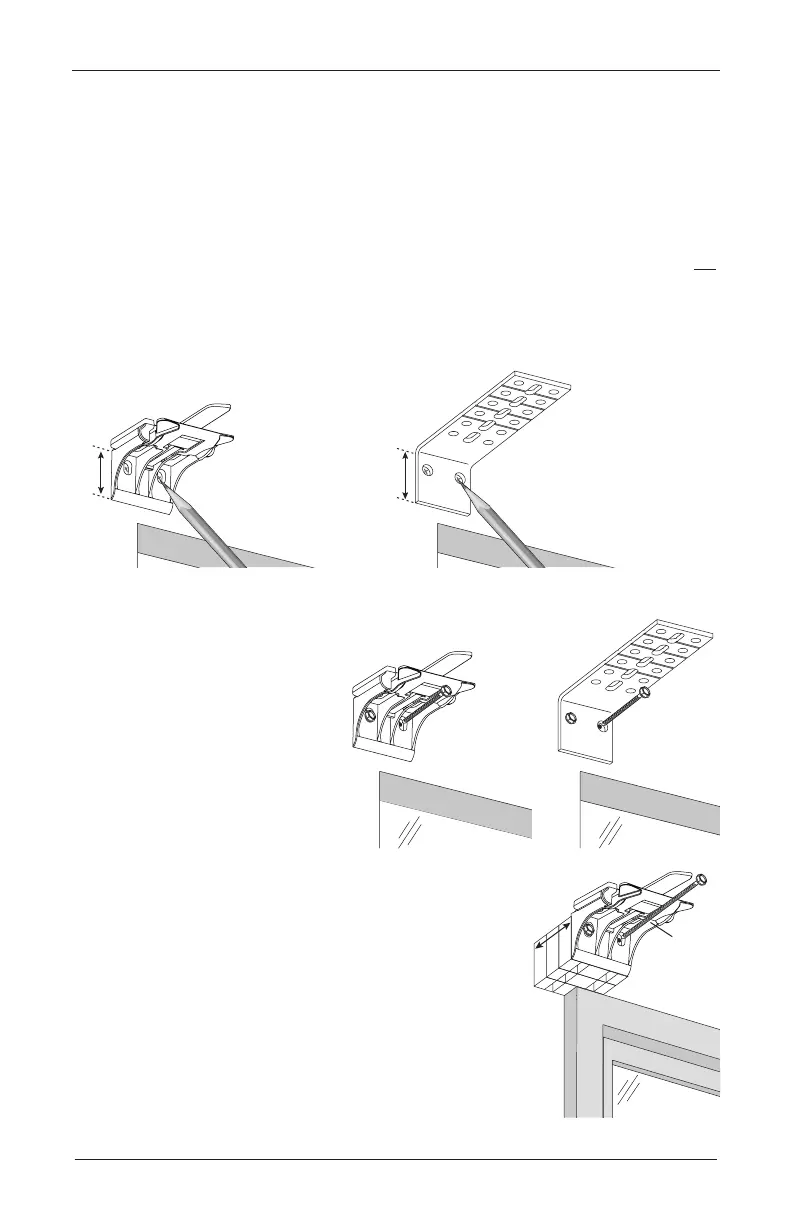
Center the installation brackets or extension brackets on your marks and mark where to
drill the screw holes.
➤
A minimum 1
1
⁄
8
" flat vertical surface isrequired for the installation brackets. Extension
brackets require 1
1
⁄
4
".
➤
The top of the installation brackets or extension brackets should be at the desired
height. The brackets should be level andaligned to each other.
CAUTION: The rear of the brackets must be flush against a flat mounting surface. Do not
mount brackets oncurved molding.
■
Use a level to check that the mounting surface is level. Shim the brackets, if necessary (use
the top tab that was removed from the brackets).
■
Drill the screw holes using a
3
⁄
32
" drill bit.
CAUTION: Use drywall anchors when mounting into drywall.
■
Attach the installation or extension
brackets using the screws provided.
IMPORTANT: The top of the
installation brackets or extension
brackets must be level with their
front edges aligned.
■
If using spacer blocks, attach the spacer block(s) and
installation bracket to a flat vertical mounting surface
with #6screws long enough for asecure installation.
➤
The top of the spacer blocks should be at the
desired shade height.
IMPORTANT: Do not add more than 1
1
⁄
2
" of
clearance using spacer blocks.
IMPORTANT: The tops of the installation brackets
must be level with the front edges aligned.
CAUTION: Use drywall anchors when mounting
into drywall.
1
∕
8
"
Extension
Bracket
1
1
∕
4
"
1
1
∕
2
"
Maximum
Spacer
Blocks
Longer
Screw