INSTALLATION — STANDARD/DESIGNER METAL BRACKETS
6
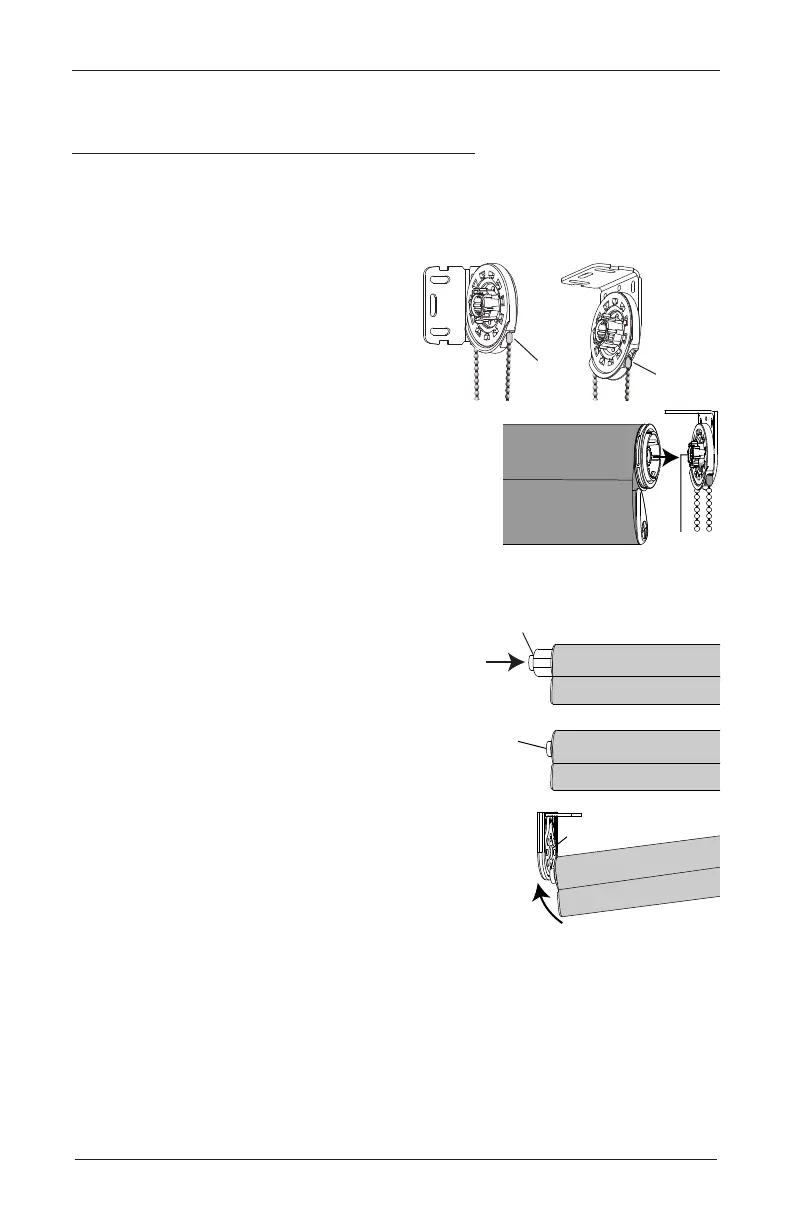
Install the Shade— Standard/Designer Metal Brackets
Standard/Designer Metal Bracket Shades
Standard brackets shown. Designer Metal brackets
follow the same installation procedure.
Install Clutch End
■
Position the bead chain connector.
➤
Ensure the bead chain connector is
pulled to the front of the chain wheel.
■
Push the clutch end of the roller with the clutch base
on the bracket, as shown in the illustration.
Install the Idler End
■
Push in the spring idler to compress.
■
Slide the idler onto the bracket and slide to the
center hole. Idler will expand and will engage
the bracket to secure the shade into the bracket.
■
If the light gap is not even, see
“Troubleshooting” on page 15.
Connector
Connector
Inside Mount
(Shown in
Ceiling-Mounted
Orientation)
Outside Mount
(Shown in
Wall-Mounted
Orientation)
Clutch
Base
Idler
Push in
to compress
Idler
Compressed
Slide Idler until
Seated in Center Hole