INSTALLATION — STANDARD/DESIGNER METAL BRACKETS
5
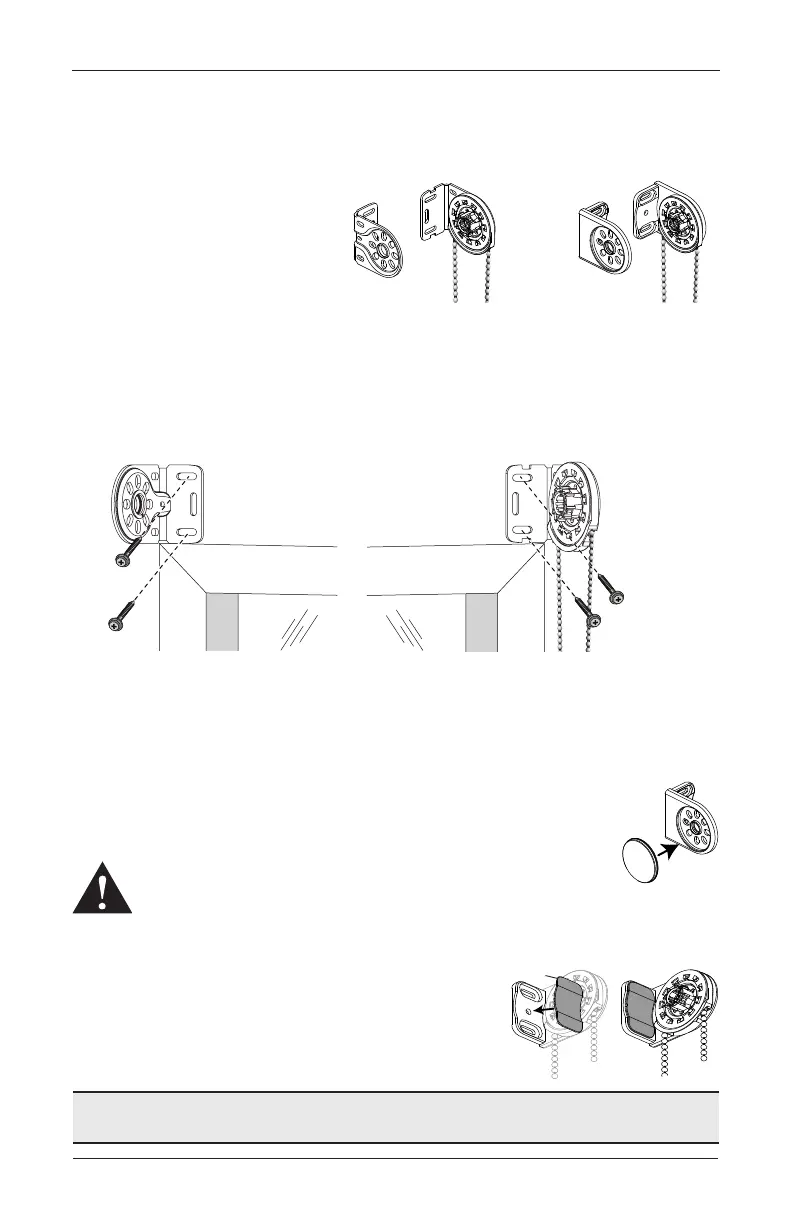
Mount the Standard/Designer Metal Brackets — Outside Mount
The installation brackets are supplied
in pairs: clutch side with the beaded
cord loop and idle side. Identify which
side each of the brackets will go on
the shade based on your order.
■
Check the orientation of the chain
guide. The chain hangs from the
bottom of the chain guide. If it is
not, see “Change the Chain Guide Orientation” on page 16.
■
Center the ordered width of the shade -
1
⁄
8
" over the window at the desired height and
mark its location.
■
Place the outside edge of the brackets on the previously made marks.
■
Mark the screw holes and drill the screw holes using a
3
⁄
32
" drill bit.
➤
A minimum 2
1
⁄
8
" flat vertical surface is required to mount the brackets.
➤
The top of the installation brackets should be at the desired height. The brackets
should be level and aligned.
■
Use a level to check that the mounting surface is level.
■
For Designer Metal Shades. Install the end cap into the back
of the bracket.
■
Attach the installation brackets using the screws provided.
WARNING: Mount into wood/metal studs or into concrete with
concrete anchors. Drywall anchors are not recommended.
■
Designer Metal Brackets Only. Install the bracket
covers over screw holes by pushing into place.
Proceed to “Install the Shade — Standard/Designer Metal Brackets”
on page 6.
Clutch-Side
Standard M Brackets
Clutch-Side
Designer Metal Brackets
Idle-Side
Idle-Side
Bracket
Clutch-Side
Bracket
End Cap